Contents
I. Box Model
Web page layout learning has three core topics—the box model, floats, and positioning. Learning the box model helps us lay out pages well.
1.1 The Essence of Web Page Layout
The web page layout process:
- First prepare the related page elements; page elements are basically all boxes (Box)
- Use CSS to set the box styles, then place them in the corresponding positions
- Put content into the boxes
Therefore the essence of web page layout is: using CSS to arrange boxes
1.2 Composition of the Box Model
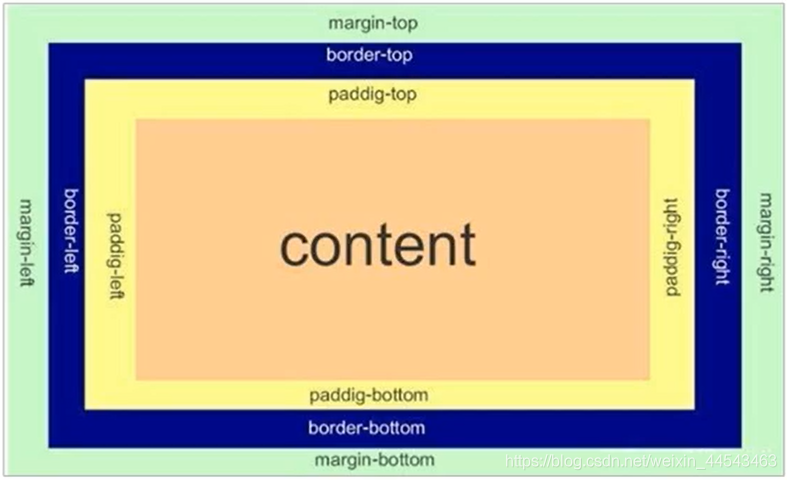
The CSS box model is essentially a box that wraps surrounding HTML elements. It includes: border, margin, padding, and the actual content
- border
- content
- padding
- margin
1.3 Border
boder can set an element’s border. A border consists of three parts: border thickness, border style, and border color
Syntax:
border: border-width || border-style || border-color| Property | Role |
|---|---|
| border-width | Defines border thickness; the unit is px |
| border-style | Border style (none default none|solid solid line|dashed dashed line|dotted dotted line) |
| border-color | Border color (default black) |
(1) Shorthand for borders: (no particular order)
border: 1px solid red;(2) Separate writing for borders:
border-top: 1px solid red;(3) Thin borders for tables
The border-collapse property controls how the browser draws table borders. (When drawing a table, the borders of two cells overlap, and the border width becomes thicker)
Syntax:
border-collpse: collapse;- The word collpse means merge
- border-collapse: collapse; means adjacent borders are merged together
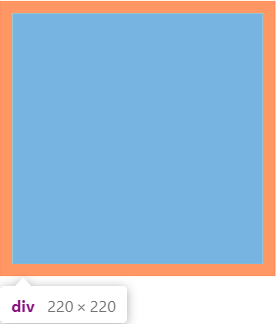
(4) Borders affect box size
Borders additionally increase the actual size of the box, so we have two solutions:
- When measuring the box size, do not measure the border
- If the measurement includes the border, subtract the border width from width/height
Example:
div {
    width: 200px;
    height: 200px;
    background-color: skyblue;
    border: 10px solid red;
}
1.4 Padding
The padding property is used to set padding, that is, the distance between the border and the content.
| Property | Role |
|---|---|
| padding-left | Left padding |
| padding-right | Right padding |
| padding-top | Top padding |
| padding-bottom | Bottom padding |
padding shorthand:
| Number of values | Meaning |
|---|---|
| padding: 5px; | 1 value: 5px padding on top, bottom, left, and right |
| padding: 5px 10px; | 2 values: top and bottom padding 5px, left and right padding 10px |
| padding: 5px 10px 20px; | 3 values: top padding 5px, left and right padding 10px, bottom padding 20px |
| padding: 5px 10px 20px 30px; | 4 values: top 5px, right 10px, bottom 20px, left 30px (clockwise) |
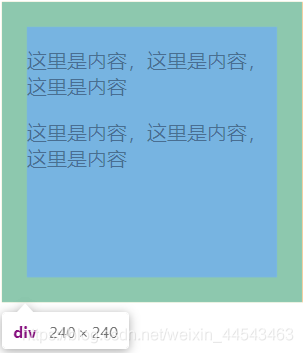
padding affects the actual size of the box
If the box already has a width and height, specifying an inner border at this point will enlarge the box. That is, the content stays the same and only the box can become larger.
Solution: subtract the extra padding size from width/height
Example:
div {
    width: 200px;
    height: 200px;
    background-color: skyblue;
    padding: 20px;
}
1.5 Margin
The margin property is used to set margin, that is, to control the distance between boxes
| Property | Role |
|---|---|
| margin-left | Left margin |
| margin-right | Right margin |
| margin-top | Top margin |
| margin-bottom | Bottom margin |
The shorthand for margin is the same as for padding.
(1) Typical uses of margin
margin can horizontally center a block-level box, but two conditions must be met:
- The box must have a specified width (width)
- The left and right margins of the box are both set to auto.
.header { width: 960px; margin: 0 auto; }Any of the following three writings works:
- margin-left:auto; margin-right:auto;
- margin: auto;
- margin: 0 auto;
Horizontally centering inline elements or inline-block elements: add text: align:center to the parent element.
(2) Margin collapsing
When using margin to define the vertical margins of block elements, margin collapsing may occur.
- Collapsing of vertical margins between adjacent block elements
When two vertically adjacent block elements meet, if the upper element has a bottom margin margin-bottom and the lower element has a top margin margin-top, the vertical spacing between them is not the sum of the two. The larger of the two values is taken; this phenomenon is called collapsing of vertical margins between adjacent block elements.
Solution: try to add a margin value to only one box.
- Collapse of vertical margins for nested block elements
For two nested elements (a parent–child relationship), if the parent has a top margin and the child also has a top margin, the parent will collapse to the larger margin value.
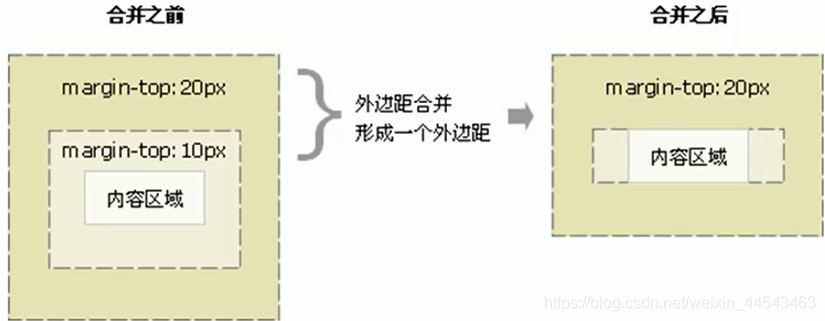
Solution:
- Define a top border for the parent element
- Define top padding for the parent element
- Add overflow:hidden to the parent element
1.6 Clearing Padding and Margin
Many web page elements come with default inner and outer padding and margin, and the default values are inconsistent across browsers. Therefore, before laying out, we first need to clear the padding and margin of page elements.
* {
	padding: 0;
	margin: 0;
}
Note: For compatibility with inline elements, try to set only left and right padding and margin, and do not set top and bottom padding and margin.
II. Special Styles
2.1 Rounded Borders
CSS3 added a rounded-border style, so our boxes can have rounded corners.
The border-radius property is used to set the rounded corners of an element’s outer border
Syntax:
border-radius:length;-
The parameter value can be a number or a percentage
border-radius: 50%; -
If it is a square and you want to set it as a circle, change the value to half the height or width, or write 50% directly
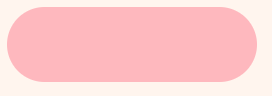
Likewise, if it is a rectangle, setting the radius to half the height makes a rounded rectangle
-
This property is a shorthand property and can take four values, representing the top-left, top-right, bottom-right, and bottom-left corners respectively. With two values, they represent top-left and bottom-right, and top-right and bottom-left respectively.
-
Rounded borders can also be written separately: for example, border-top-left-radius
2.2 Box Shadow
CSS3 added box shadows; you can use the box-shadown property to add a shadow to a box.
Syntax:
box-shadow: h-shadow v-shadow blur spread color inset;| Parameter | Description |
|---|---|
| h-shadow | Required. Horizontal shadow position; negative values allowed. |
| v-shadow | Required. Vertical shadow position; negative values allowed. |
| blur | Optional. Blur distance. |
| spread | Optional. Shadow size. |
| color | Optional. Shadow color. |
| inset | Optional. Change the outer shadow outset to an inner shadow |
- The default is the outer shadow outset, but you must not write outset, or the shadow will stop working
- Box shadows do not occupy space and do not affect the position of other boxes
Example:
box-shadow: 10px 10px 10px -3px rgba(0, 0, 0, 0.3);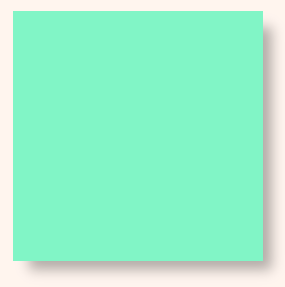
2.3 Text Shadow
The text-shadow property can apply a shadow to text
Syntax:
text-shadow: h-shadow v-show blur color;| Parameter | Description |
|---|---|
| h-shadow | Required. Horizontal shadow position; negative values allowed. |
| v-shadow | Required. Vertical shadow position; negative values allowed. |
| blur | Optional. Blur distance. |
| color | Optional. Shadow color. |
This article references instructor Pink’s video tutorial from Heima Programmer. Heima Programmer instructor Pink’s introductory frontend video tutorial: https://www.bilibili.com/video/BV14J4114768
Comments