Contents
- I. Floats
- 1.1 Three Traditional Web Page Layout Methods
- 1.2 Standard Flow
- 1.3 Why Floats Are Needed
- 1.4 What Is a Float?
- 1.5 Characteristics of Floats
- 1.6 Floating Elements Are Often Used with a Standard-Flow Parent
- II. Common Web Page Layouts
- 2.1 Common Web Page Layouts
- 2.2 Notes on Float-Based Layouts
- III. Clearing Floats
- 3.1 Why Floats Need to Be Cleared
- 3.2 The Essence of Clearing Floats
- 3.3 Methods for Clearing Floats
I. Floats
1.1 Three Traditional Web Page Layout Methods
CSS provides three traditional layout methods:
- Normal flow (standard flow)
- Floats
- Positioning
All three layout methods are used to arrange boxes. Once the boxes are placed in the appropriate positions, the layout naturally takes shape.
In actual development, a page generally includes all three layout methods (mobile devices have newer layout methods).
1.2 Standard Flow
Standard flow means that tags are arranged according to their predefined default behavior:
- Block-level elements occupy an entire line and are arranged from top to bottom
- div、hr、p、h1~h6、ul、ol、dl、form、table
- Inline elements are arranged from left to right in sequence and automatically wrap when they reach the edge of the parent element
- span、a、i、em
Standard flow is the most basic layout method.
1.3 Why Floats Are Needed
Standard flow cannot achieve many layout effects. In these cases, floats can be used to create the layout because they can change the default order of element tags.
A typical use of floats: arranging block-level elements horizontally
Use standard flow to arrange multiple block-level elements vertically, and use floats to arrange multiple block-level elements horizontally.
1.4 What Is a Float?
The float property creates a floating box and moves it to one side until its left or right edge touches the edge of its containing block or another floating box.
Syntax:
选择器 { float: 属性值; }| Value | Description |
|---|---|
| none | The element does not float (default) |
| left | The element floats to the left |
| right | The element floats to the right |
1.5 Characteristics of Floats
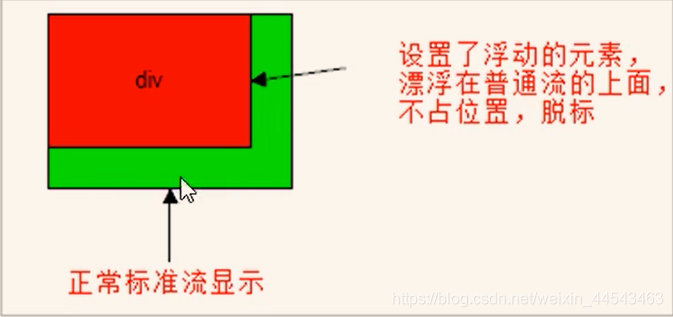
(1) Floating elements are removed from standard flow
-
They break free from the control of standard flow and move to the specified position (float)
-
Floating boxes no longer retain their original positions
If there are two boxes, one with a float applied and one without:
(2) Floating elements appear on the same line and are aligned at the top
- To appear on the same line, every element must have the float property applied
- Floating elements sit next to each other. If the parent is not wide enough to contain all the floating boxes, the extra boxes wrap to a new line and align there
(3) Floating elements take on characteristics of inline-block elements
- Any element can float. Regardless of its original type, it takes on characteristics similar to those of an inline-block element after a float is applied
1.6 Floating Elements Are Often Used with a Standard-Flow Parent
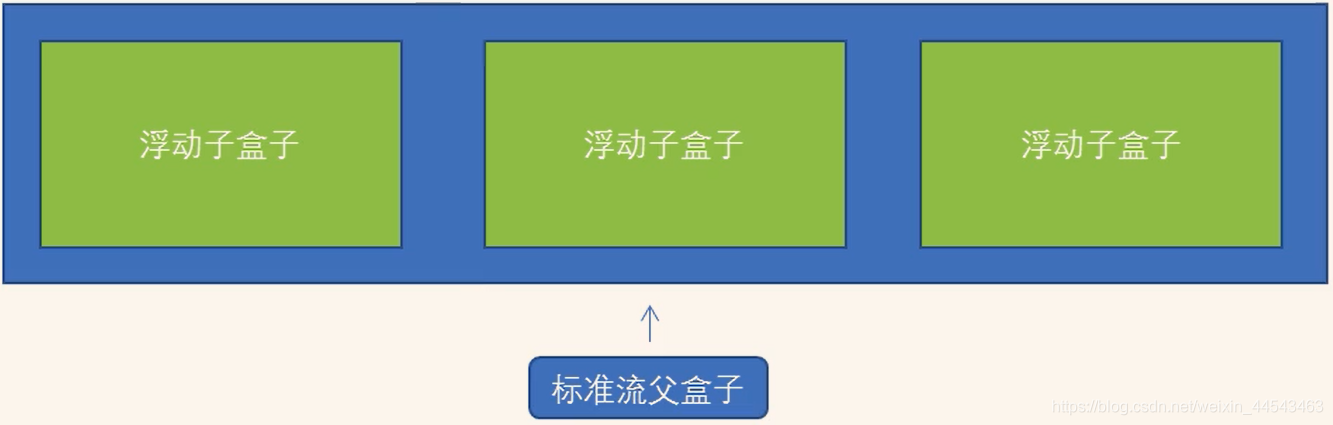
To constrain the positions of floating elements, web page layouts generally use this strategy:
First, use a parent element in standard flow to arrange the vertical position, and then use floats on its child elements to arrange their horizontal positions.
II. Common Web Page Layouts
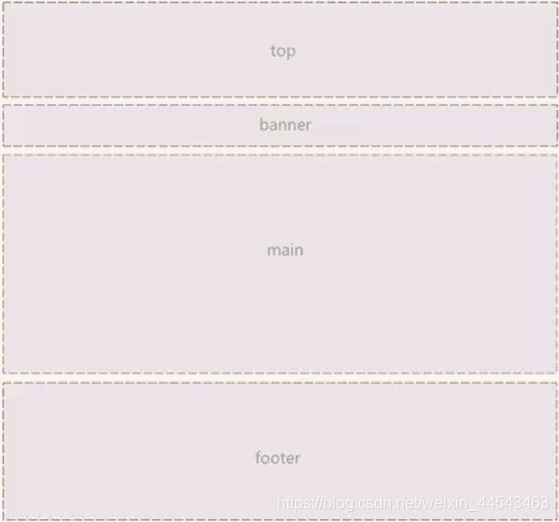
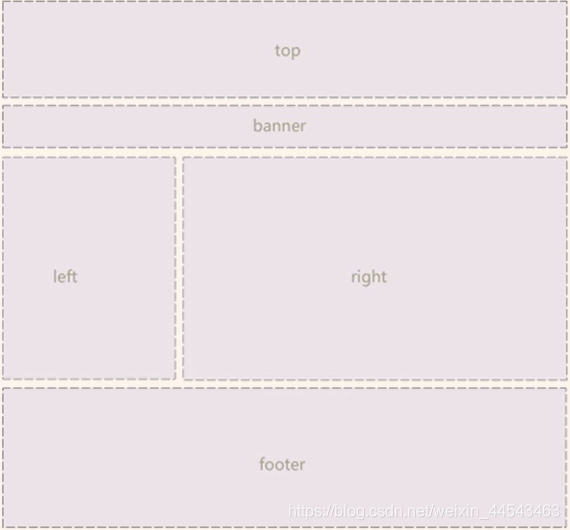
2.1 Common Web Page Layouts
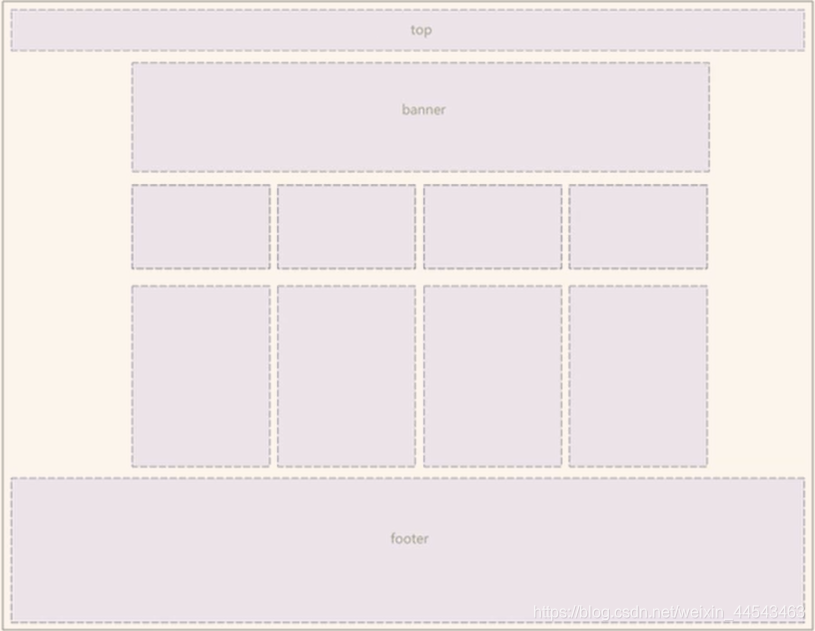
2.2 Notes on Float-Based Layouts
(1) Use floats together with a standard-flow parent box
First, use a parent element in standard flow to arrange the vertical position, and then use floats on its child elements to arrange their horizontal positions.
(2) If one element floats, its sibling elements should theoretically float as well
If a box contains multiple child boxes and one of them floats, the other sibling elements should also float to prevent problems.
A floating box only affects the standard flow after it, not the standard flow before it.
III. Clearing Floats
3.1 Why Floats Need to Be Cleared
In many cases, it is inconvenient to assign a height to the parent box. However, floating child boxes do not occupy space, causing the parent box to have a height of 0 and consequently affecting the standard-flow boxes below it.
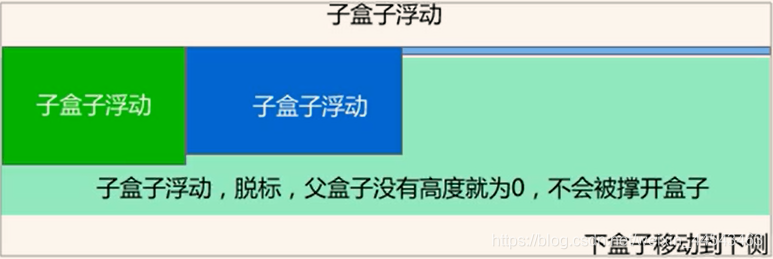
- Floating elements no longer occupy their original positions in standard flow, so they affect the layout of subsequent elements
3.2 The Essence of Clearing Floats
-
The essence of clearing floats is eliminating the effects caused by floating elements
-
If the parent box already has a height, there is no need to clear the floats
-
After the floats are cleared, the parent automatically determines its height from the floating child boxes. Once the parent has a height, it no longer affects the standard flow below it
Syntax:
选择器 { clear: 属性值; }| Value | Description |
|---|---|
| left | Disallows floating elements on the left (clears their effect) |
| right | Disallows floating elements on the right (clears their effect) |
| both | Clears the effects of floating elements on both the left and right |
In practice, almost only clear:both is used.
The strategy for clearing floats is to enclose the floats.
3.3 Methods for Clearing Floats
(1) Extra-tag method, also known as the divider method
The extra-tag method adds an empty tag after the floating elements, such as <div style=""clear:both></div> or another tag such as <br/>.
- Advantage: easy to understand and write
- Disadvantage: adds many meaningless tags, resulting in poor structure
- Note: the newly added empty tag must be a block-level element.
(2) Add the overflow property to the parent
You can add the overflow property to the parent and set it to hidden, auto, or scroll: overflow: hidden;
Note: add this code to the parent element.
- Advantage: concise code
- Disadvantage: overflowing content cannot be displayed
(3) Add an after pseudo-element to the parent
The :after method is an upgraded version of the extra-tag method. It is also added to the parent element.
/* 添加如下样式 */
.clearfix:after{
    content: "";
    display: block;
    height: 0;
    clear: both;
    visibility: hidden;
}
.clearfix{ /* IE6、7专有 */
    *zoom: 1;
}
/* 为父元素添加clearfix类 */
<div class="clearfix">- Advantage: adds no tags, resulting in a simpler structure
- Disadvantage: needs to support older browsers
(4) Add two pseudo-elements to the parent
/* 添加如下样式 */
.clearfix:before,
.clearfix:after {
    content: "";
    display: table;
}

.clearfix:after {
    clear: both;
}

.clearfix {
    *zoom: 1;
}
/* 为父元素添加clearfix类 */
<div class="clearfix">- Advantage: more concise code
- Disadvantage: needs to support older browsers
Comments