Contents
1 Markdown
1.1 What Is Markdown?
Markdown is currently one of the most popular writing languages on the internet. It uses simple symbols to mark text formatting, and its concise syntax, attractive formatting, and extensive software support have made it very popular among internet users.
Markdown documents are written in an easy-to-read, easy-to-write plain-text format and then converted into valid HTML documents. The learning curve is very gentle; you may need only a few minutes to get started.
Almost all blog platforms, online documentation sites, and similar services now support Markdown, and it is especially common among programmers. For example, documentation on GitHub generally uses the .md format.
1.2 Why Use Markdown?
Markdown was created primarily to address the following pain points:
- Software incompatibility: For example, different versions of Word, or different applications such as Office and WPS, may display the same document differently. It may look normal in one, have formatting errors in another, or show garbled text elsewhere.
- Time-consuming formatting: The more features we have, the more choices we tend to consider and the more problems we may encounter. When the goal is to focus on writing, you may not need so many formatting options, such as line height, line spacing, fonts, and colors. The content should be the focus. In Word, you also need to manually choose the formatting after writing each paragraph. That extra step may interrupt your train of thought. Markdown lets you format a document with only the keyboard while you write it.
- Format incompatibility: When you copy the same text into another document, its formatting can easily become a mess. The same problem applies when copying text to a webpage or from somewhere else, making formatting difficult to manage.
To solve these problems, Markdown provides the following benefits:
- Simple syntax: It requires only a few simple markup symbols, such as
# * > - [] () = - Strong compatibility: Every editor can open
.mdfiles; even Notepad and Vim can edit them - Easy export: Documents can be exported to PDF or embedded in formats such as HTML and LaTeX
- Focus on content: Your hands never need to leave the keyboard while writing, so you no longer need to worry about formatting
1.3 How to Use Markdown
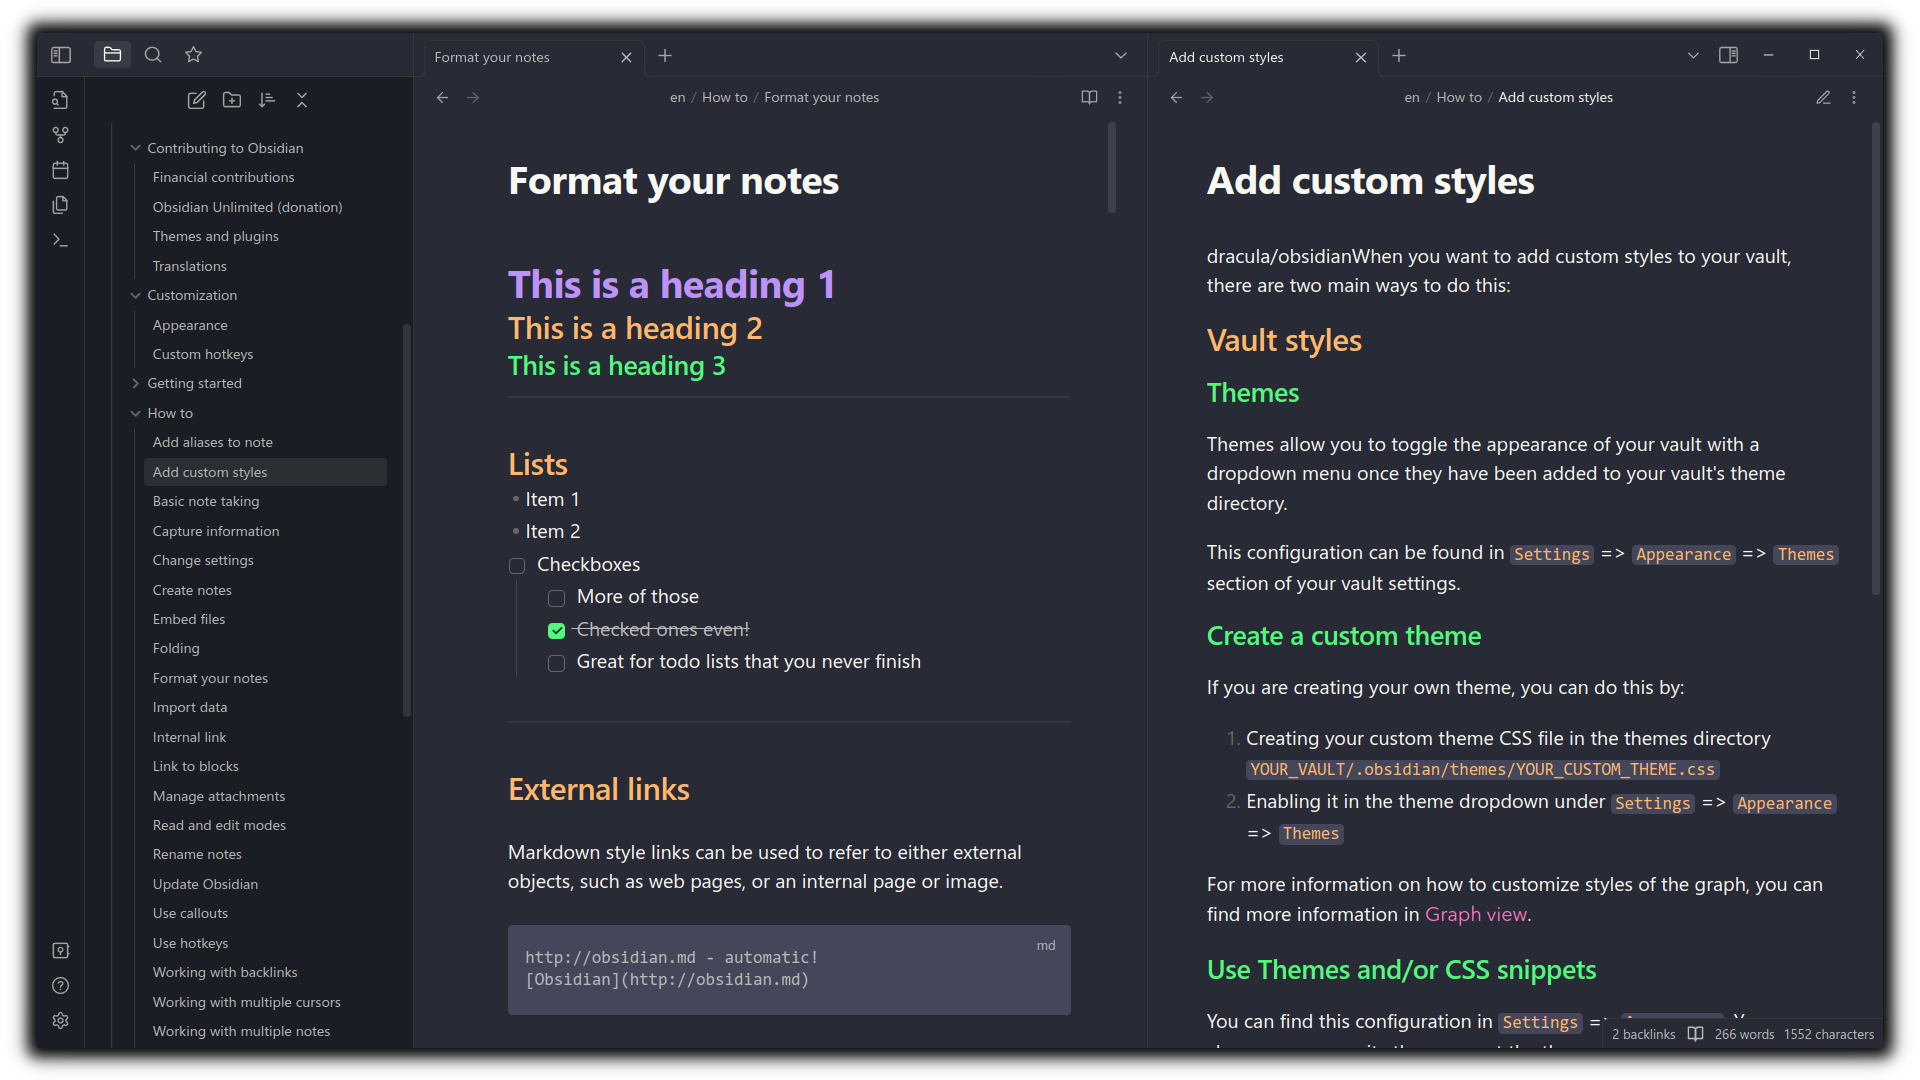
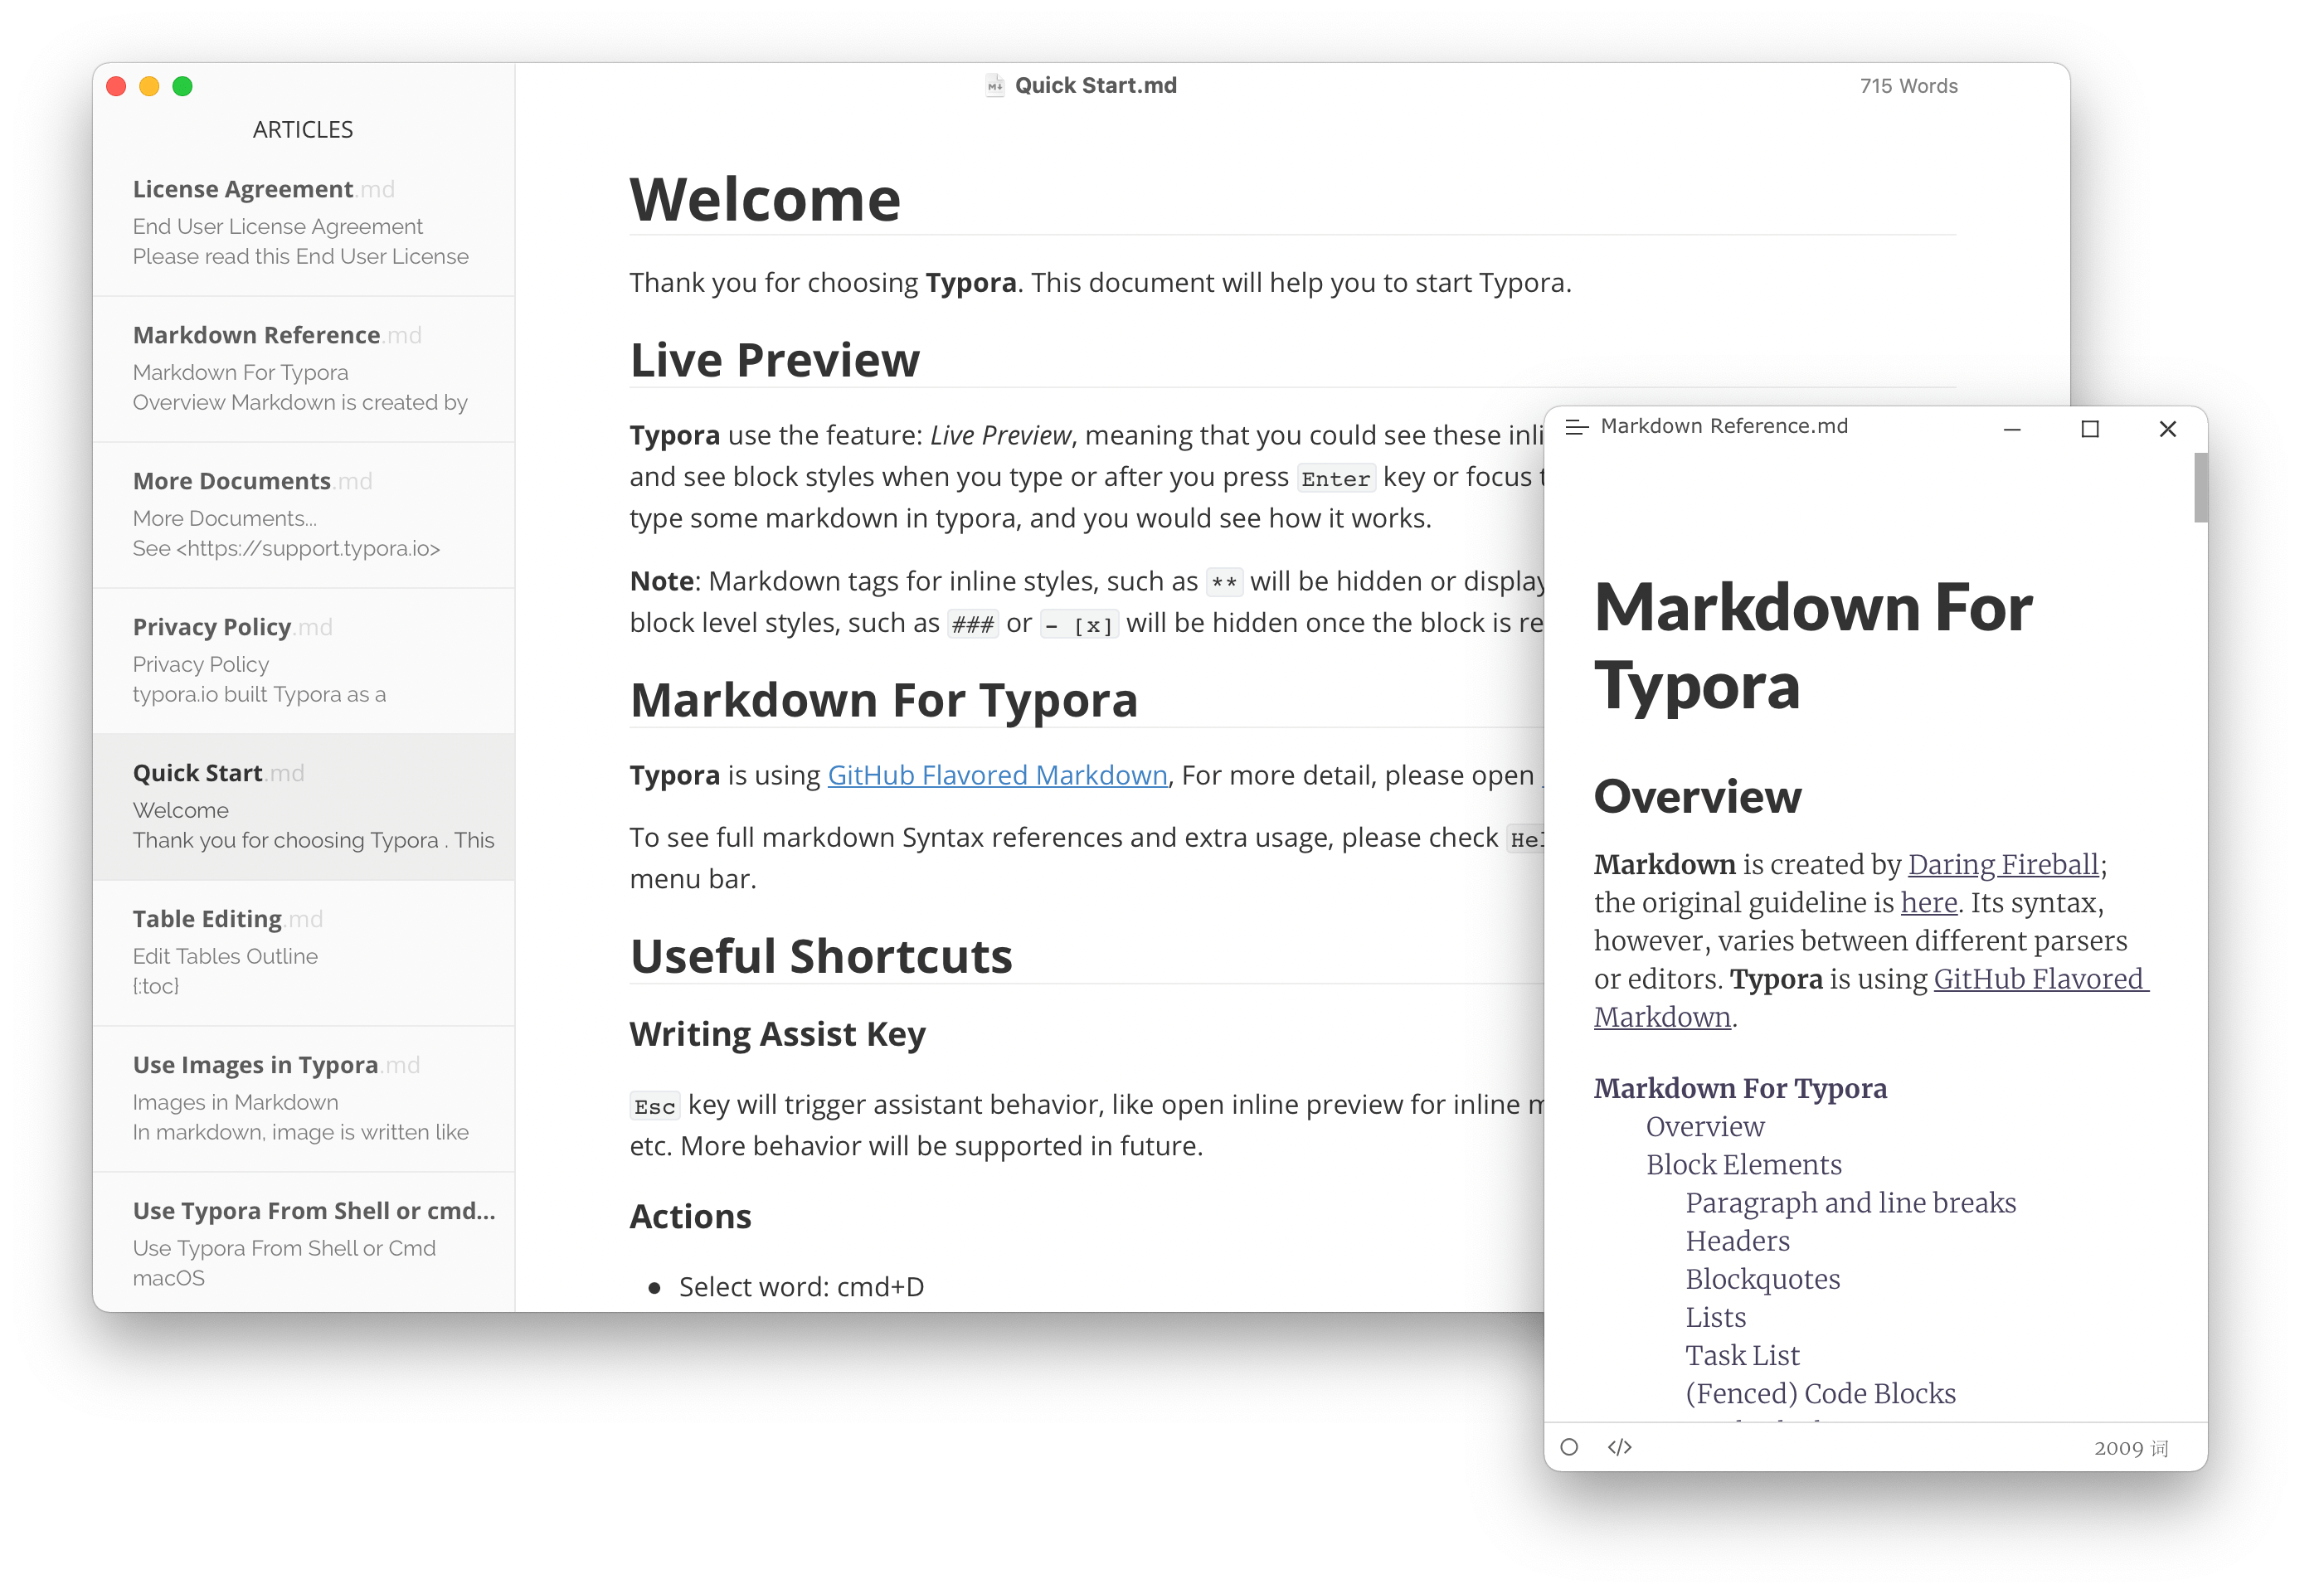
Although every editor can edit Markdown files, I recommend two excellent WYSIWYG Markdown editors for a more intuitive and pleasant writing experience: Obsidian and Typora. I currently use the former as my note-taking software and knowledge-base management tool. I used the latter when I first started writing, and it also provides an excellent editing experience.
The image below shows Obsidian:
The image below shows Typora:
Open your Markdown editor, create a file, and you can start writing.
1.4 Basic Markdown Syntax
Below are some commonly used Markdown features, arranged in the order in which I use them most often:
1. Headings
The format is # + 空格 + 标题文字. Note that # and 标题文字 must have an 空格 between them:
# 一级标题
## 二级标题
### 三级标题
#### 四级标题
##### 五级标题
###### 六级标题
First-Level Heading
Second-Level Heading
Third-Level Heading
Fourth-Level Heading
Fifth-Level Heading
Sixth-Level Heading
2. Italics
Use *被倾斜的文字* or _被倾斜的文字_. The keyboard shortcut is Ctrl+I. For example:
这里是正常文字,*这里是被倾斜的文字*,这里又是正常文字

_下划线在Obsidian中好像只能倾斜整行_
This is normal text, this text is italicized, and this is normal text again.
In Obsidian, underscores seem to italicize only the entire line.
3. Bold
Use **被加粗的文字** or __被加粗的文字__. The keyboard shortcut is Ctrl+B. For example:
这里是正常文字,**这里是被加粗的文字**,这里又是正常文字

__下划线在Obsidian中好像只能加粗整行__
This is normal text, this text is bold, and this is normal text again.
In Obsidian, underscores seem to make only the entire line bold.
***当然倾斜和加粗可以一起使用,那样就是三个星号***

___也可以是三个下划线___
Of course, italics and bold can be used together by using three asterisks.
You can also use three underscores.
4. Highlighting
Use the following format:
这里是正常文字,==这里是被高亮的文字,但是不能换行,如果要对多段高亮,需要每一段使用高亮标记==,这里又是正常文字This is normal text, this text is bold, but it cannot span multiple lines. To make multiple paragraphs bold, apply the bold markers to each paragraph, and this is normal text again.
***==当然倾斜和加粗可以一起使用,就像这样==***

==***也可以是这样***==

==___也可以是下划线___==
Of course, italics and bold can be used together by using three asterisks.
You can also do it this way.
Underscores work too.
5. Lists
Unordered lists
Use + - to mark an unordered list. The format is +/- + 空格 + 文字. Note that +/- and 文字 must have an 空格 between them.
- 这是无序列表的第一项
- 这是第二项
- 这是第三项- This is the first item in the unordered list
- This is the second item
- This is the third item
+ 这是无序列表的第一项
+ 这是第二项
+ 这是第三项- This is the first item in the unordered list
- This is the second item
- This is the third item
Ordered lists
The format is 数字 + . + 空格 + 文字.
For example:
1. 第一项
2. 第二项
3. 第三项- First item
- Second item
- Third item
6. Blockquotes
Use > to mark quoted content. The format is > + 空格 + 引用文字. Note that > and 文字 must have an 空格 between them.
> 这是被引用的内容This is quoted content
7. Code
Code can be written as inline code or as a code block.
Inline code uses the following format:
这里是正常文字`code`文字继续This is normal textcodeand the text continues.
Code blocks use the following format:
```代码格式(c, c++, python, html, java, css, yaml, shell ...)
代码内容
```ㅤㅤ
For example:
```python
import numpy as np
np.array([1, 2, 3])
```ㅤㅤ
The result is as follows:
import numpy as np
np.array([1, 2, 3])
8. Links
Links use the following format:
[链接显示文字](链接地址)

[马浩飞丨博客](https://www.mahaofei.com)9. Images
Images use the following format:


10. Horizontal Rules
A horizontal rule consists of three or more *, -, or _ characters. For example:
分割线之上

---

或者使用

***

再或者

___

就这些
Above the horizontal rule
Or use
Or
That’s all
11. Tables
Tables can be a little cumbersome to use. In Obsidian, some plugins can simplify the process of creating them.
The usual format is shown below. Note that the |-|-|-| in the middle cannot be removed. Write one |-| for each column in the table:
|表头1|表头2|表头3|
|-|-|-|
|表格内容1|表格内容2|表格内容3|
|表格内容4|表格内容5|表格内容6|| Header 1 | Header 2 | Header 3 |
|---|---|---|
| Table content 1 | Table content 2 | Table content 3 |
| Table content 4 | Table content 5 | Table content 6 |
One more thing: to make the structure clear, Markdown uses a blank line to separate two paragraphs.
第一段

第二段
12. Callouts
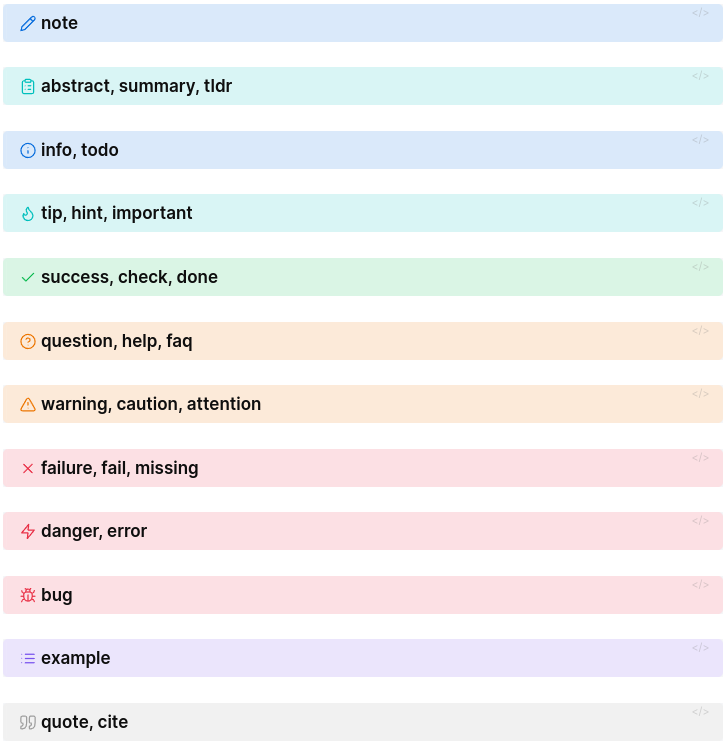
Use > [!note] to create a callout block. For example:
> [!INFO]
> 这里是callout模块
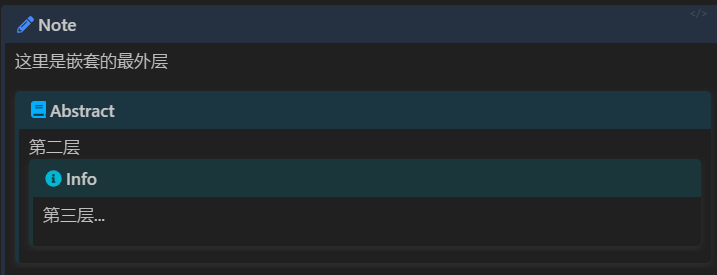
There are 12 styles by default. Each has a different color and icon. You can replace the word in the title with > ![替换] to achieve the effects below.
You can use + to expand the body by default or - to collapse it by default. For example:
> [!FAQ]- 点击就可以展开了
> 这里是callout的内容
Click to expand This is the callout content
2 Obsidian
2.1 Why Use Obsidian?
Obsidian is well suited to managing many files across multiple levels, making it an excellent tool for building a knowledge base.
I initially started using Obsidian because I was writing more and more articles and found them inconvenient to manage in Typora. This was also when Typora began charging after its update to 1.0 and Obsidian was starting to gain attention, so I gave Obsidian a try. Since then, Obsidian has always had a place in the dock on every one of my devices. Whenever I am using a computer, Obsidian is always open.
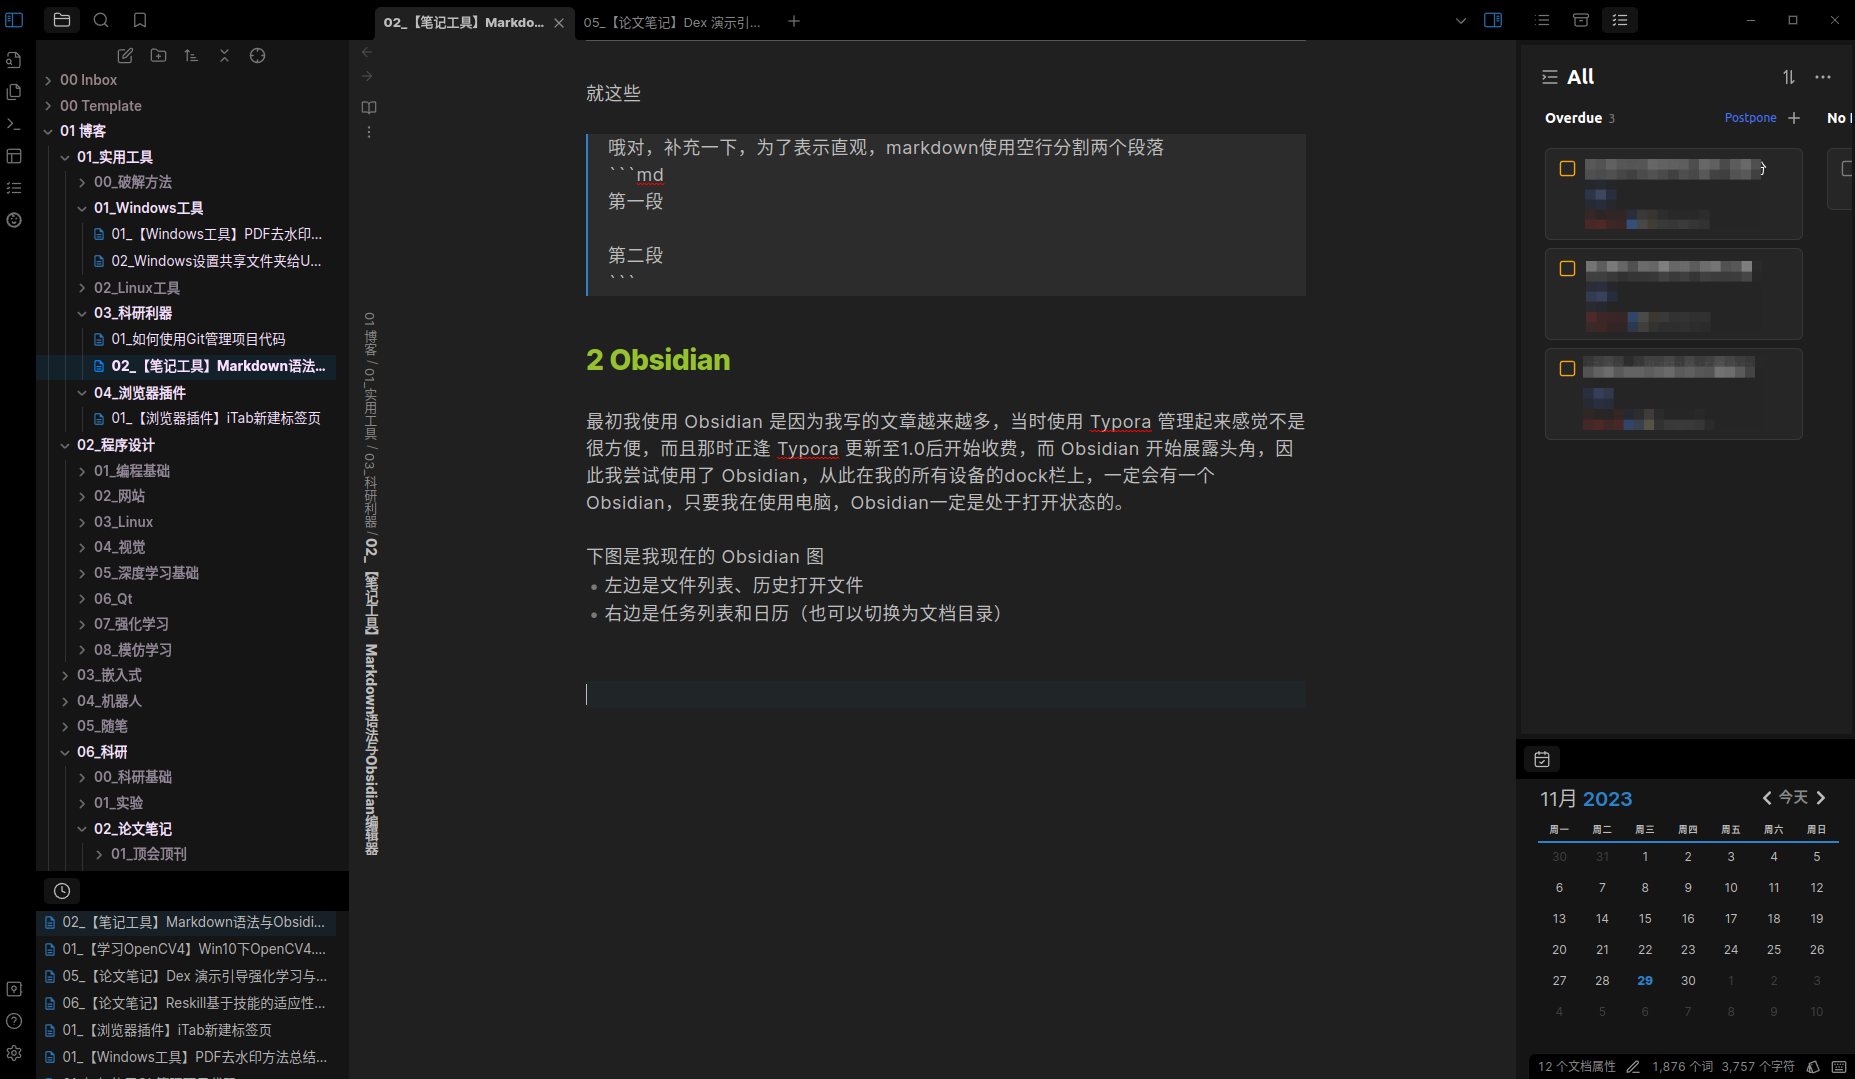
The image below shows my current Obsidian setup:
- The left side contains the file list and recently opened files
- The right side contains the task list and calendar, and can also be switched to the document outline
All the content for my blog is stored in Obsidian. I also use it to record notes and the various bugs I encounter. When I run into a similar problem, I can use global search to find the solution quickly. This has already helped me solve problems many times and saved me a great deal of time.
I personally do not trust cloud-based notes. Obsidian provides completely local file editing and management.
For various reasons, I do not want to keep everything I write in a cloud note-taking service. If the service went down or shut down, it would cause serious problems. Examples include Youdao Note and Evernote. I have also used tools such as OneNote, but their portability is poor. If you want to switch to another note-taking application, you simply cannot export what you previously recorded.
Obsidian, by contrast, uses local file management. The file list on the left consists of actual folders and .md files stored locally. For synchronization across multiple devices, I recommend Nutstore or OneDrive for real-time synchronization.
Obsidian offers an extensive feature set: it is a note-taking application, but it is also much more than that.
I use Obsidian for many purposes. Taking notes is, of course, the main one, including study notes, bug notes, and group-meeting records.
The custom frames plugin also lets me embed webpages in Obsidian. I added TickTick, which provides the task-management features shown on the right side of the image above.
I also wrote an automation script that makes changes based on the content of my note library and updates my blog on a daily schedule.
Obsidian looks excellent, offers a wide variety of themes, and lets you customize almost every visual style.
I also spent some time experimenting with its appearance. In the end, I settled on the Blue Topaz theme with a few personalized settings from the Style Settings plugin. Overall, I did not change very much.
There are also some highly customized open-source vault templates available online. You can download and use them directly, but after looking around, I found that I still preferred a simple, straightforward setup. You can choose one that suits your own aesthetic preferences.
2.2 Distinctive Obsidian Features
This section only provides an overview of the features. For detailed instructions, refer to the official Obsidian tutorial. Alternatively, after downloading Obsidian, you will see a sample vault the first time you open it. I learned by reading that sample vault.
Bidirectional Links
I am not sure whether Obsidian was the first note-taking application to support bidirectional links, but it was among the earliest.
As the name suggests, a bidirectional link is a link that provides references in both directions. For example, if I use [[B文章的标题或者小标题]] in article A, I can create a link between the two articles. It works somewhat like a webpage link, except that it navigates within the note-taking application.
In the referenced note, you can also see which other notes refer to it. For example, content from a note such as [[Ubuntu系统Buglist]] may be referenced many times while I write other experiment notes.
When all the notes are linked to one another in this way, they form a large relationship graph, which Obsidian can also display.
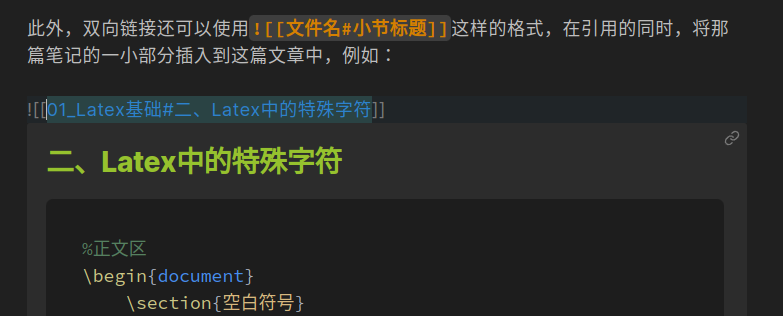
Bidirectional links can also use formats such as ![[文件名]] or ![[文件名#小节标题]] to embed an entire referenced note or one of its sections in the current article. For example:
Templates
Obsidian provides a template feature.
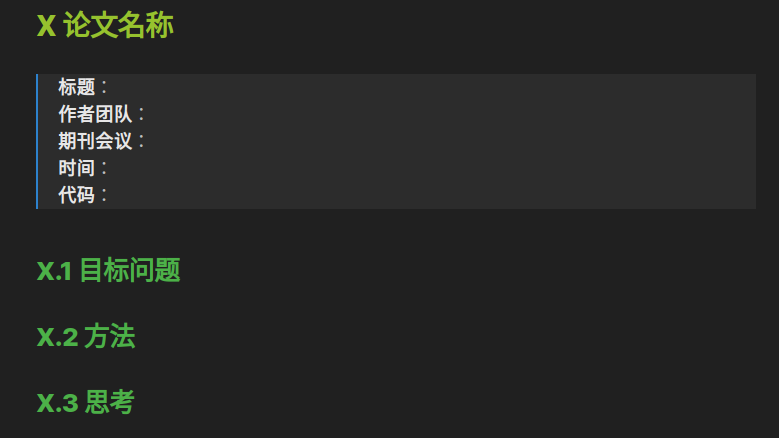
I created a folder to store all my templates. After creating a note, I can insert an existing template directly, such as the paper-note template I often use:
# X 论文名称

> **标题**:
> **作者团队**:
> **期刊会议**:
> **时间**:
> **代码**:

## X.1 目标问题

## X.2 方法

## X.3 思考
Saving and Quickly Restoring Workspaces
Sometimes I open several notes at once, such as experiment notes, paper notes, and a bug list. I place them in different split-screen positions, like this:
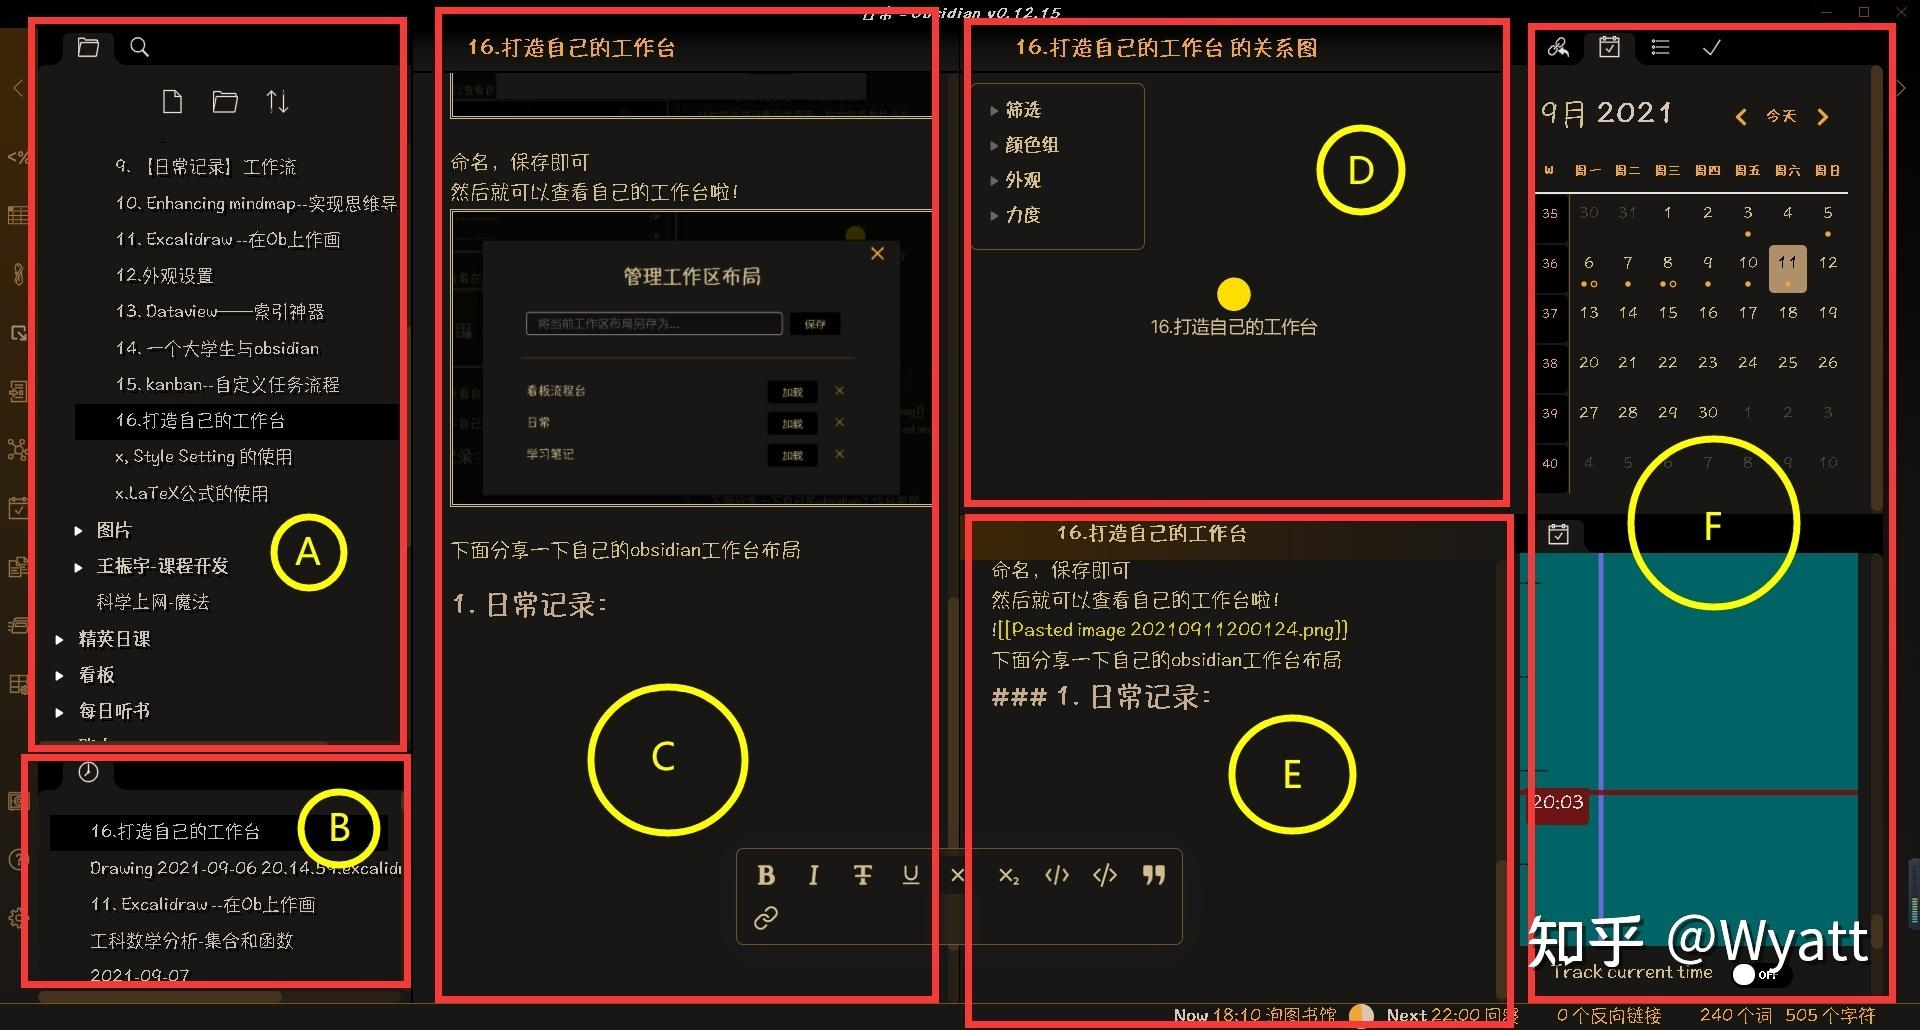
But if I need to do something else at that point, such as attend a meeting, I have to close all the current notes and open the meeting record. Restoring the previous layout the next time is inconvenient.
In this situation, click the 管理工作空间布局按钮 on the left to save the workspace layout. You can then close it without worry. The next time you use Obsidian, load the workspace layout to restore the previous arrangement with one click.
Extensive Plugin System
Obsidian provides an extensive plugin system. Some plugins add functionality, some improve its appearance, and others enhance the editing experience.
I will continue updating the section below with plugins that I have found useful.
Audio Recording
While researching this article, I suddenly discovered that Obsidian had added an audio-recording feature. Enable it under [Settings - Core plugins]. After it is enabled, an icon appears on the far left of the main page; press it to start recording.
After the recording is complete, it is saved in the current note file.

2.3 Recommended Obsidian Plugins
All plugins can be found and downloaded directly from the plugin marketplace under [Settings - Third-party plugins - Community plugins].
I will add introductions and usage details for each plugin when I have time.
1. Improving the Editing Experience
Media Extended enhances media playback with features including links to online videos, speed control, looping, and subtitle support.
It also supports timestamped note links and obtaining timestamps from online videos, local videos, and audio recordings.
(Current testing suggests that it can only add online YouTube videos.)
Enhances list formatting:
- Move items up or down and indent lists
- Add vertical indentation guides to lists
- Add collapse and expand functionality
Simplifies the syntax for creating tables: type a |, enter the first heading, press tab, and continue entering headings until you have created all of them. Then press Enter to move to the first row and enter its content, and continue in the same way.
When the cursor is in a table:
| Keyboard shortcut | Action |
|---|---|
Tab | Next cell |
Shift + Tab | Previous cell |
Enter | Next row |
Ctrl + Shift + D | Open the table controls sidebar |

2. Adding Functionality
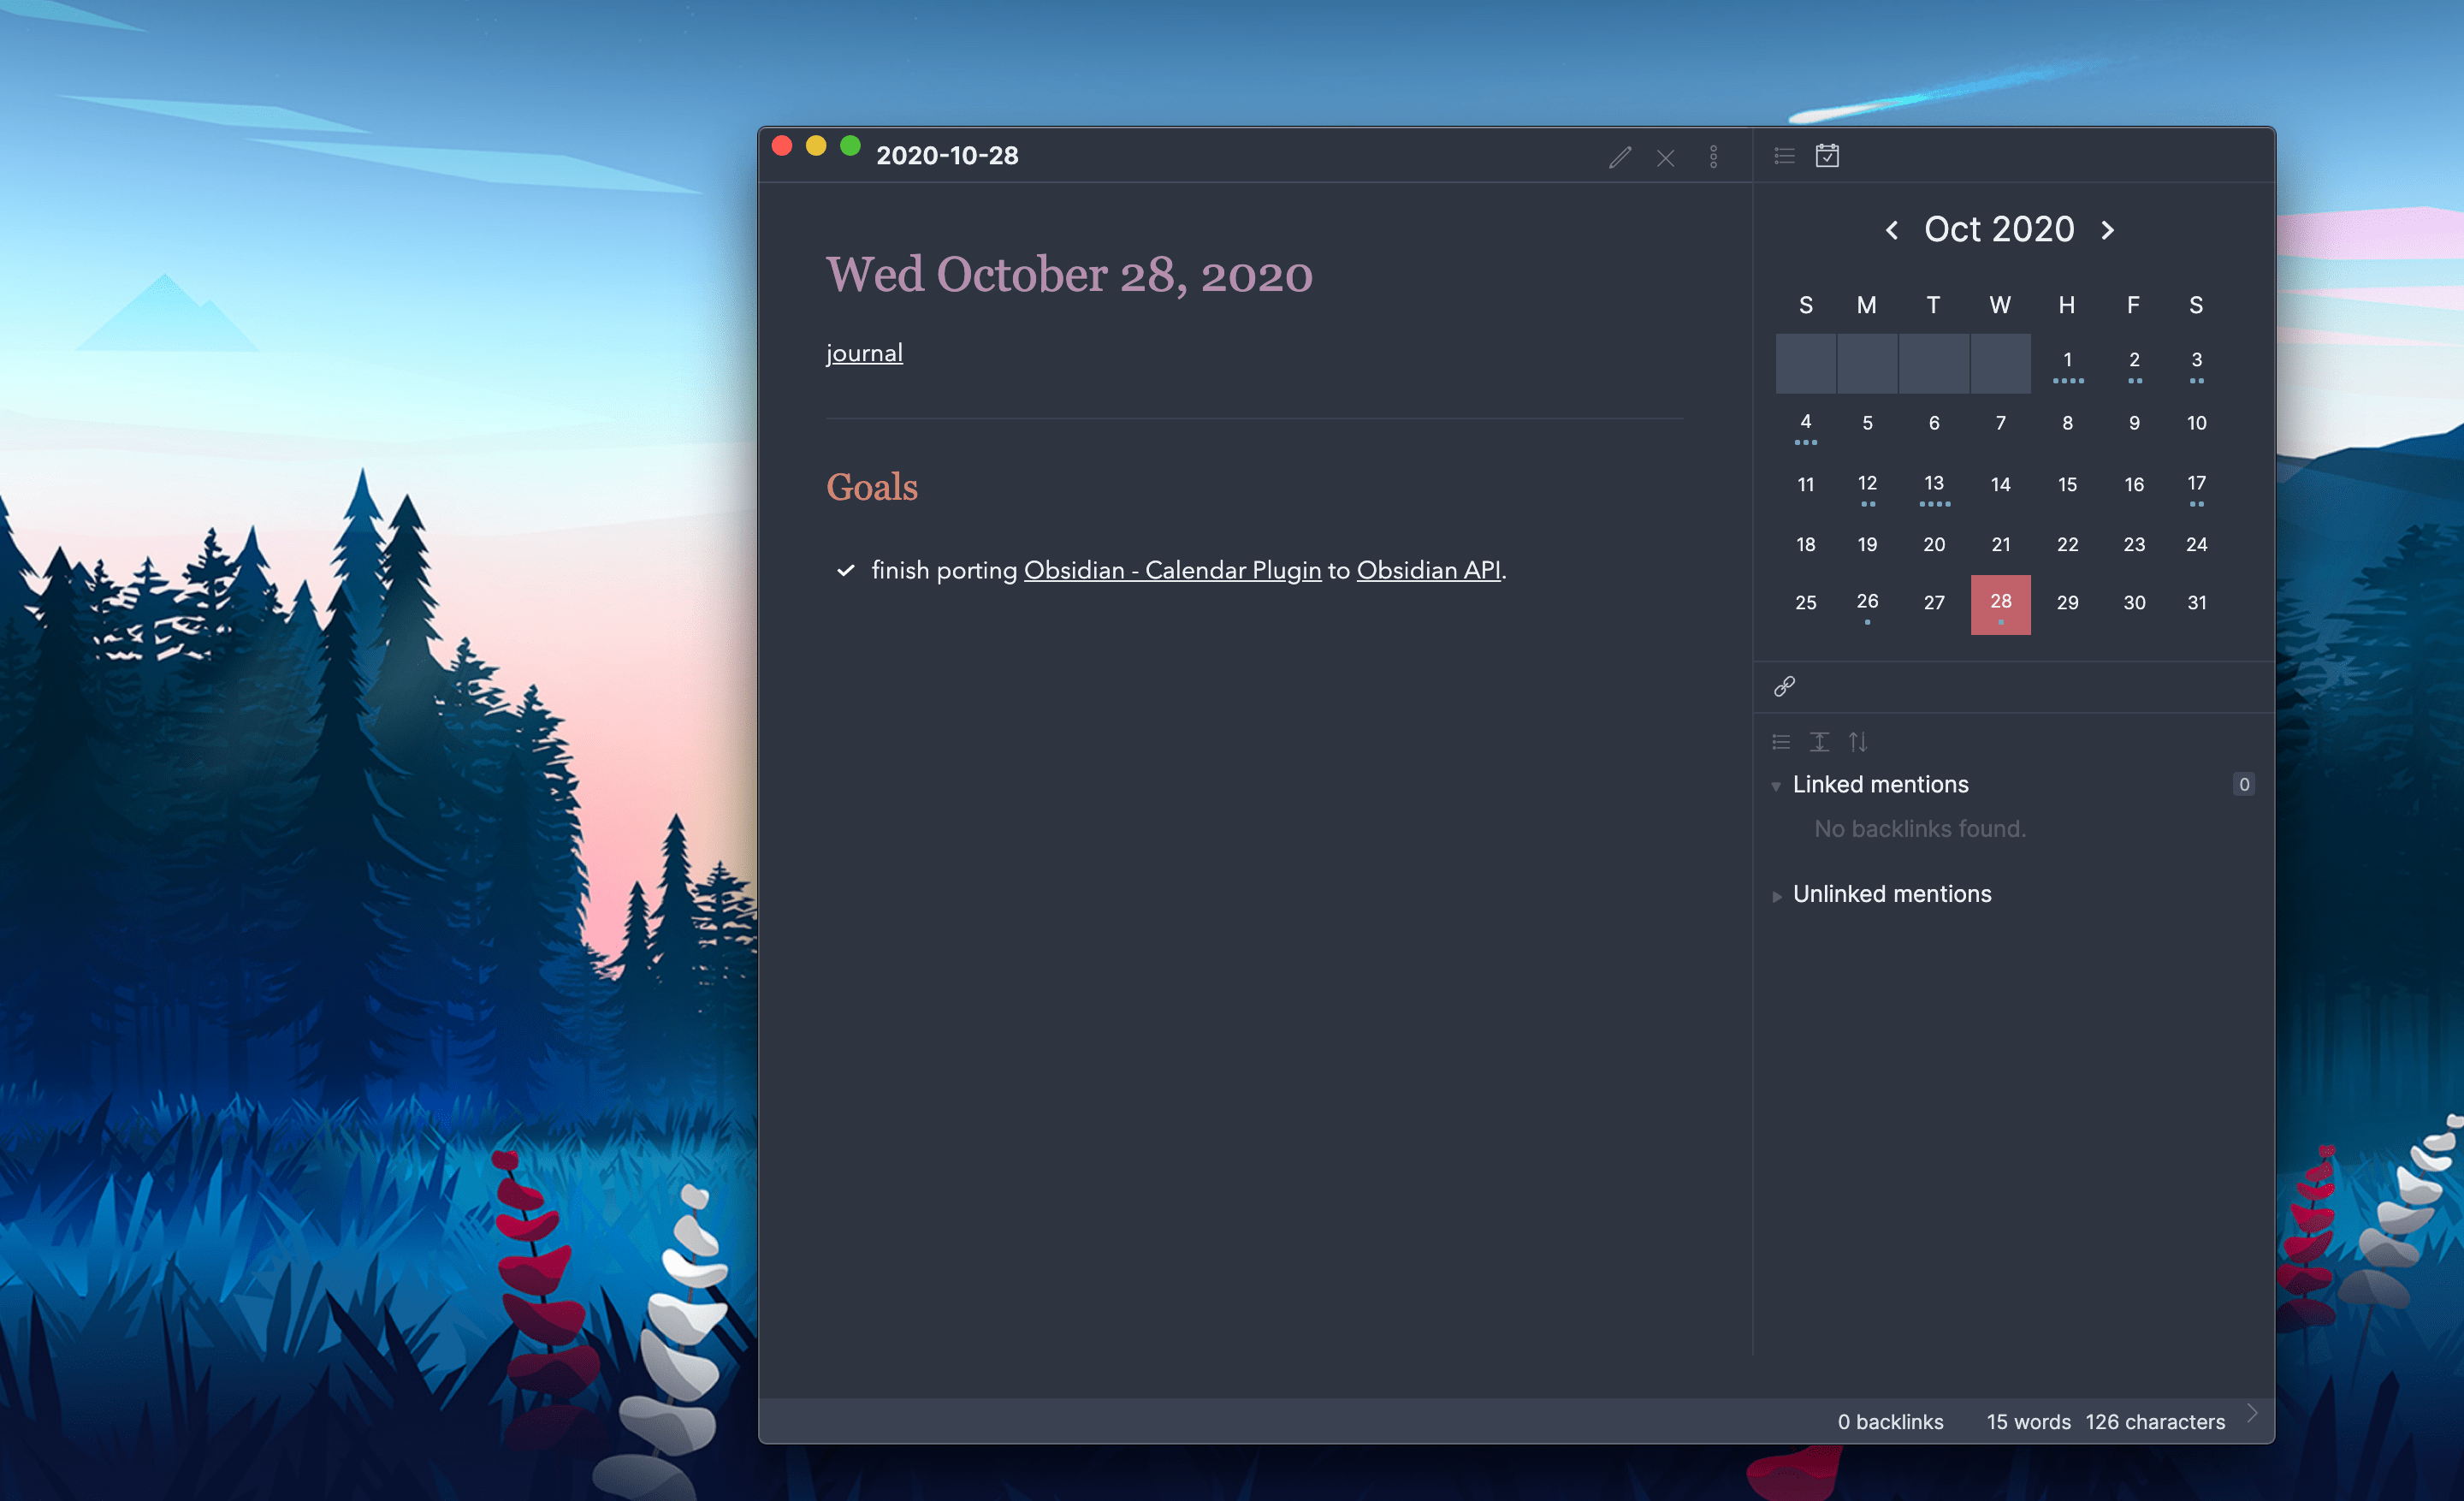
A calendar plugin. When enabled, a calendar appears in the right sidebar.
Click a date on the calendar to open that day’s daily note. Daily notes can also use a template.
Converts any webpage into an Obsidian pane. It works very well.
For example, the TickTick pane on the right in my setup:
Used together with PicGo, the Image auto upload Plugin can automatically upload images inserted into Obsidian to an image hosting service, improving the image-insertion experience.
Here, I use Alibaba Cloud OSS to store my images. For details, see How to Set Up Alibaba Cloud Image Hosting.
Its purpose is very straightforward: it adds a list of recently opened files to the file list on the left.
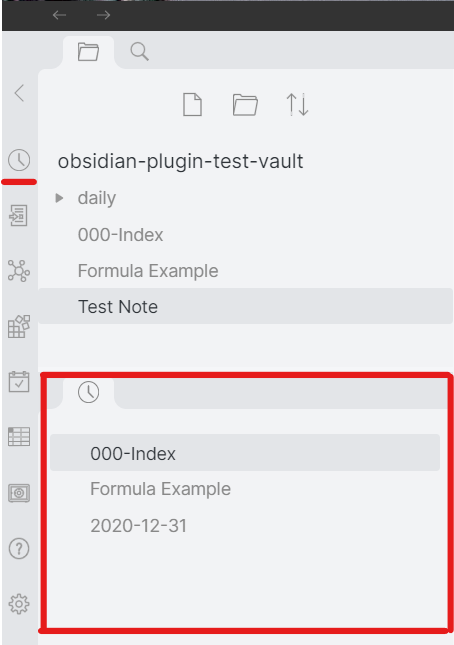
An efficient plugin for dynamic information queries. Once you have enough notes, you can use it to generate tables of contents, and it supports various query constraints.
Compared with Obsidian’s built-in template tool, Templater can create more complex templates, define more variables and functions, and generate powerful templates.
A plugin that adds styled boxes to Obsidian, making notes attractive and well structured. It can be used with plugins such as Task, QuickAdd, Button, and Dataview.
A useful and powerful plugin for quickly adding information, capturing ideas, creating notes from templates, adding macros, and rapidly performing multiple operations.
Lets you add custom buttons for specific people, such as running commands or opening links, or for implementing automated workflows together with QuickAdd.
Adds and manages banner images at the beginning of notes, generally for use when creating a note homepage.
Quickly switches and manages workspace layouts. You can organize workspaces according to your different working habits.
Enhances the core Page Preview feature by turning hover pop-ups into fully functional editors.
3. Personalization
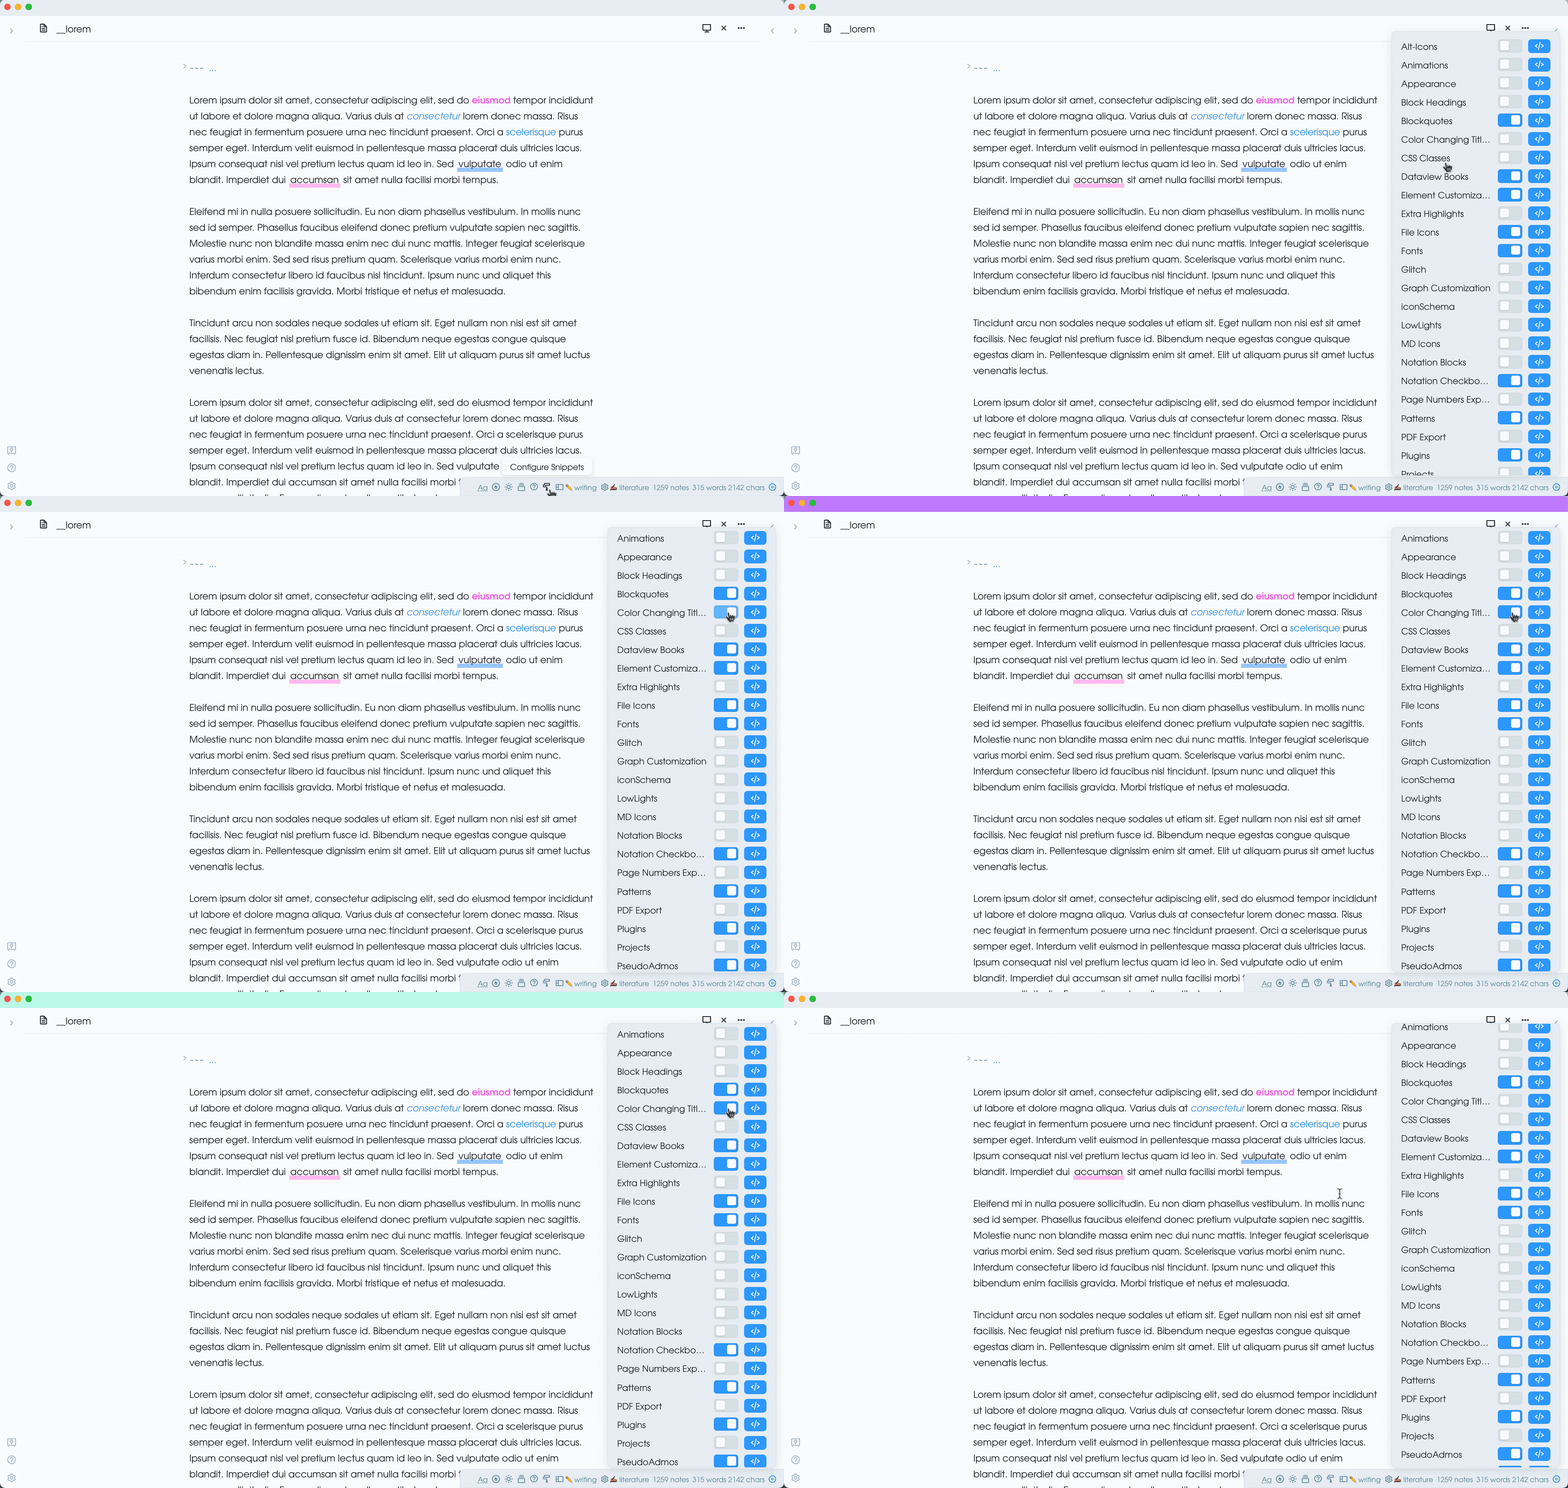
A CSS snippet management plugin that adds a CSS management menu in the bottom-right corner. Click it to enable or disable CSS snippets easily.
There are generally two ways to download Obsidian plugins. The first is through the official channel within the Obsidian application; the second is to download them through GitHub or another source and then install them manually.
Obsidian42 - BRAT can help you directly install plugins that cannot be installed from the community plugin marketplace.
A theme-customization plugin that lets you extensively modify an existing theme according to your needs.

Comments