Contents
I now publish blog posts on CSDN and my own website at the same time. However, I used to write and publish directly in the CSDN editor, which was an uncomfortable way to work. I still prefer a local Markdown editor such as Typora. This means I need my own image host, so screenshots pasted into the local Markdown editor are automatically uploaded to it.
Activate Alibaba Cloud OSS
First, activate Alibaba Cloud OSS. After logging in, simply click Activate Now.
Alibaba Cloud offers two billing methods:
- Pay-as-you-go billing: This is the default billing method. Once OSS is activated, this is the method used. There is no upfront payment; charges are deducted directly from your account after use.
- Monthly or annual plans: Click Discount Packages to see plans with different capacities and durations.
Since I only store images used for blogging here, each image is only a few dozen K. Even the smallest 40G plan is far more than I need. Therefore, I choose pay-as-you-go billing, which means I do not change anything here and simply continue to the next step.
Update for February (month 2) of 2023: this is a small personal website with monthly traffic of around 3-5G. Over a year, only two yuan and six jiao of the 10 yuan I topped up was used; the amount over 60 in the middle was for renewing the domain.


Create a Bucket
A Bucket is like a container for storing images. Create a new Bucket here.
- Enter a Bucket name: It becomes part of the generated URL (*****.oss-cn-beijing.aliyuncs.com)
- Region: Choose the one closest to you.
- Storage class: Generally select Standard Storage.
- Read/write permissions: You must select Public Read; otherwise, other people will not be able to access the images.
- None of the remaining services need to be enabled.
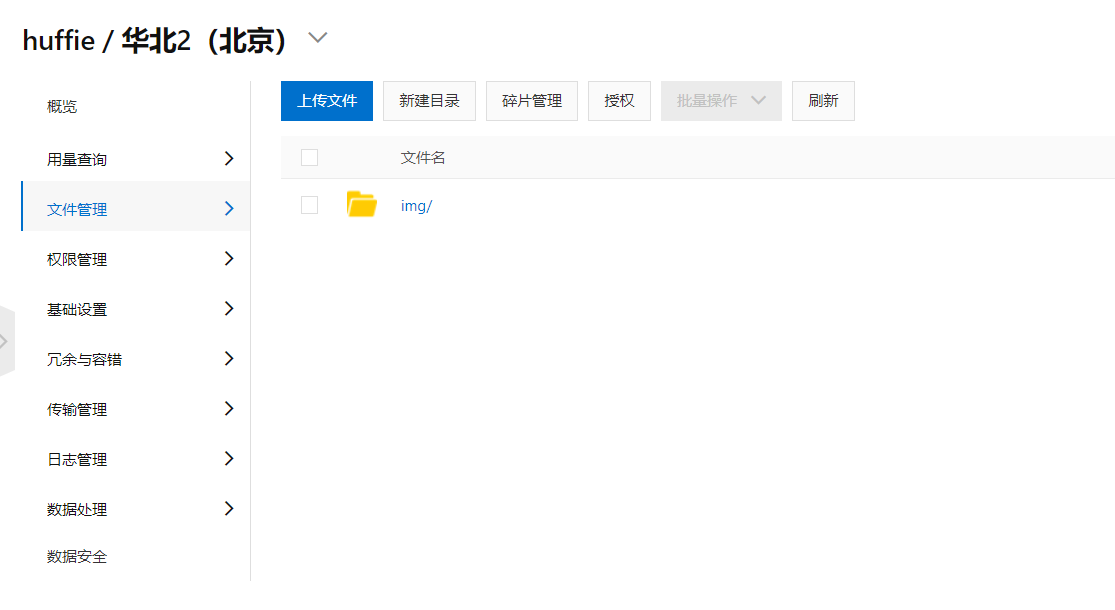
Open the Bucket List and create a new directory named img under the bucket you just created for storing blog images.
Set Up a Custom Domain
Bind a domain name to the Bucket.
Open your Bucket, go to 【Transfer Management】, and click 【Domain Management - Bind Domain】.
The image part will be the prefix used to access images in the future (for example, https://image.mahaofei.com/avatar.jpg).

Ideally, apply for a free SSL certificate and deploy it as well.
Obtain an Alibaba Cloud AccessKey
Move the pointer over your profile picture in the upper-right corner of the Alibaba Cloud homepage, then click AccessKey Management.
After opening the page, you may see a security warning. Click Continue Using AccessKey.
Click Create AccessKey. After completing verification, you will be able to see the AccessKey.
Make sure to record the AccessKey ID and AccessKey Secret, and never disclose them.
Download and Install PicGo
Below is the GitHub link for the PicGo project. You can download it directly from here. https://github.com/Molunerfinn/PicGo
Configure PicGo
In PicGo Settings, select Show Alibaba Cloud OSS Image Host (many common image hosts are already enabled by default).
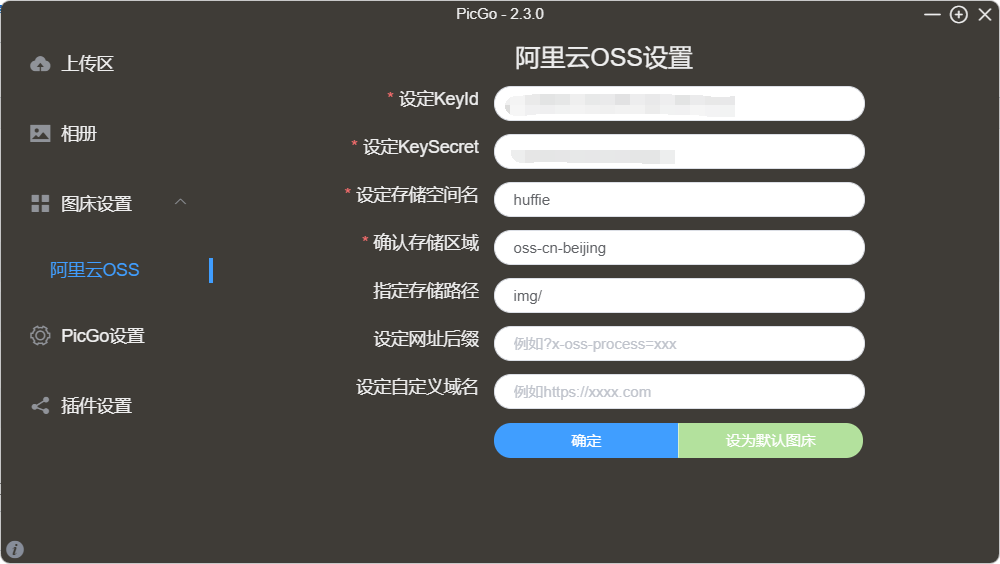
Under Image Hosting Settings - Alibaba Cloud OSS Settings, enter your own information.
Comments