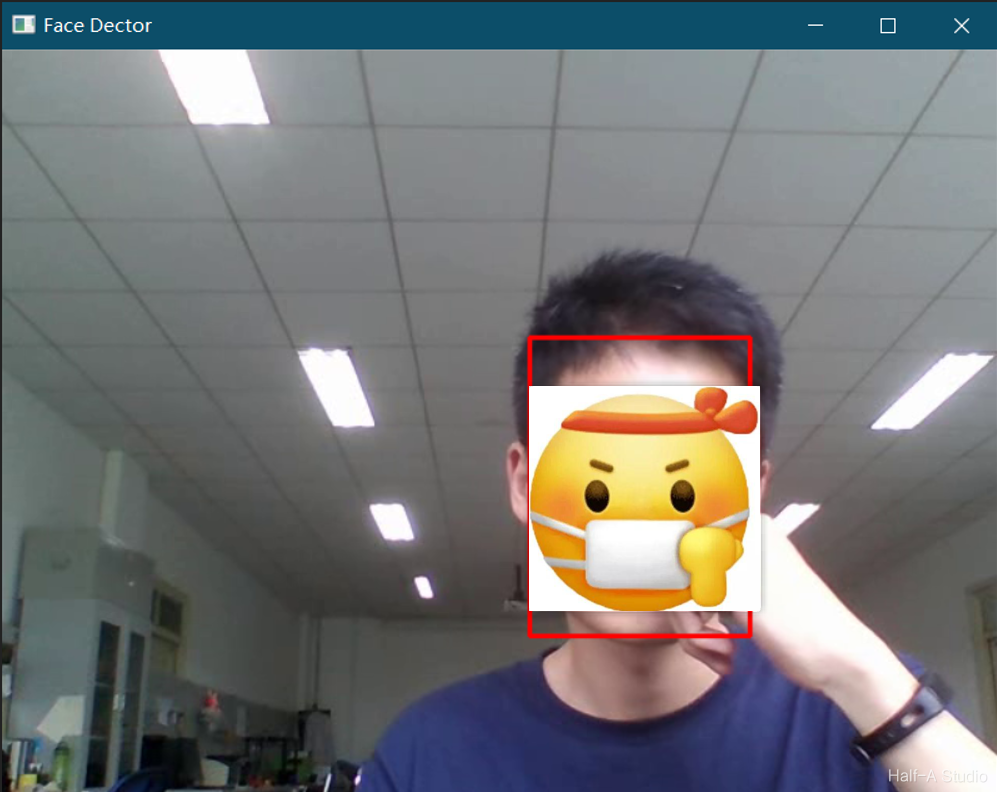
The goal of this article is to implement real-time detection of faces in the camera feed.
I. File Preparation
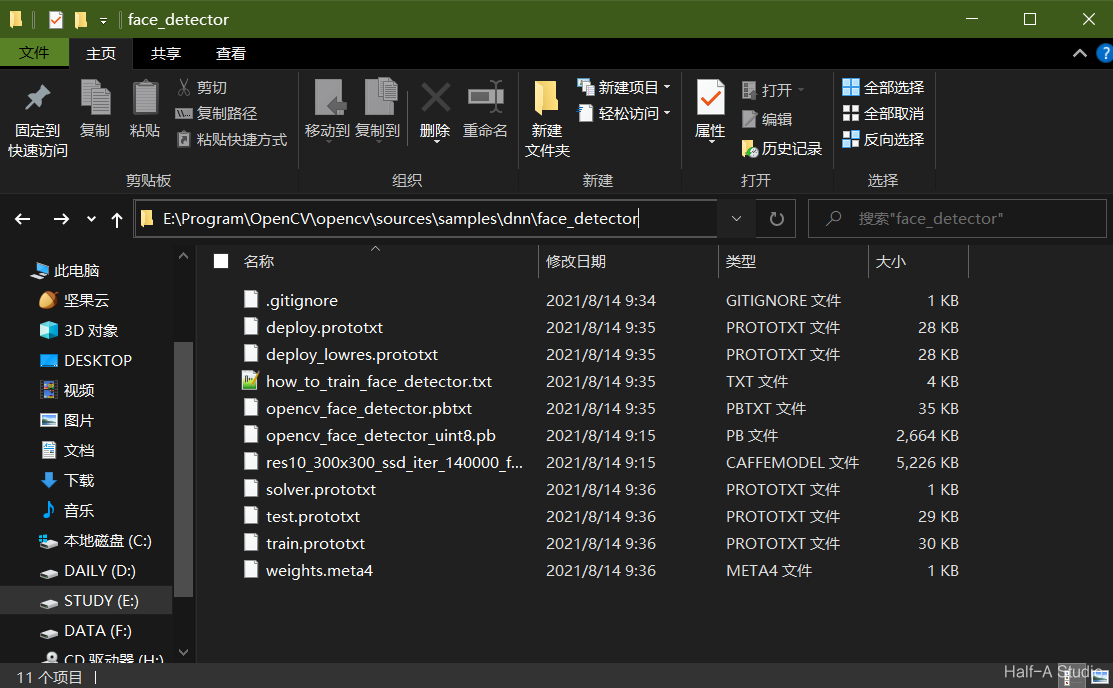
First, go to OpenCV’s GitHub page, download all the files in opencv/samples/dnn/face_detector/, and use them to overwrite the files in the local ...\opencv\sources\samples\dnn\face_detector directory. Then open weights.meta4 in Notepad and download the files corresponding to the two URLs it contains.
Because the download process may require circumventing network restrictions, I have packaged the required files as face_detector.zip. Simply extract the archive and copy all the files in it to the local ...\opencv\sources\samples\dnn\face_detector directory.
II. Program Design
2.1 Main Functions
1. blobFromImage()
The parameters specify the image to be processed by the neural network, the scaling applied to pixel values, the input image size required during training, the mean value to subtract from the image, whether to swap the BGR order to RGB, and whether cropping is required.
blobFromImage(InputArray image, 					//输入神经网络进行处理的图片
			  double 	 scalefactor=1.0, 			//对像素值进行一定的尺度缩放
		      const 	 Size& size = Size(),		//神经网络在训练的时候要求输入的图片尺寸
			  const 	 Scalar& mean = Scalar(), 	//需要将图片整体减去的平均值
			  bool		 swapRB = false, 			//BGR的顺序是否要交换,如果为true则为RGB
			  bool 		 crop = false,				//是否需要裁剪
			  int 		 ddepth = CV_32F
)
2. net.forward()
Mat probs = net.forward(); Its output has four dimensions:
- First dimension: the index of each image among all images
- Second dimension: the batchid and imageid of the current image
- Third dimension: the number of boxes;
- Fourth dimension: each box has seven values—the first two are the type and dst, the third is the confidence, and the last four are the top-left and bottom-right corners of the rectangle
2.2 Example Program
void MyDemo::faceDetector_Demo() {
	//创建VideoCapture类
	VideoCapture capture(0);
	Mat frame;

	////读取模型和配置参数
	std::string root_dir = "E:/Program/OpenCV/opencv/sources/samples/dnn/face_detector/";
	dnn::Net net = dnn::readNetFromTensorflow(root_dir+"opencv_face_detector_uint8.pb", root_dir+"opencv_face_detector.pbtxt");

	//实时检测
	while (capture.isOpened()) {
		capture.read(frame);	//逐帧读取视频
		flip(frame, frame, 1);	//将读取的视频左右反转
		if (frame.empty()) {	//如果视频结束或未检测到摄像头则跳出循环
			break;
		}

		//准备数据
		Mat blob = dnn::blobFromImage(frame, 1.0, Size(300, 300), Scalar(104, 177, 123), false, false);
		//scalefactor=1.0表示图像的色彩保存在0到255之间;size和mean参数保存在models.yml中。两个false表示不需要rgb的转换也不需要剪切
		net.setInput(blob);//将数据读入模型中。(blob结果是NCHW。N是个数,C通道数,H高度,W宽度)
		Mat probs = net.forward();
		//输出的第一个纬度所有图像中,每个图像的index;
		//第二纬度,当前图像是第几个批次batchid,第几张图imageid;
		//第三个纬度表示有多少个框;
		//第四个纬度,每个框有七个值,前两个是类型和dst,第三个是置信度,最后四个是矩形的左上角和右上角
		Mat detectionMat(probs.size[2], probs.size[3], CV_32F, probs.ptr());
		//框的个数为行数,每个框的七个值为每行的元素

		//解析结果
		for (int i = 0; i < detectionMat.rows; i++) {
			float confidence = detectionMat.at<float>(i, 2);//取出第三个值:置信度
			if (confidence > 0.6) {
				//再乘以图像的宽度或高度才能变为真实的
				int x1 = static_cast<int>(detectionMat.at<float>(i, 3) * frame.cols);
				int y1 = static_cast<int>(detectionMat.at<float>(i, 4) * frame.rows);
				int x2 = static_cast<int>(detectionMat.at<float>(i, 5) * frame.cols);
				int y2 = static_cast<int>(detectionMat.at<float>(i, 6) * frame.rows);
				Rect box(x1, y1, x2 - x1, y2 - y1);
				rectangle(frame, box, Scalar(0, 0, 255), 2, 8, 0);
			}
		}
		imshow("Face Dector", frame);

		char k = waitKey(33);	//两帧读取的间隔时间
		if (k == 'q') {			//按下q键退出循环
			break;
		}
	}
Comments