
Anaconda
Anaconda is a tool for managing various Python packages. Here, we mainly use NumPy and some other commonly used packages.
Anaconda official website: https://www.anaconda.com/
You can directly download and install the Anaconda installer for your operating system. For instructions on how to use it, refer to this article
CUDA
- First, check the CUDA version supported by your computer’s GPU. As shown in the figure, open NVIDIA Control Panel -> Help -> System Information -> Components (you can open it from Control Panel or the notification area in the lower-right corner). The CUDA version supported by my GPU is 11.6.106, so the CUDA version I install cannot exceed this version.
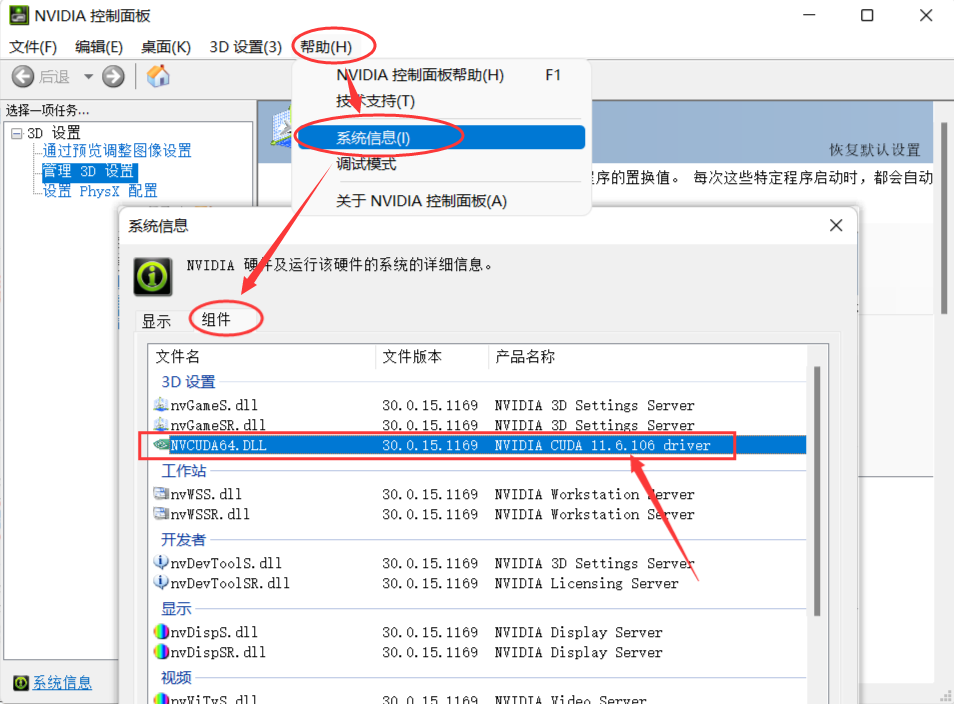
Alternatively, enter nvidia-smi in cmd to check the CUDA version.
- Go to the CUDA Toolkit Archive and select a CUDA Toolkit version lower than the version you just found. This article uses CUDA Toolkit 11.0 Update 3. Download the installer, which is about 2.7G.
Note: The CUDA version selected here determines the cuDNN and tensorflow-gpu versions installed later. These three versions are related, and they will not work if the versions do not match. For specific compatible versions, refer to https://tensorflow.google.cn/install/source_windows. The table below is an excerpt.
| Version | Python Version | Compiler | Build Tool | cuDNN | CUDA |
|---|---|---|---|---|---|
| tensorflow_gpu-2.6.0 | 3.6-3.9 | MSVC 2019 | Bazel 3.7.2 | 8.1 | 11.2 |
| tensorflow_gpu-2.5.0 | 3.6-3.9 | MSVC 2019 | Bazel 3.7.2 | 8.1 | 11.2 |
| tensorflow_gpu-2.4.0 | 3.6-3.8 | MSVC 2019 | Bazel 3.1.0 | 8.0 | 11.0 |
| tensorflow_gpu-2.3.0 | 3.5-3.8 | MSVC 2019 | Bazel 3.1.0 | 7.6 | 10.1 |
| tensorflow_gpu-2.2.0 | 3.5-3.8 | MSVC 2019 | Bazel 2.0.0 | 7.6 | 10.1 |
| tensorflow_gpu-2.1.0 | 3.5-3.7 | MSVC 2019 | Bazel 0.27.1-0.29.1 | 7.6 | 10.1 |
| tensorflow_gpu-2.0.0 | 3.5-3.7 | MSVC 2017 | Bazel 0.26.1 | 7.4 | 10 |
| tensorflow_gpu-1.15.0 | 3.5-3.7 | MSVC 2017 | Bazel 0.26.1 | 7.4 | 10 |
| tensorflow_gpu-1.14.0 | 3.5-3.7 | MSVC 2017 | Bazel 0.24.1-0.25.2 | 7.4 | 10 |
| tensorflow_gpu-1.13.0 | 3.5-3.7 | MSVC 2015 update 3 | Bazel 0.19.0-0.21.0 | 7.4 | 10 |
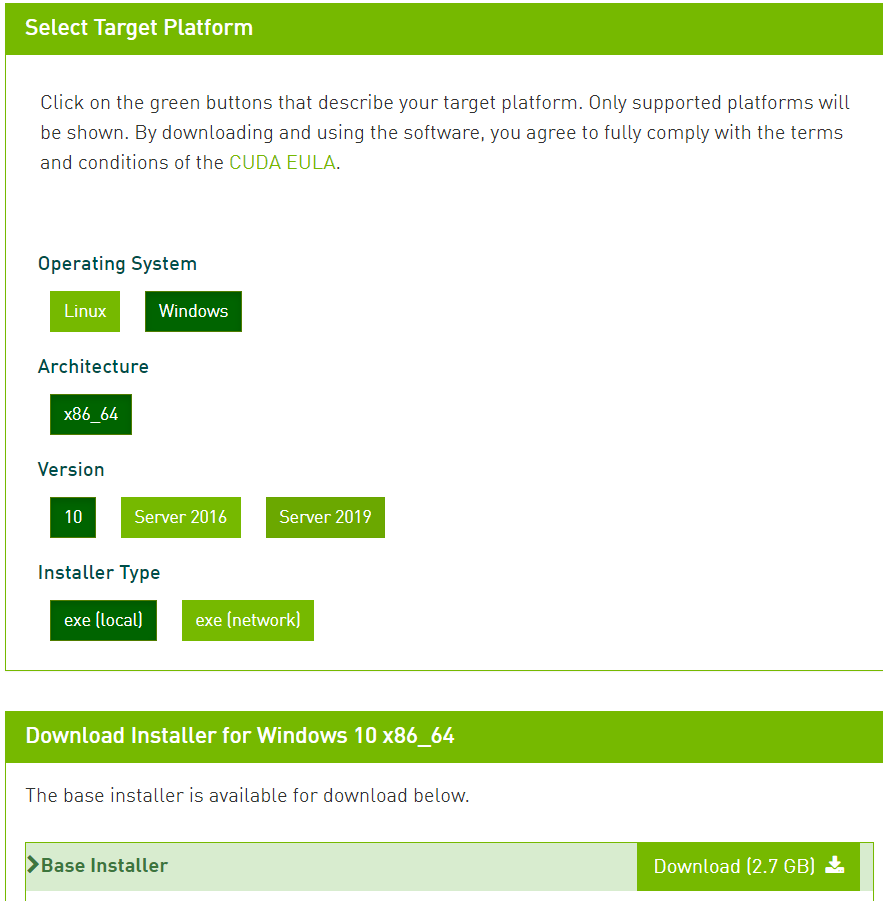
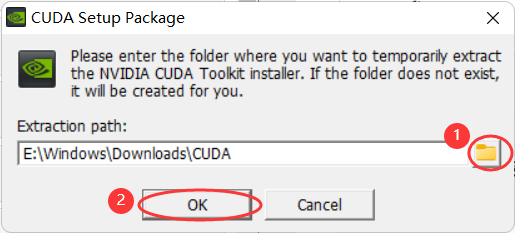
- Double-click the downloaded exe installer, select a location for temporary extraction, and then click ok. Extraction takes about two minutes.
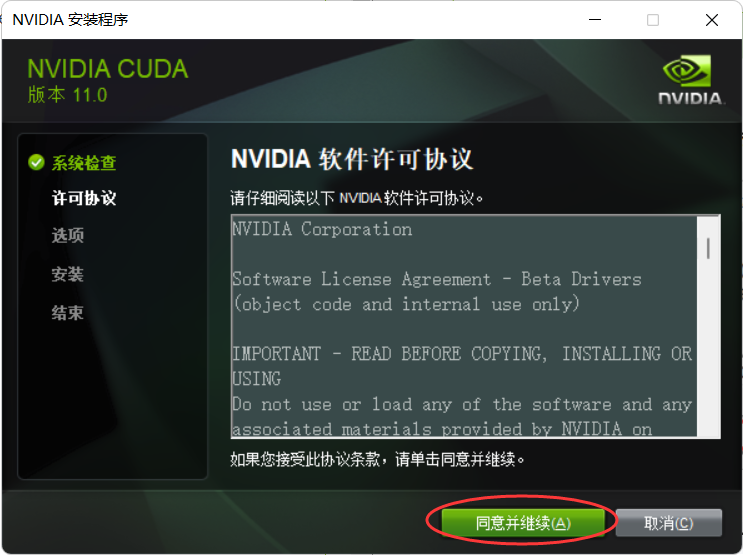
- Accept the license agreement, select the custom installation option, and then click Next.

- Select the driver components. Be sure to check CUDA, and then click Next.
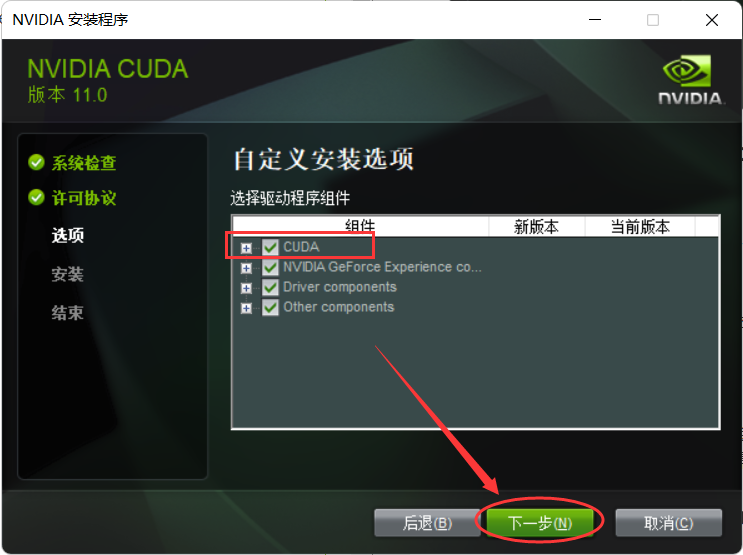
- Choose an installation location on your computer, and then start the installation.
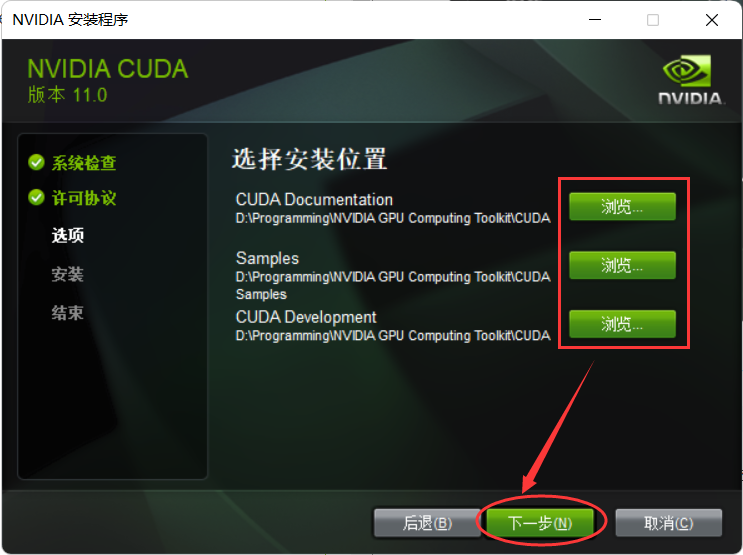
-
Wait for the installation to finish. On this ‘18 laptop with a mechanical hard drive, the installation took about 5 minutes.
-
Check the environment variables. They are generally configured automatically after installation. Open Settings - System - System Information - Advanced System Settings - Environment Variables to check them. If they are not present, you need to add them yourself (remember to change them to your own installation path when adding them).
- Check whether the system variables contain the two environment-variable groups CUDA and NVCUDASAMPLES.
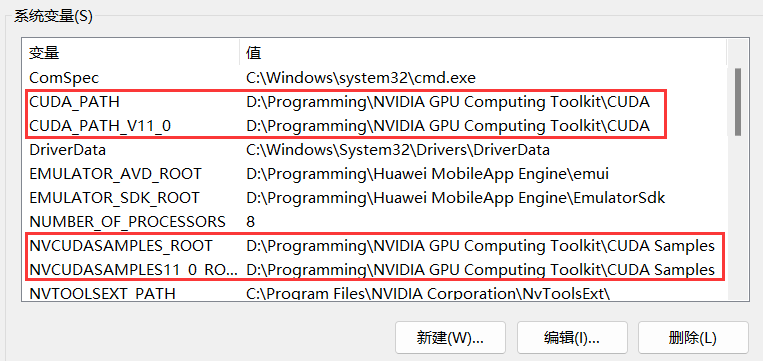
- Open Path under system variables and check whether it contains the following environment variables.
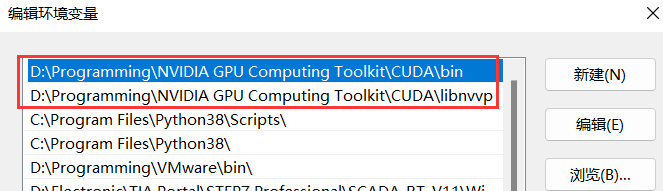
- CUDA installation is complete
Pytorch
(1) Create a PyTorch environment
Use Anaconda to create a pytorch virtual environment, mainly to separate different projects. For example, TensorFlow and PyTorch use different package environments, and creating a new environment can handle incompatibility issues between projects.
-
Open
Anaconda Prompt -
Create a new virtual environment
conda create -n pytorch python=3.8Here we create a pytorch environment. In the command, pytorch is the environment name — you can call it whatever you like. For the Python version, either 3.8 or 3.9 works here.
Use the conda info --envs command to see all environments, and use conda activate pytorch to activate the pytorch environment you just created.
When the prompt changes from (base) to (pytorch), it means you have switched to the pytorch environment.

(2) Install PyTorch
Go to the PyTorch official website: https://pytorch.org/, where you can see the PyTorch installation page.
By default, some information has already been selected based on your computer. You only need to select the CUDA version. I just checked that my computer’s CUDA version is 11.6.106, so I select CUDA 11.6 here.
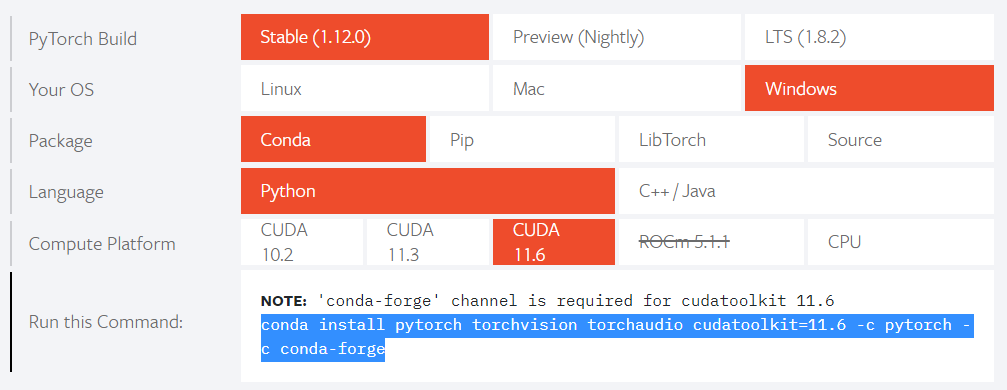
It notes that cudatoolkit needs to be installed on the computer before installation. We already installed it in the previous section, so you can run the install command shown below directly in the conda pytorch environment.
Enter the virtual environment
conda activate pytorchInstall PyTorch
conda install pytorch torchvision torchaudio cudatoolkit=11.6 -c pytorch -c conda-forgeIf the download fails with an error, make sure to turn off your VPN, then go to the Tsinghua University mirror site and add the index by following the steps there. If it still fails and you can use a VPN, you can use the command
conda config --remove-key channelsto remove the Tsinghua channel, delete theC:/用户/xxx/.condarcfile, and download using a VPN with the default channels.
Testing
Open the Anaconda Prompt command line and enter the pytorch environment.
conda activate pytorchEnter python to enter the Python interactive interface
Enter the following commands to test:
import torch
print(torch.__version__) # pytorch版本
print(torch.version.cuda) # cuda版本
print(torch.cuda.is_available()) # 查看cuda是否可用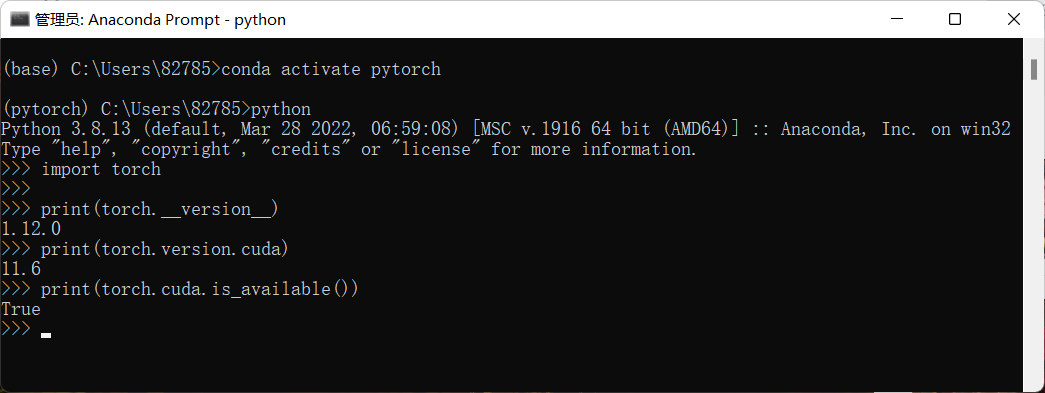
Comments