Contents
- I. Purchasing a Server and Registering a Domain Name
- 1.1 Purchasing a Server
- 1.2 Domain Name Registration and ICP Filing
- II. Installing BT Panel
- 2.1 Preparation
- 2.2 Installing BT Panel
- III. Installing WordPress
- 3.1 Uploading the WordPress Installation Package
- 3.2 Modifying the Site Configuration File
- 3.3 Domain Name Resolution and Binding
- 3.4 Installing WordPress Online
I. Purchasing a Server and Registering a Domain Name
1.1 Purchasing a Server
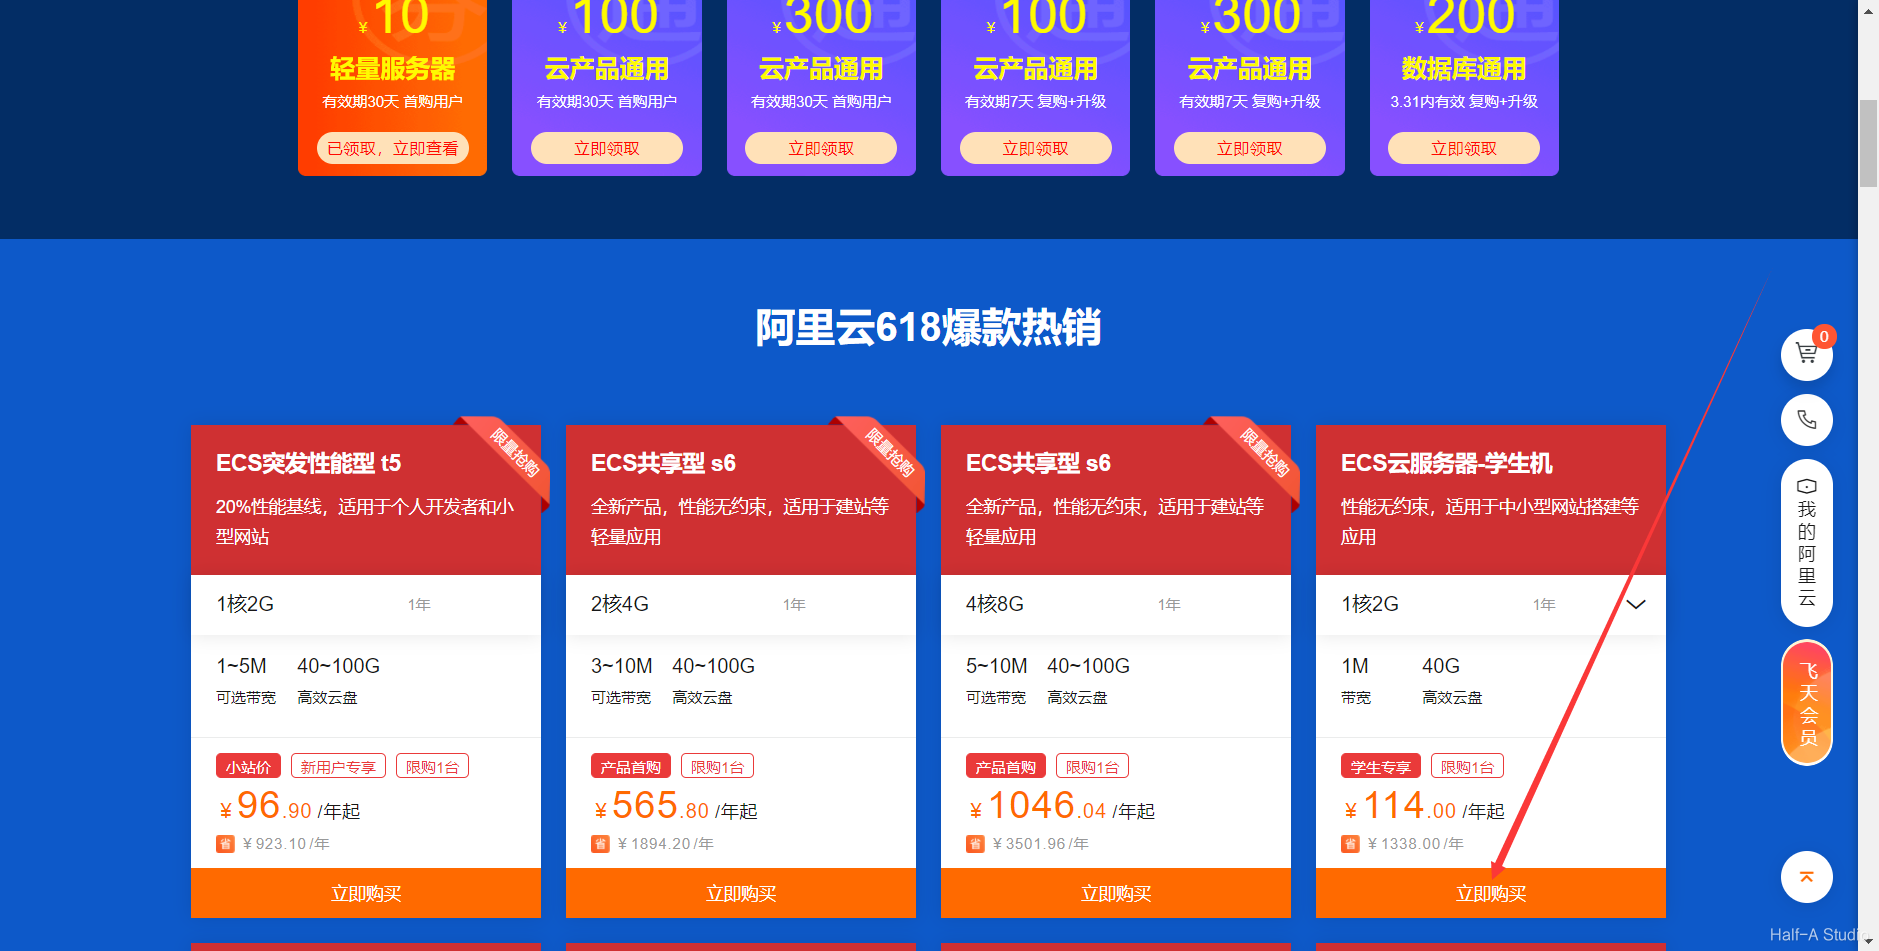
- Go to the Alibaba Cloud website and purchase an Alibaba Cloud ECS instance (you can check out the Developer Growth Program, although I bought a student ECS during China’s 618 shopping festival). Choose CentOS or Ubuntu as the server’s operating system.
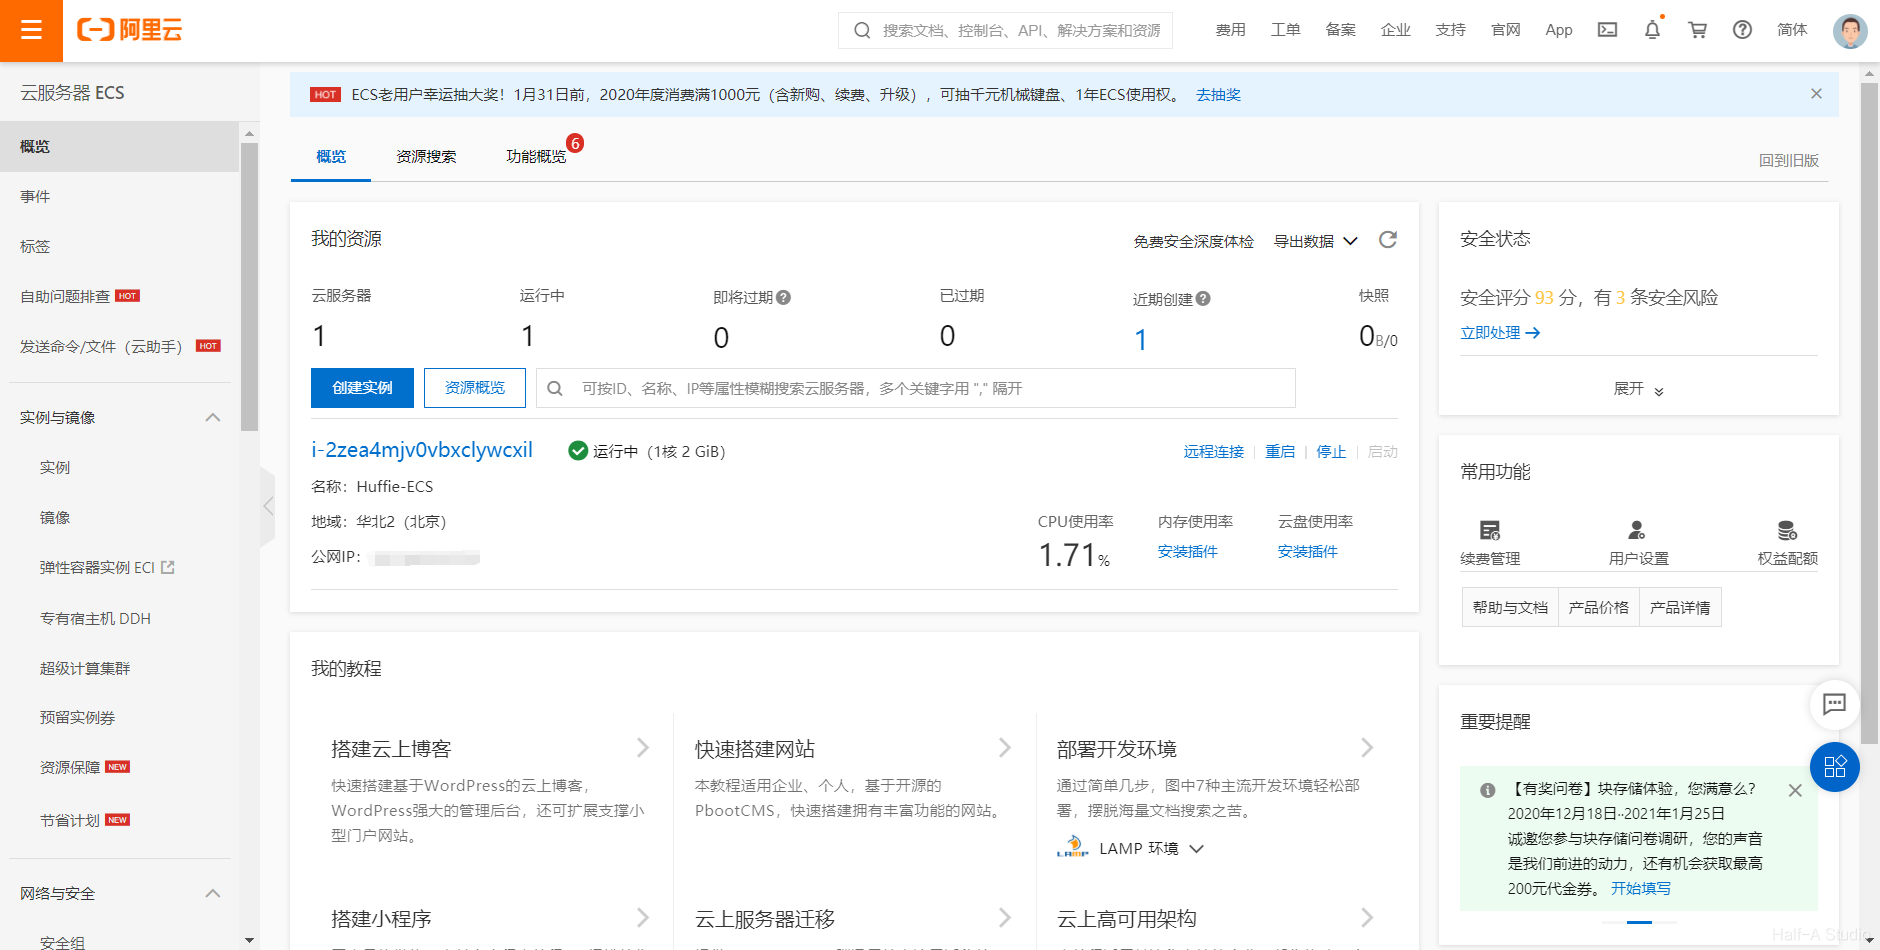
 After completing the purchase, you will enter the Console, where you can see the server you just purchased.
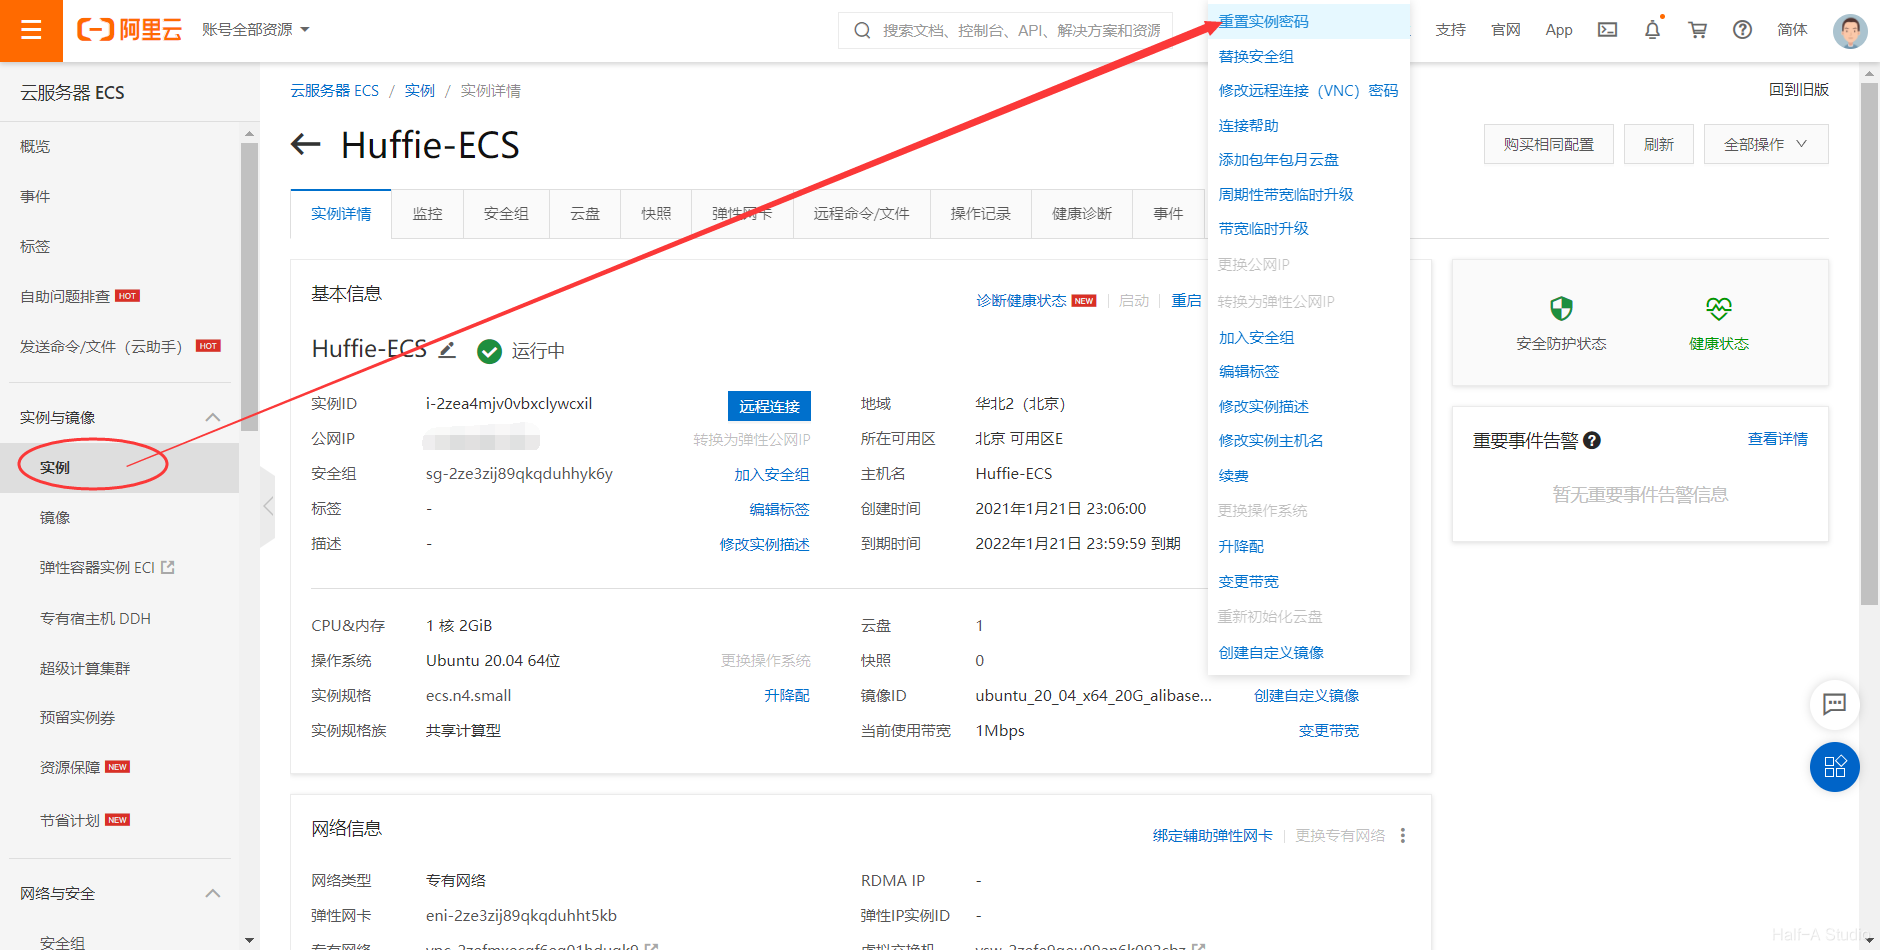
- Before using the server, we first need to reset the root user’s password.
- After resetting the password, you can log in to the server through its public IP using Xshell, PuTTY, or Alibaba Cloud’s remote connection tool.
1.2 Domain Name Registration and ICP Filing
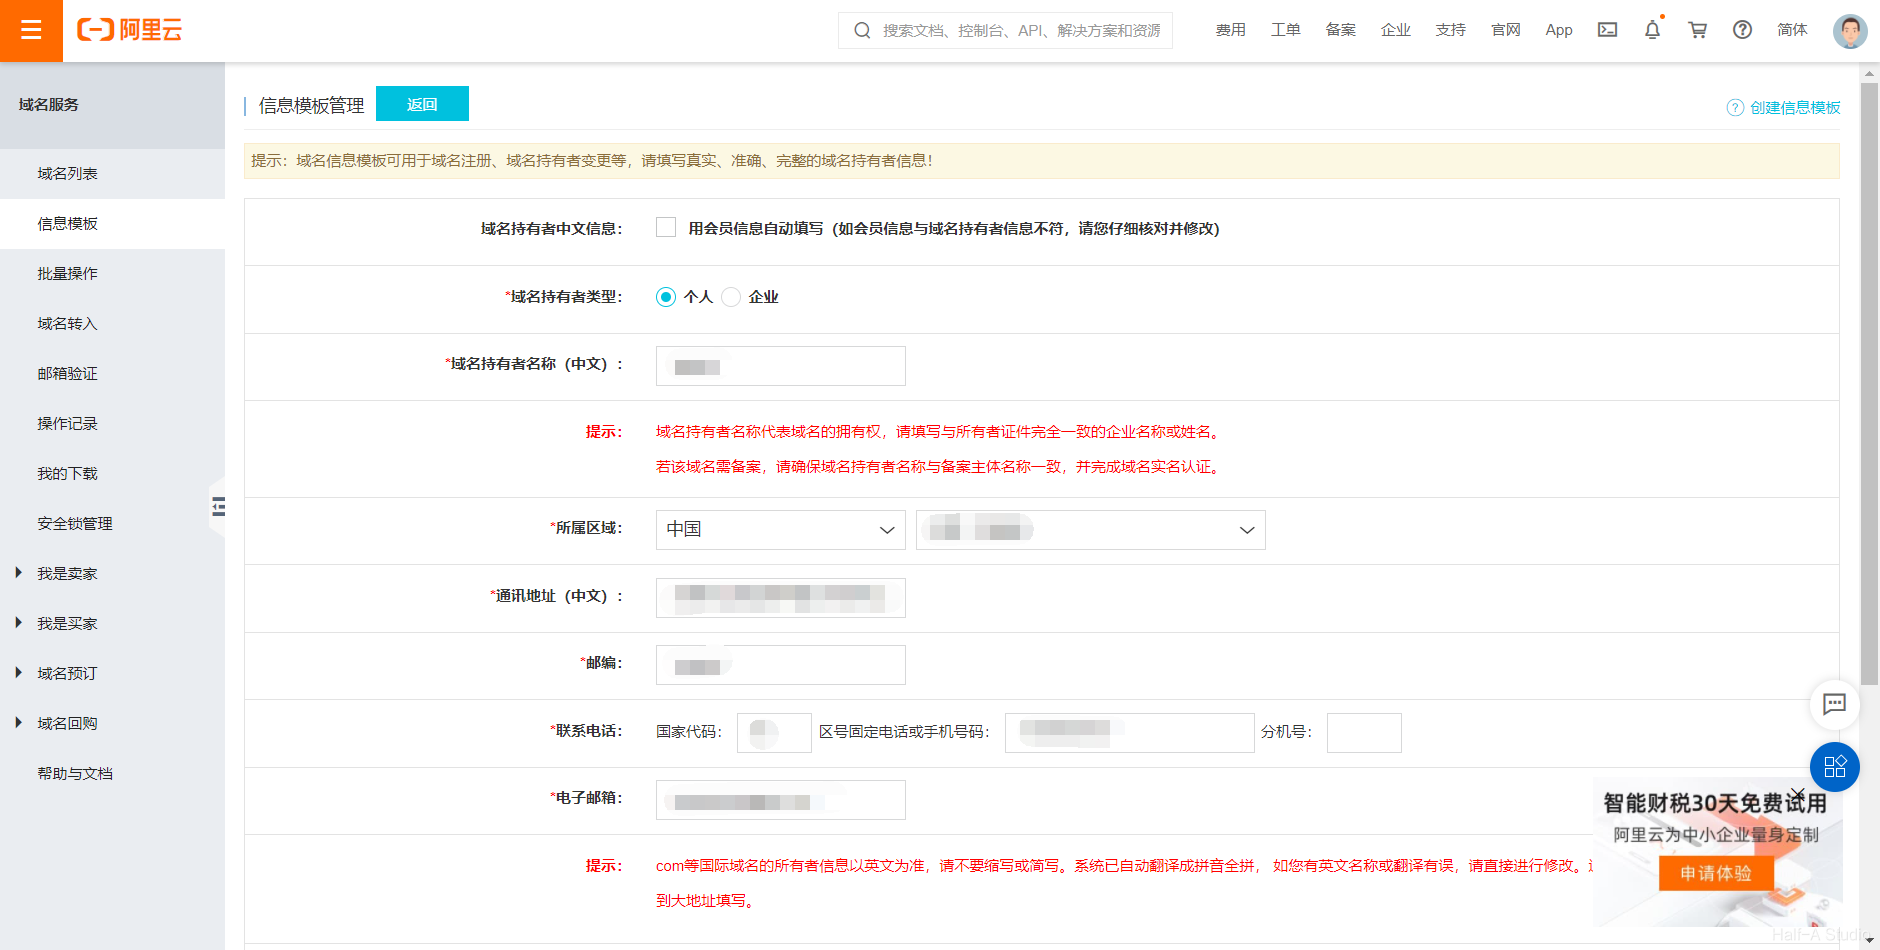
- Go to the domain registration platform, choose a suitable domain name, and click Checkout. (If you have not registered a domain name before, you will need to create a personal information template during checkout. Simply fill in the required information.)
- Once purchased, the domain name registration is complete. Next, the website needs an ICP filing. Go to Alibaba Cloud’s ICP Filing homepage to start the filing process.
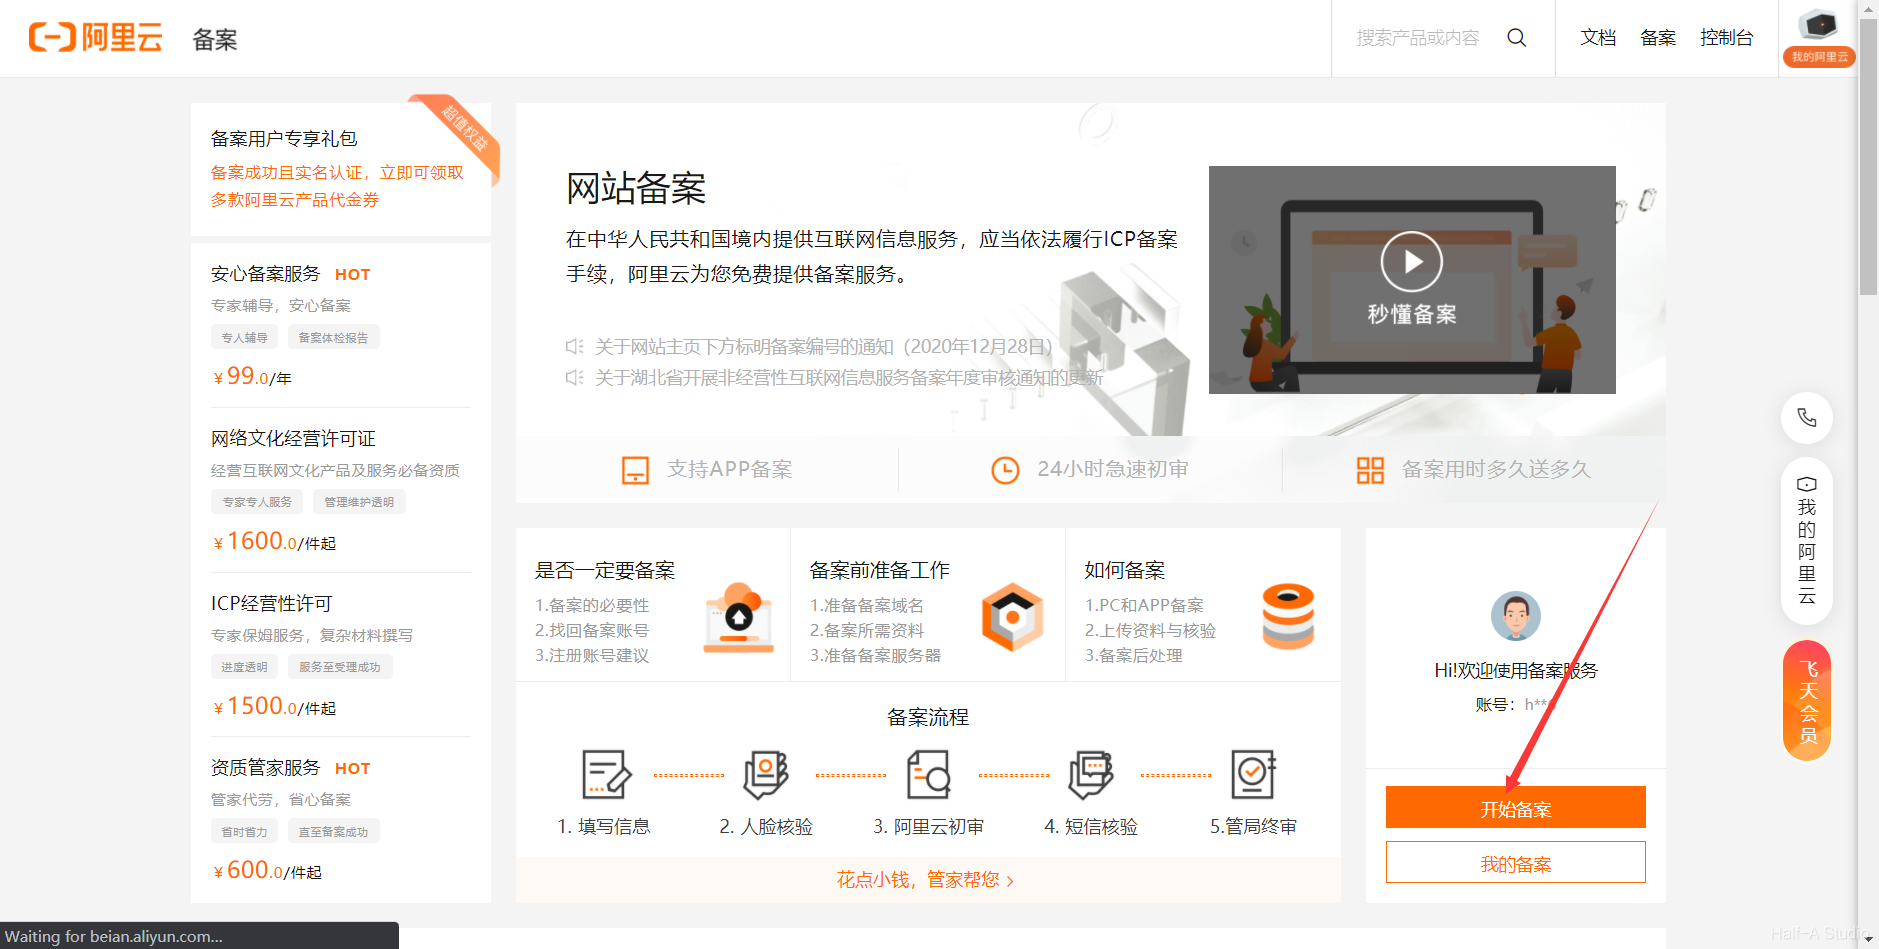
- After completing your personal information, click Verify Information (note: you must wait two to three days after registering the domain name before applying for an ICP filing).
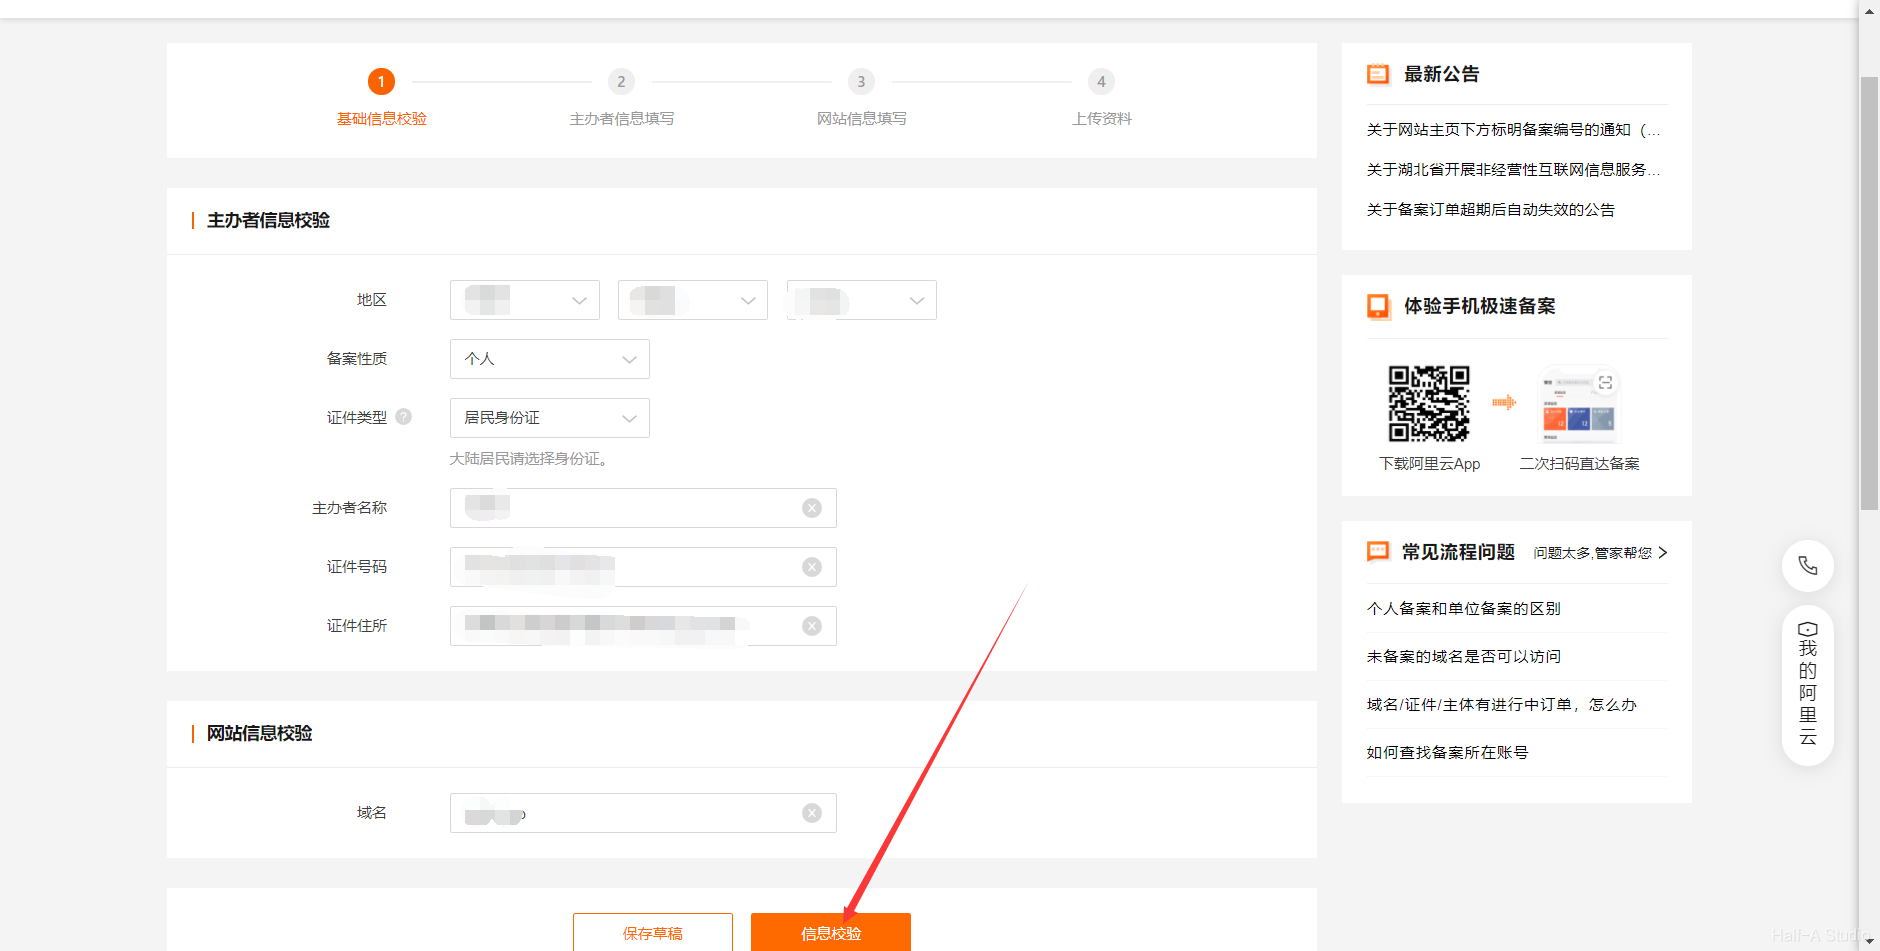 Then fill in your information and the website information as required, complete identity verification, and submit everything for review. Make sure every item is accurate. If anything does not meet the requirements, you will need to make corrections by phone later.
 - Within one business day after you submit the application for review, Alibaba Cloud customer service will call to verify your identity and tell you what filing information needs to be changed. Keep your phone available during this period.
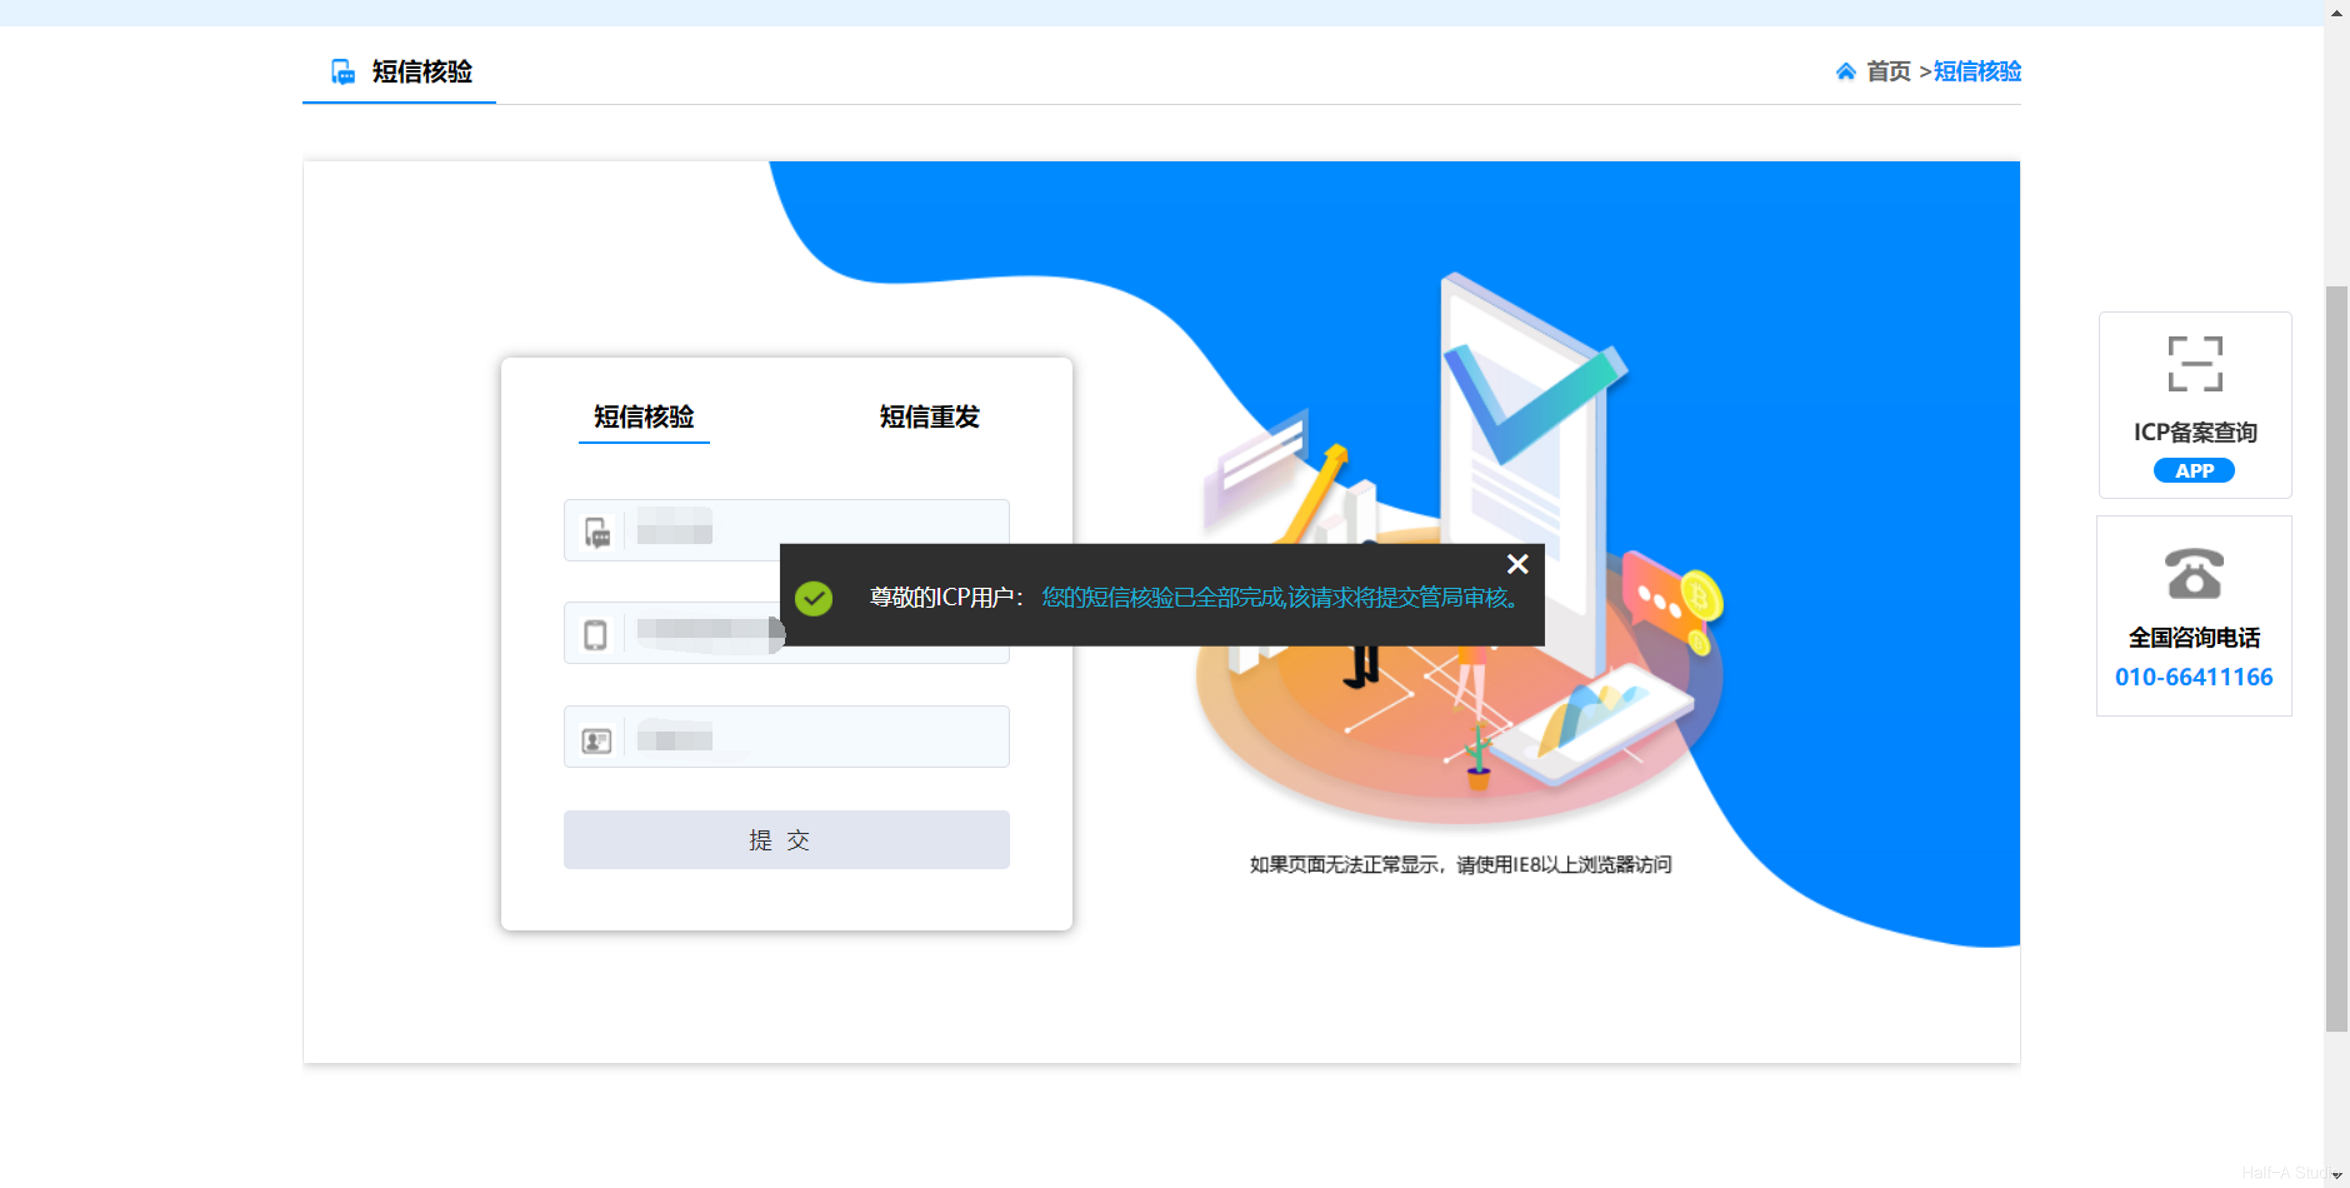
- After Alibaba Cloud completes its initial review, it will submit the filing information to the local communications administration. Within about a day, you will receive a verification text message from the Ministry of Industry and Information Technology. Use the verification code in the message to verify your application on the Ministry of Industry and Information Technology website.
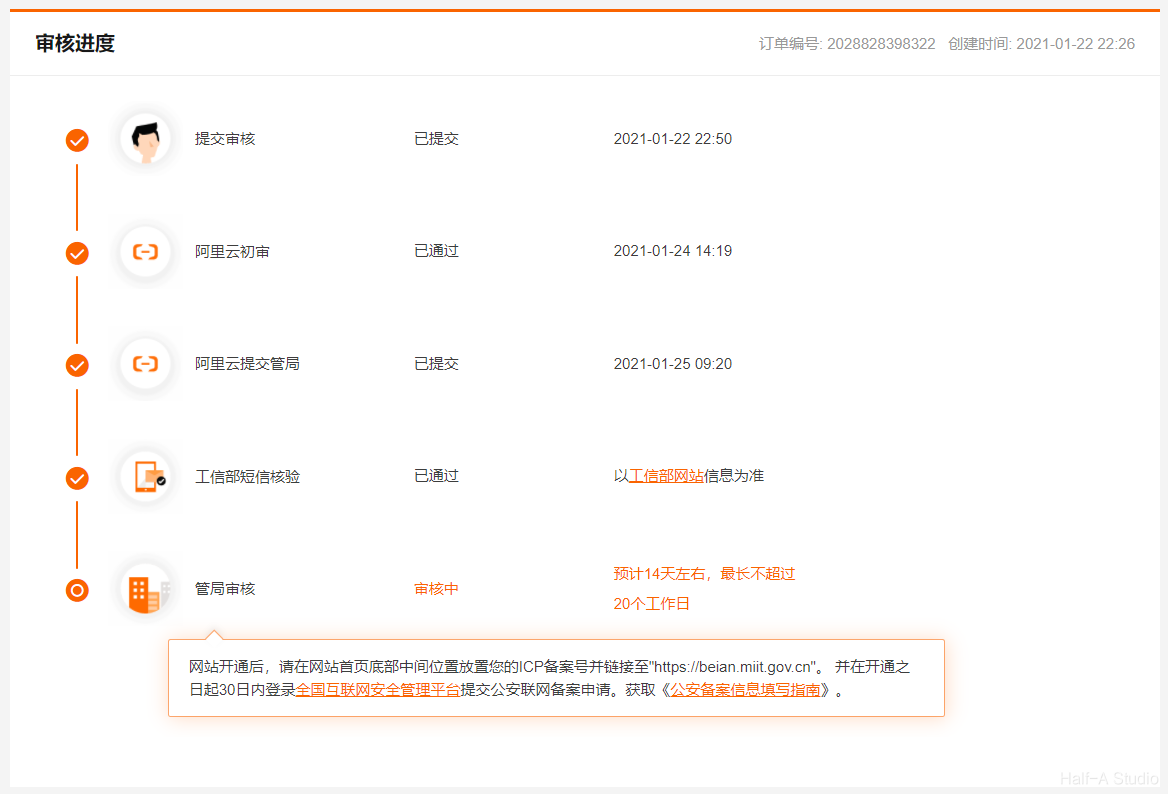
- Wait 7–20 days. Once the local communications administration completes its review, the filing is done.
II. Installing BT Panel
2.1 Preparation
Go to the BT website and register a BT account, which you will need later.
2.2 Installing BT Panel
The following installation process is based on the official guide: https://www.bt.cn/bbs/thread-19376-1-1.html
- Open the server ports
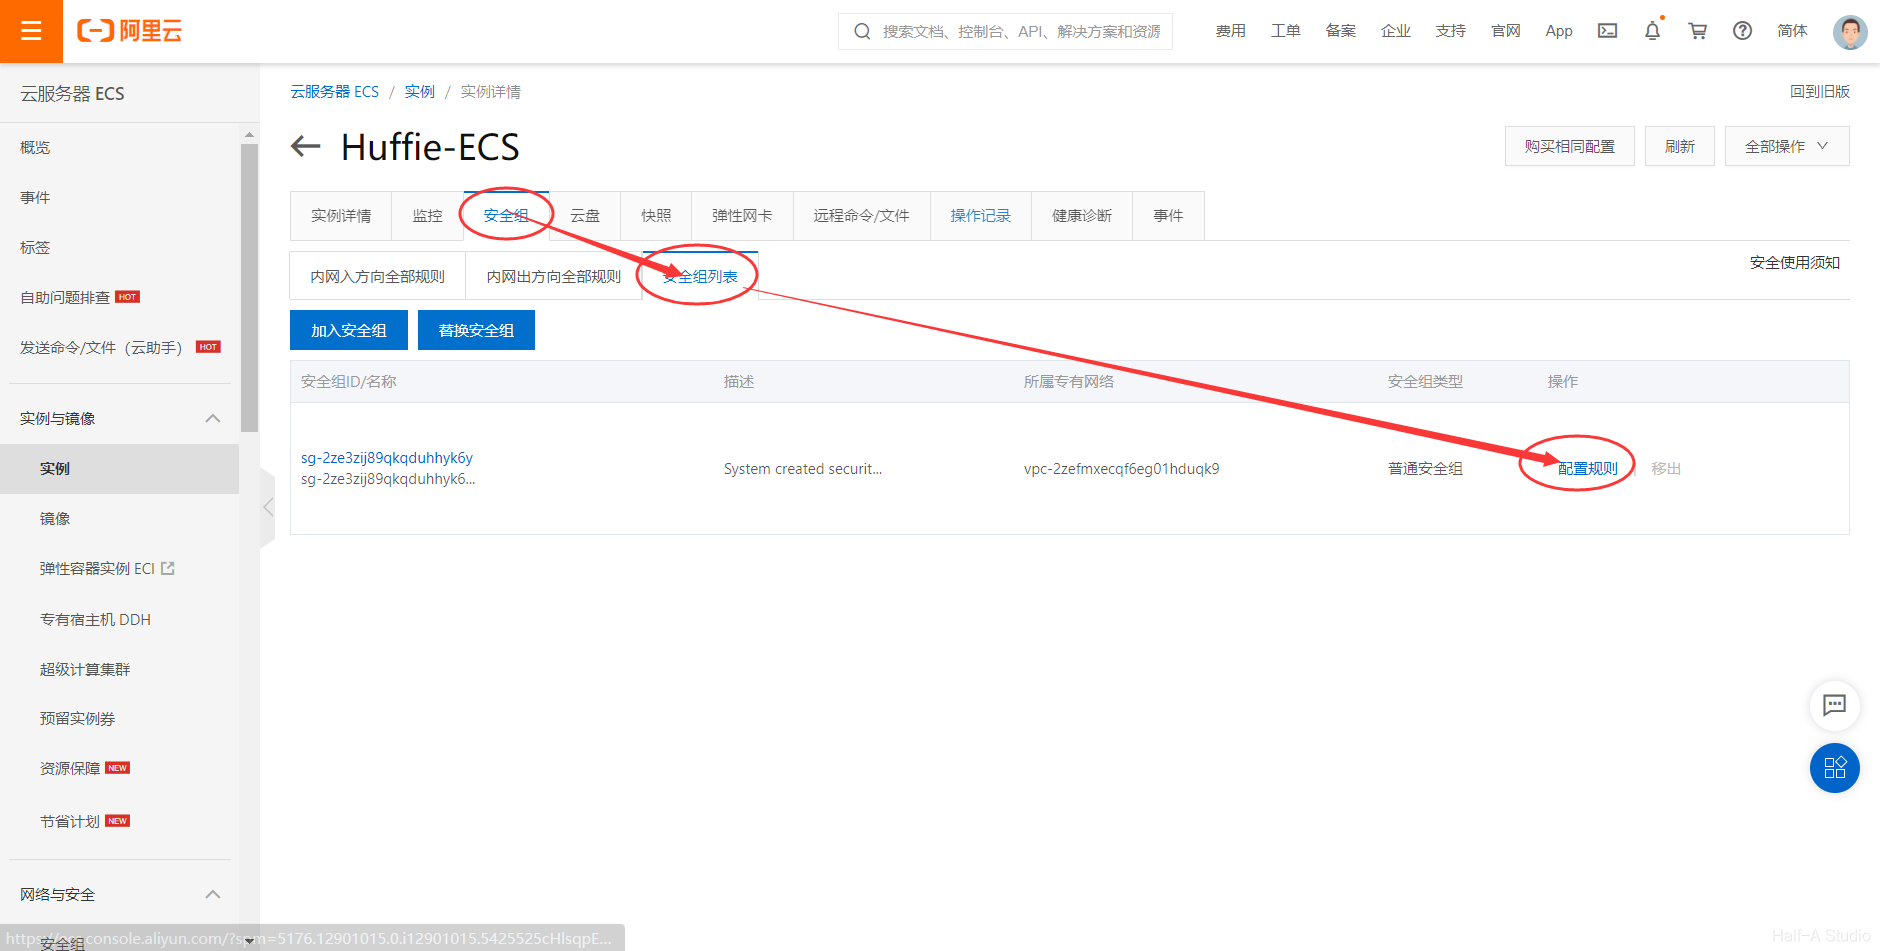
Go to the Console, click the instance name, open Security Groups > Security Group List, and click Configure Rules.
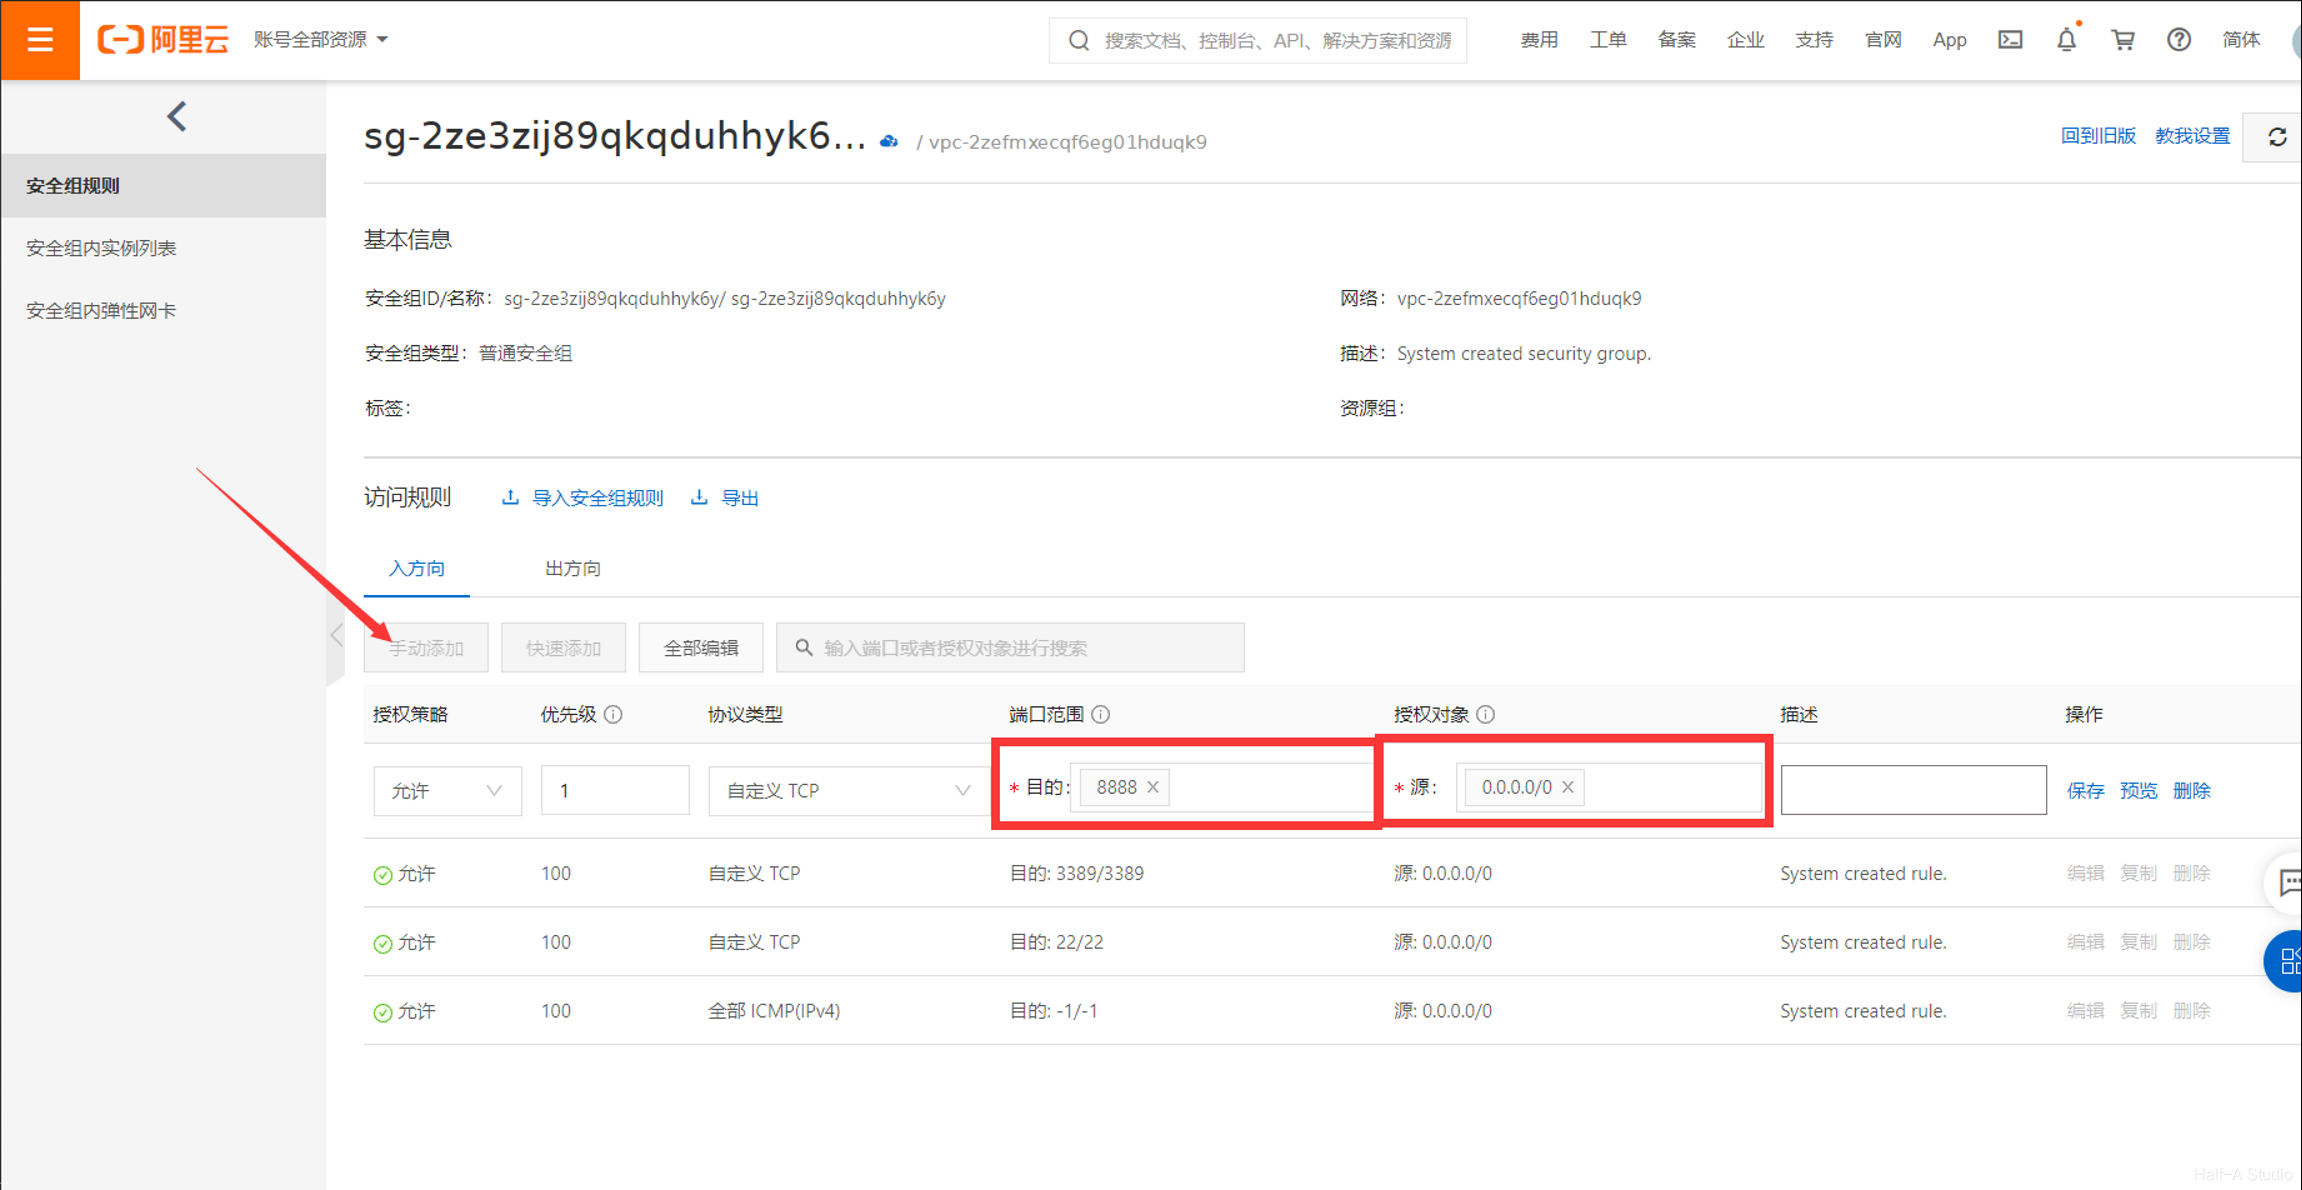
 As shown below, allow access to port 8888 from all IP addresses, then click Save.
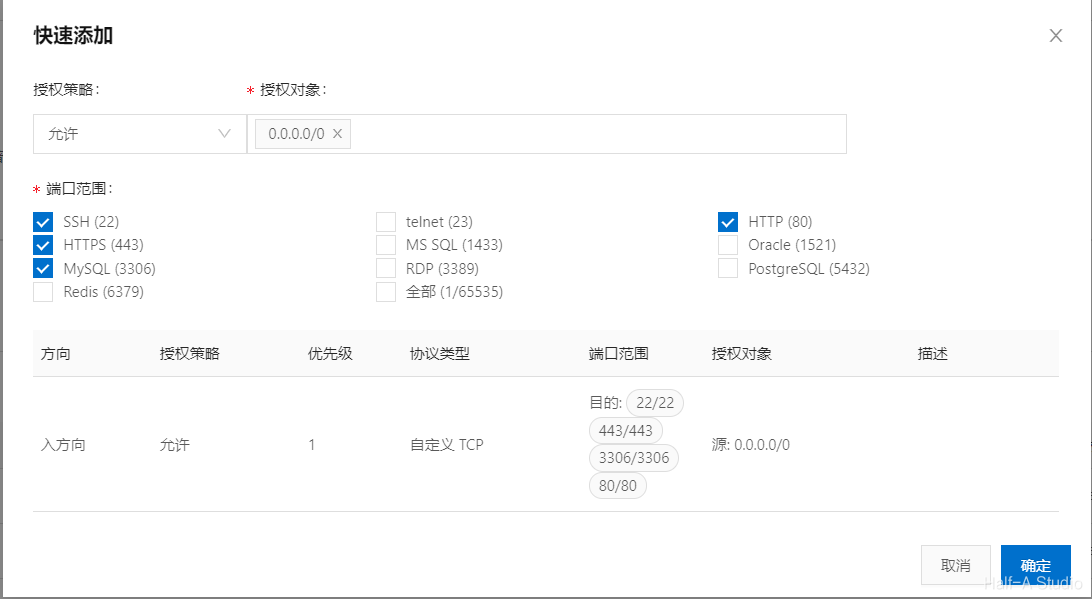
 Also open the other ports here. Click Quick Add, select SSH, HTTP, HTTPS, and MySQL, and add them to make the website accessible later.
- Install the panel
- CentOS installation command:
yum install -y wget && wget -O install.sh http://download.bt.cn/install/install_6.0.sh && sh install.sh- Ubuntu installation command:
wget -O install.sh http://download.bt.cn/install/install-ubuntu_6.0.sh && sudo bash install.shAfter installation succeeds, the BT Panel login page address, username, and password will be displayed. Open the address in a browser and log in to the BT Panel admin panel.
- Configure BT Panel
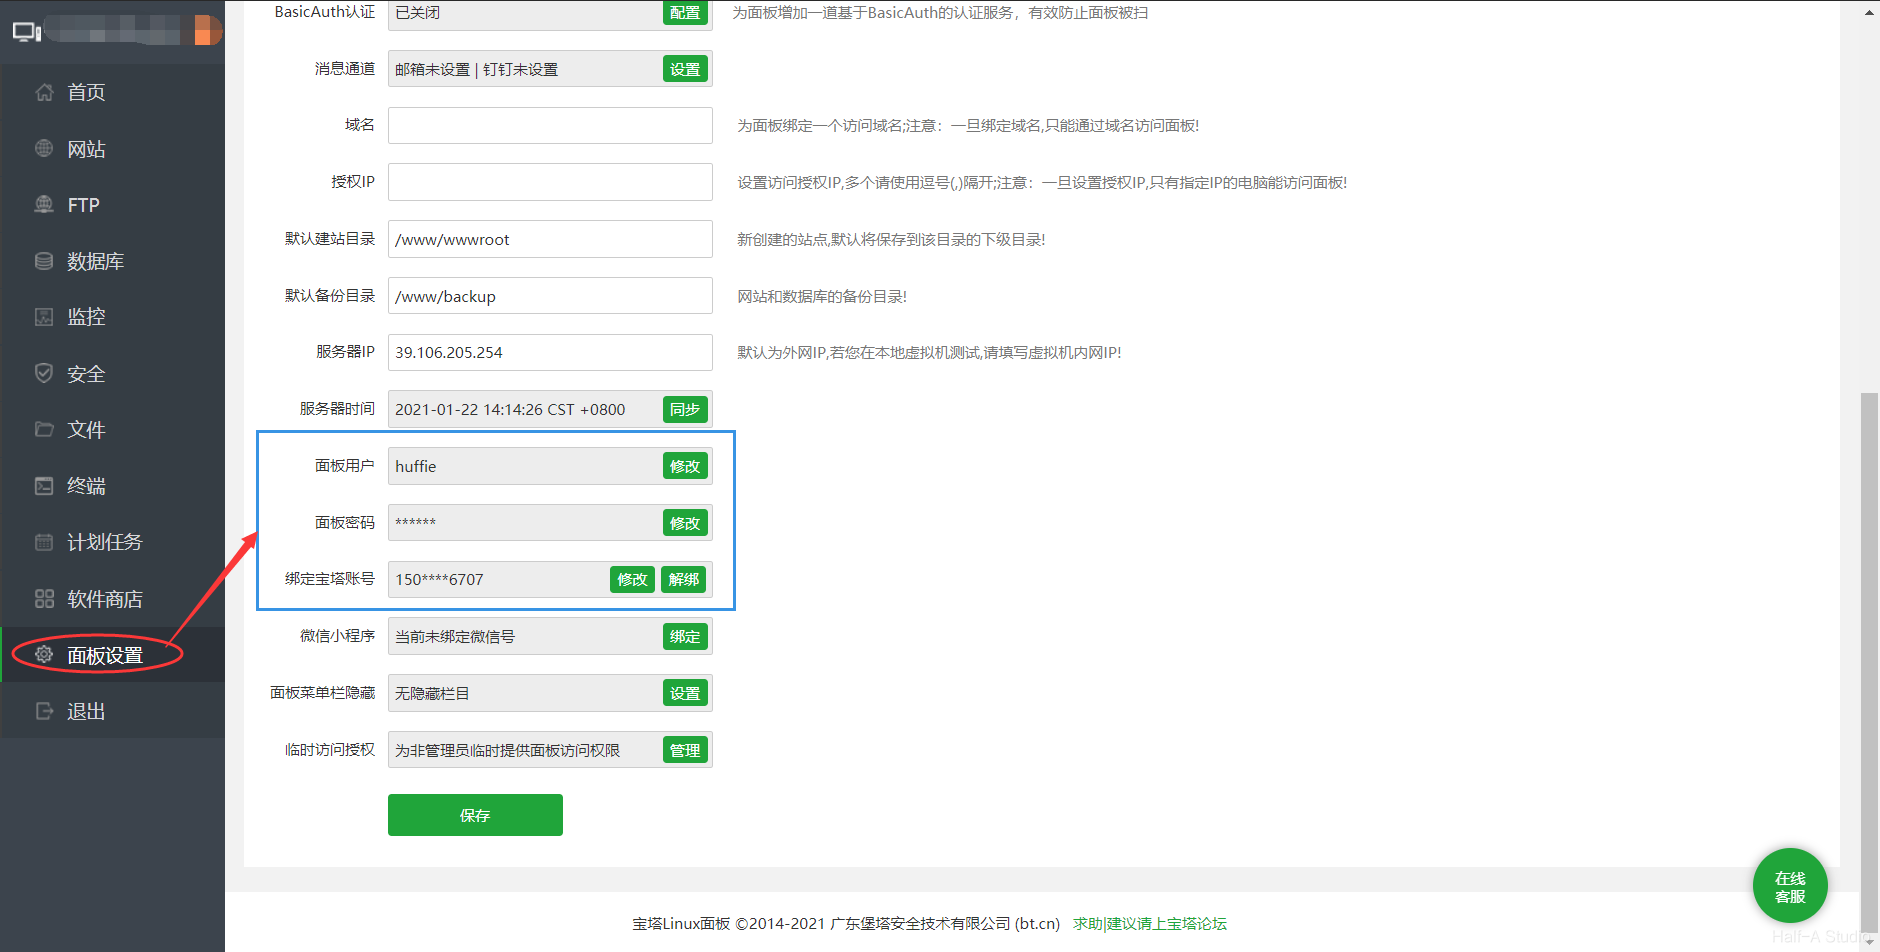
For security, first change the BT Panel username and panel password after entering the panel. (This panel username and password are not your account for the official website; they are the credentials needed to access BT Panel on each cloud server.)
- Install the LNMP environment
The LNMP web environment is the combination of Linux + Nginx + MySQL + PHP. It is used to quickly set up various open-source website applications such as WordPress and Typecho.
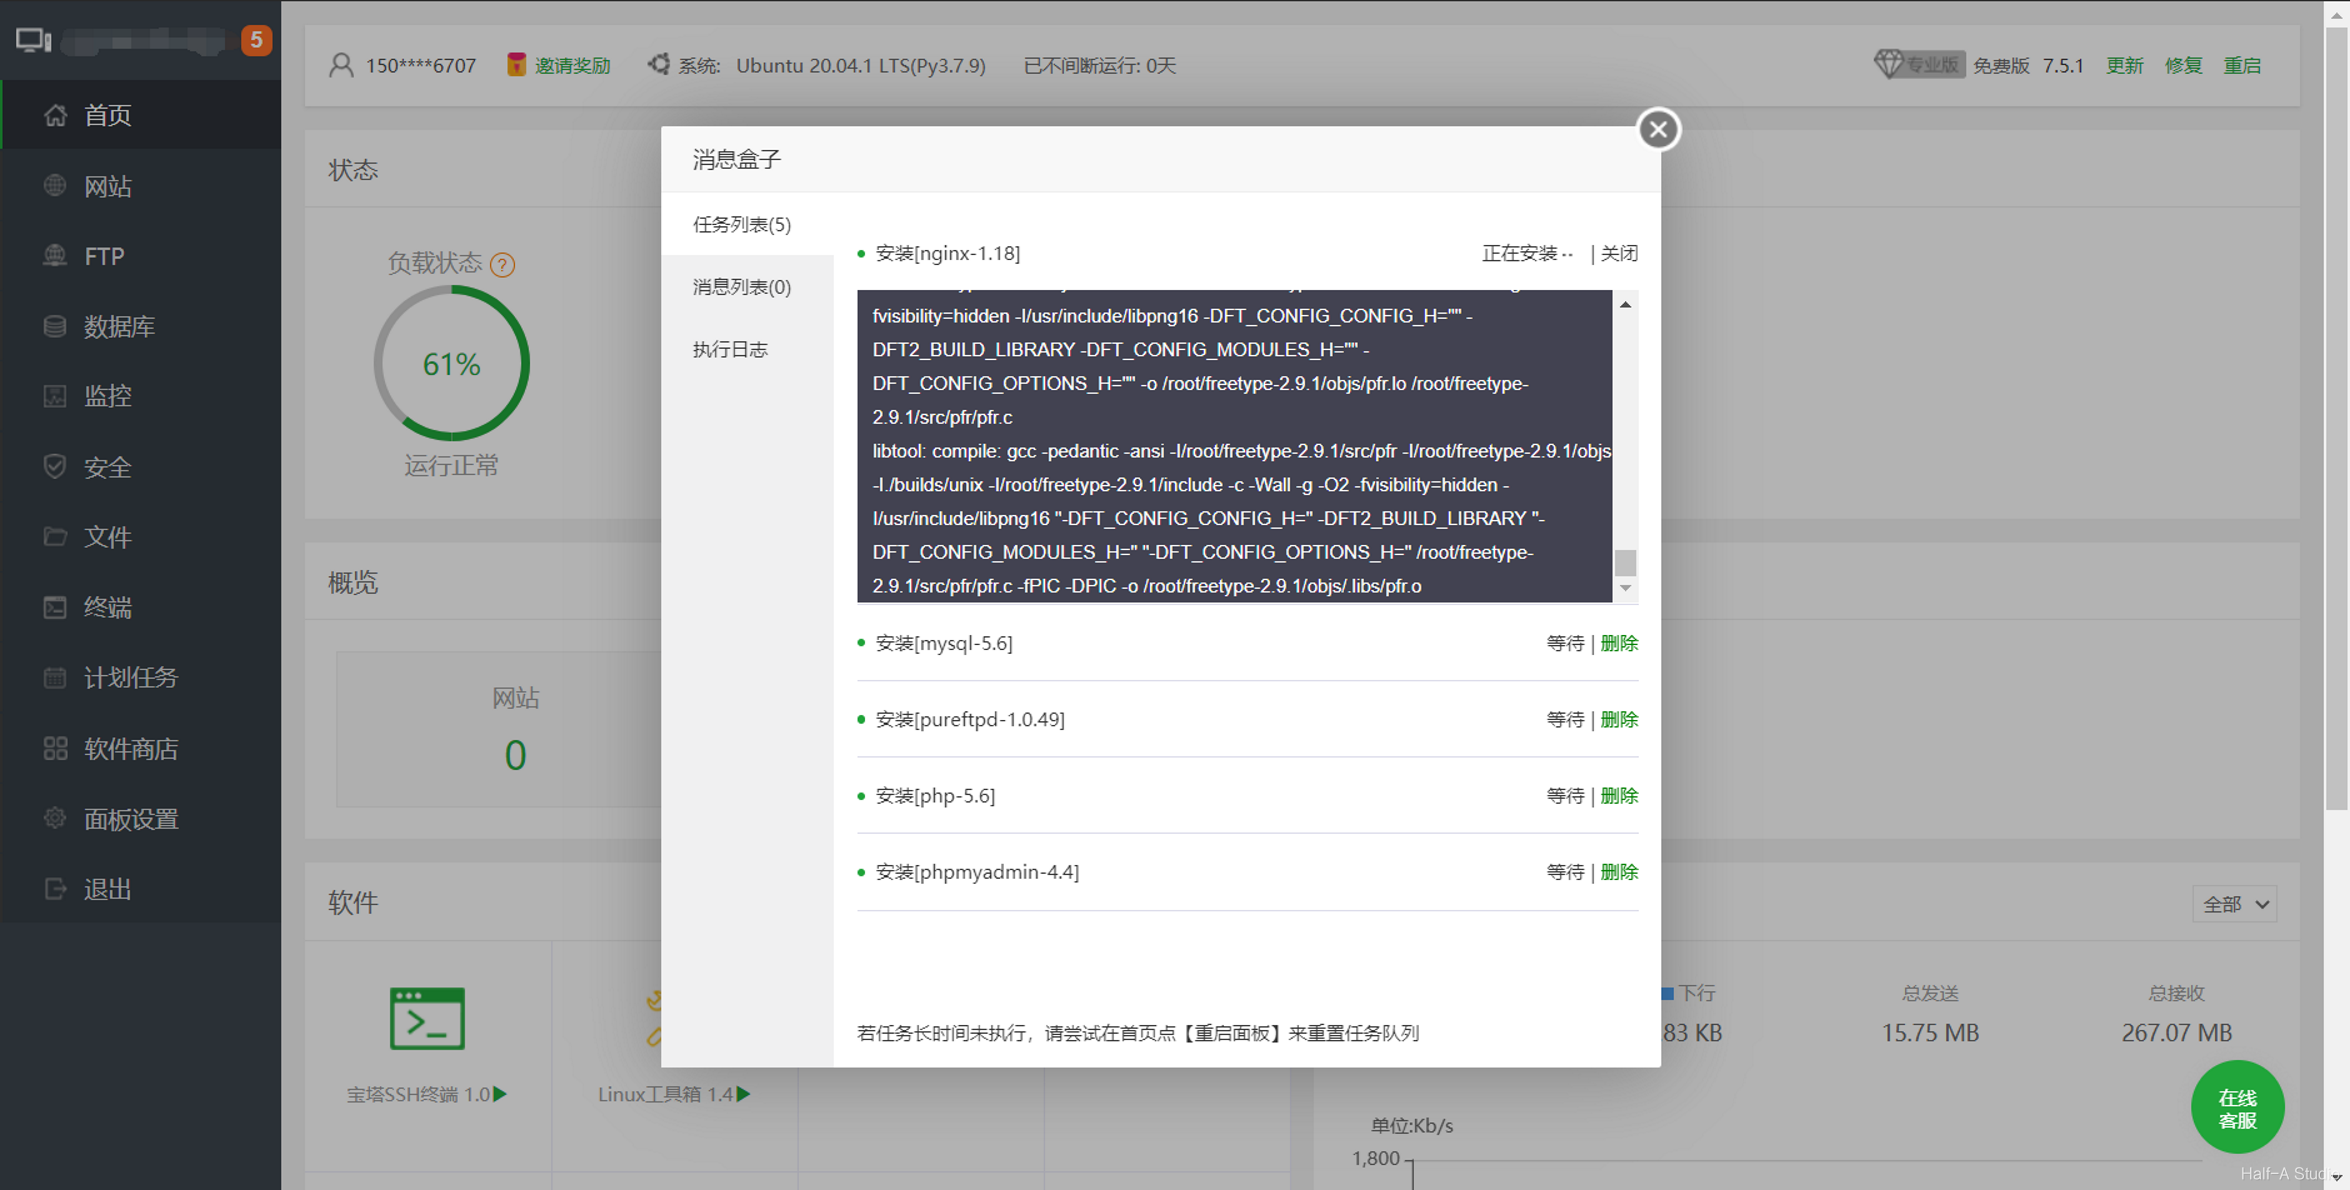
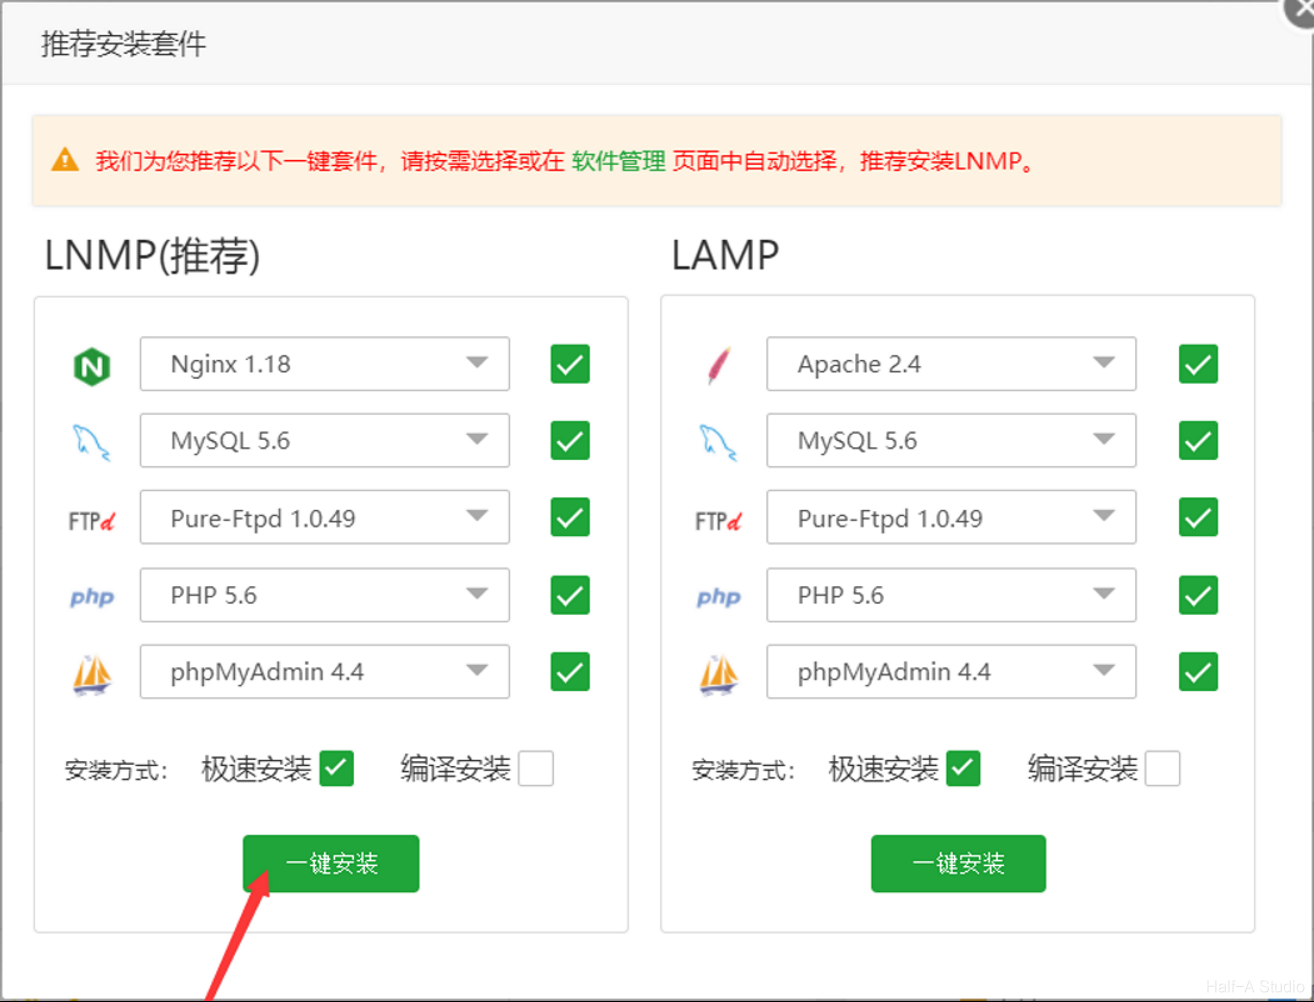 Installation takes 10~20 minutes and is completed automatically. Just wait for a while.
- Complete real-name verification for the BT account
Go to the BT website and click Member Center in the upper-right corner, or use this link to open it directly: https://www.bt.cn/admin/userinfo.
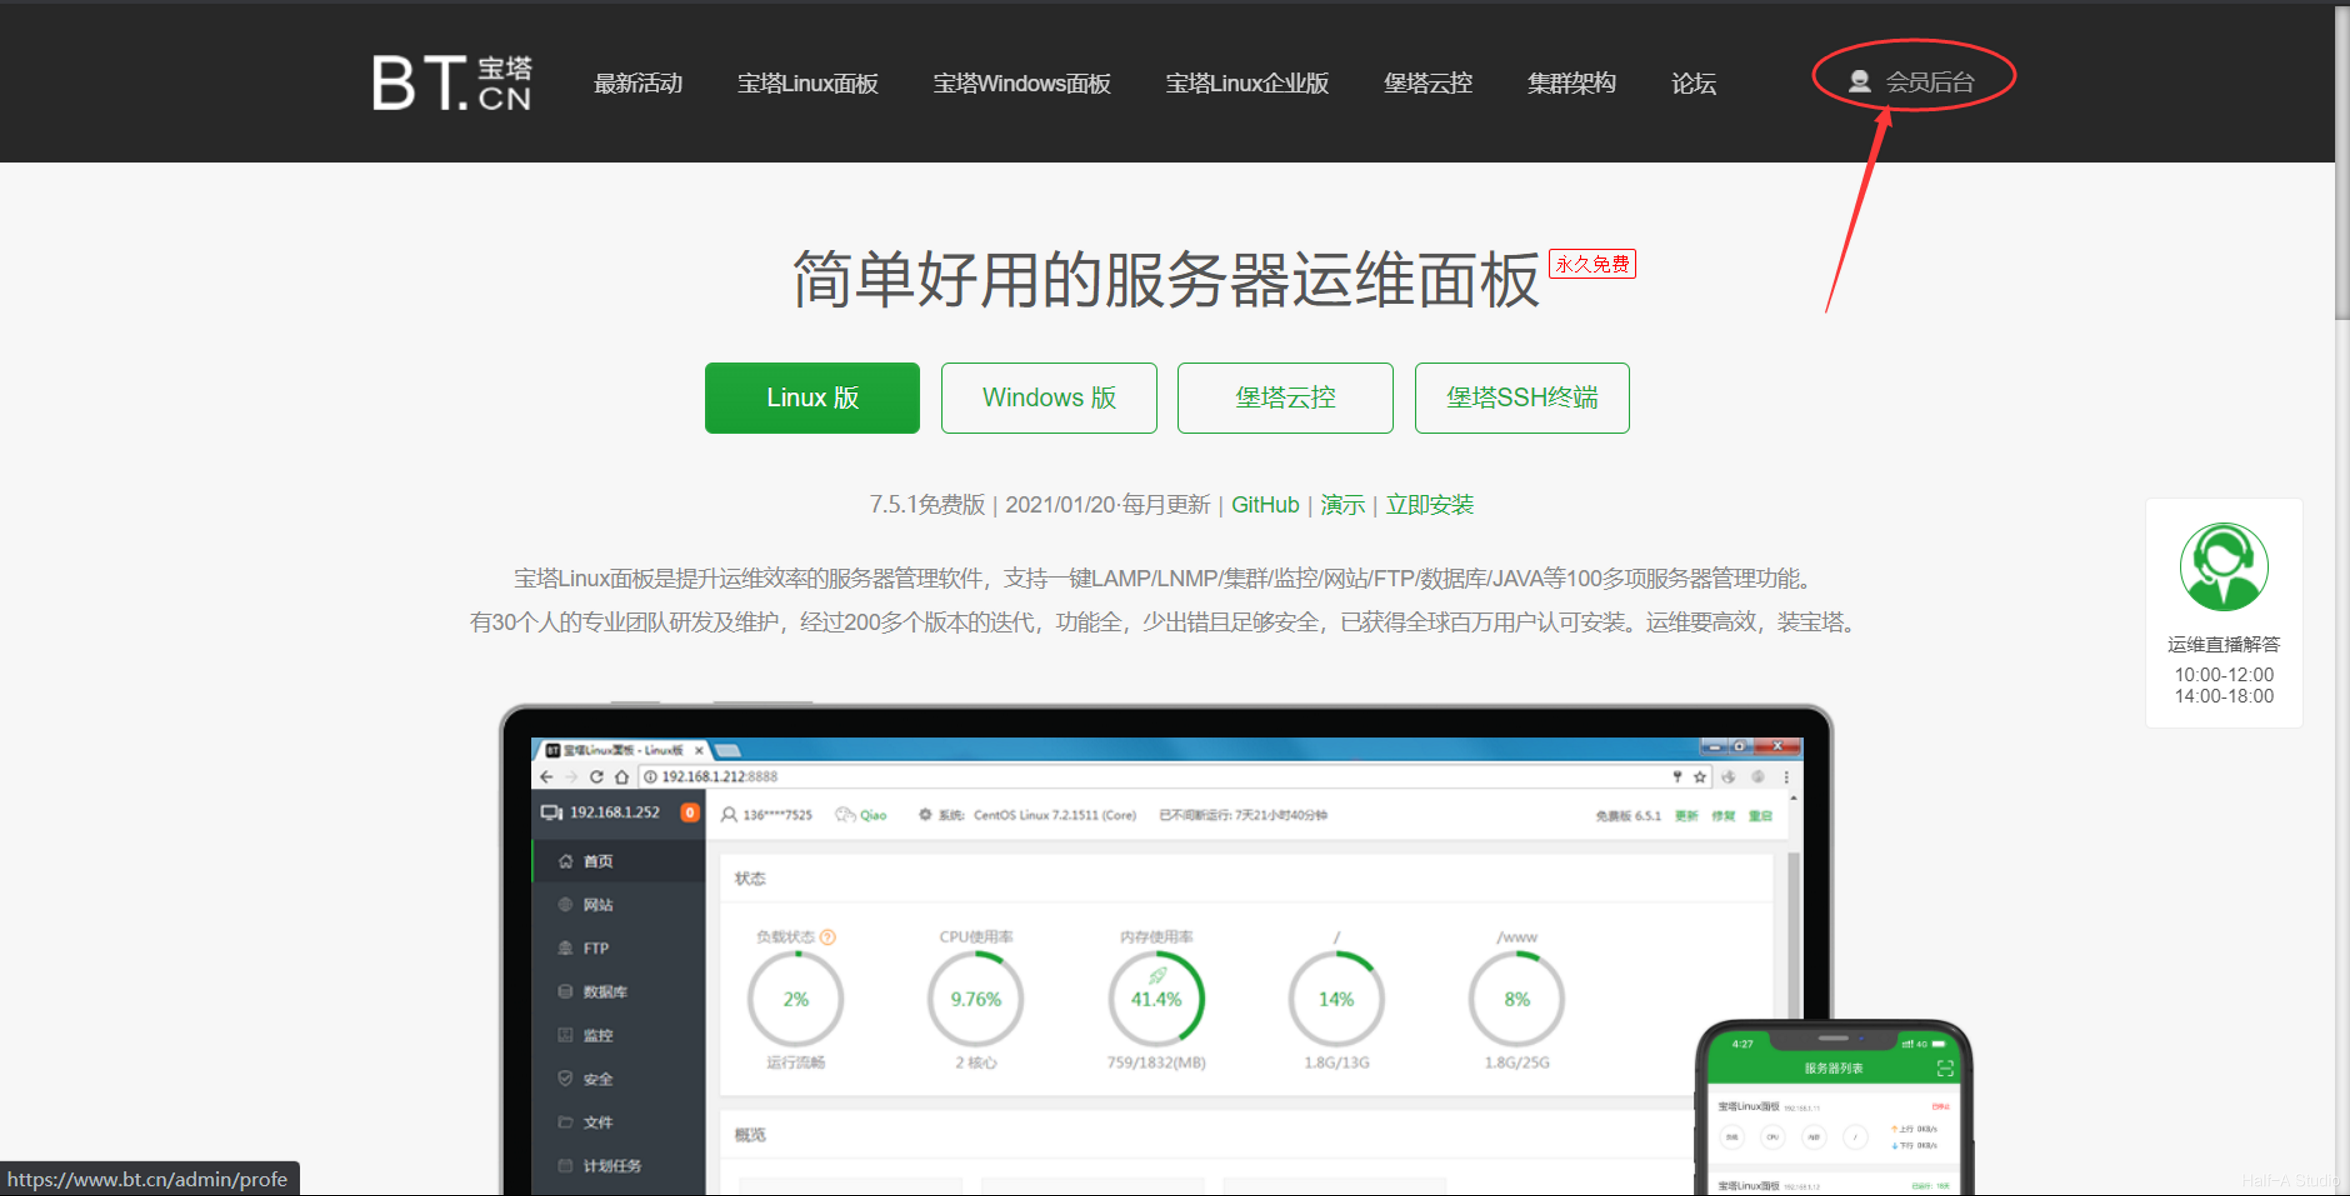 Select Account Management on the left and complete real-name verification.
 6.Add a site
Click Websites > Add Site on the left.
6.Add a site
Click Websites > Add Site on the left.
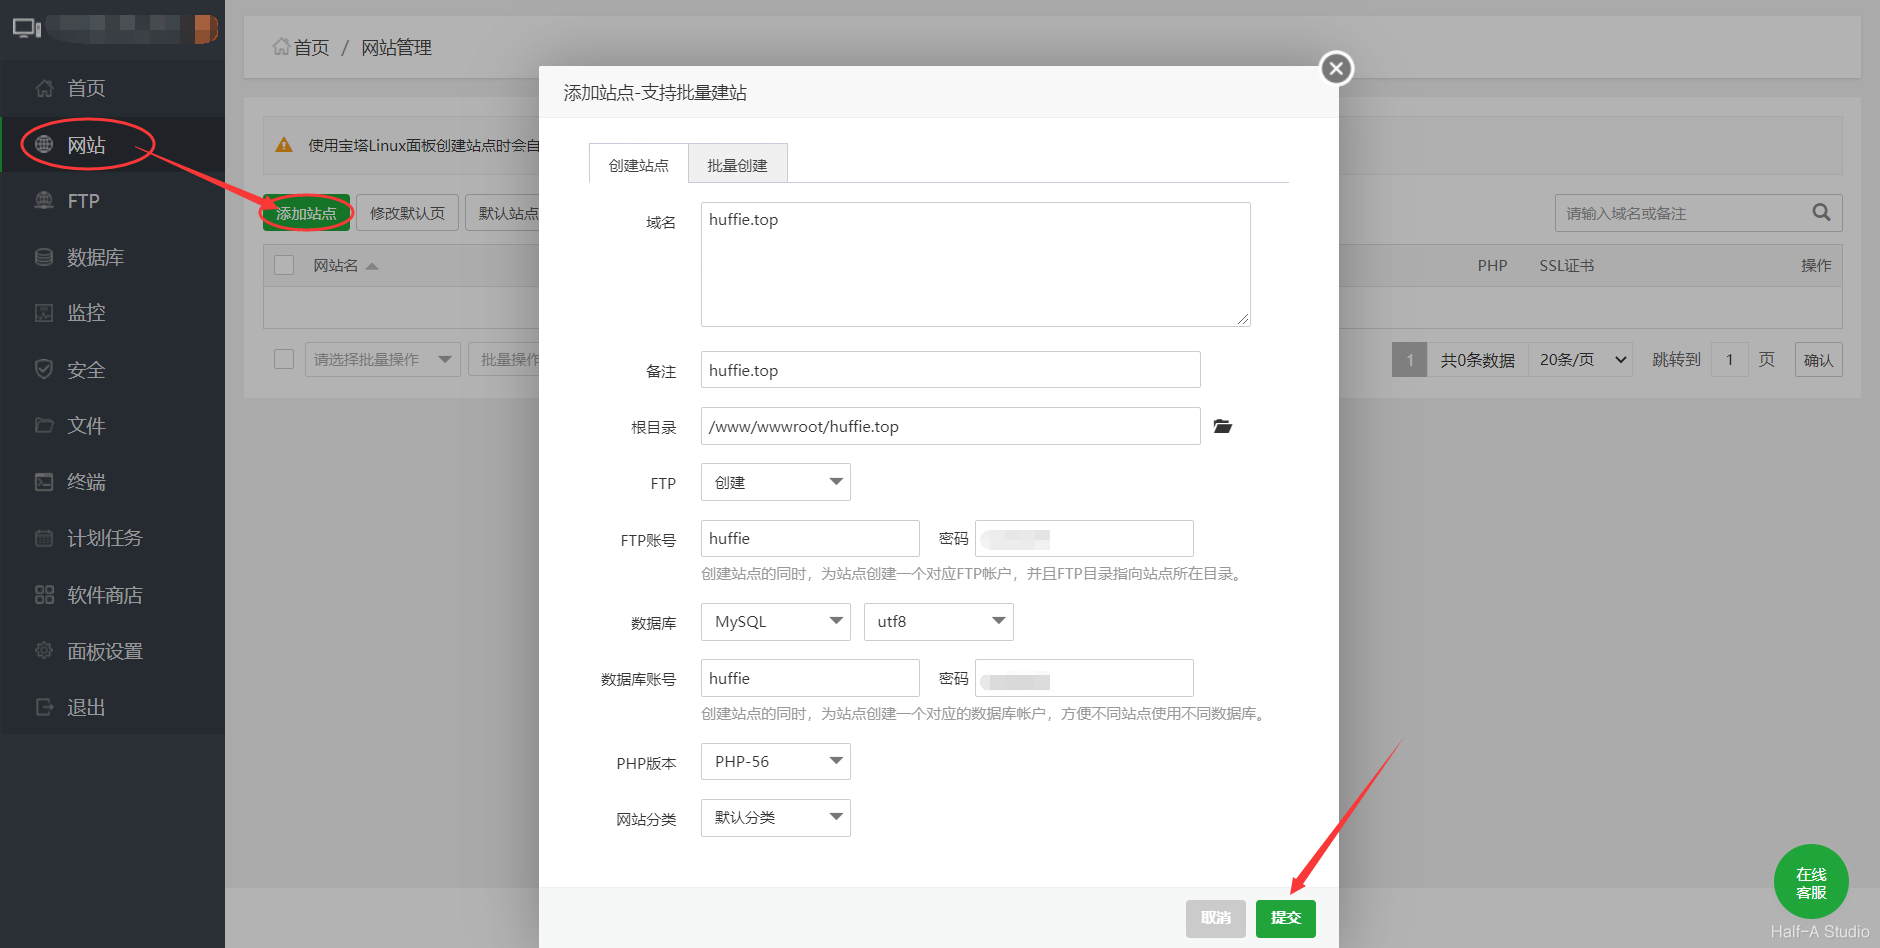
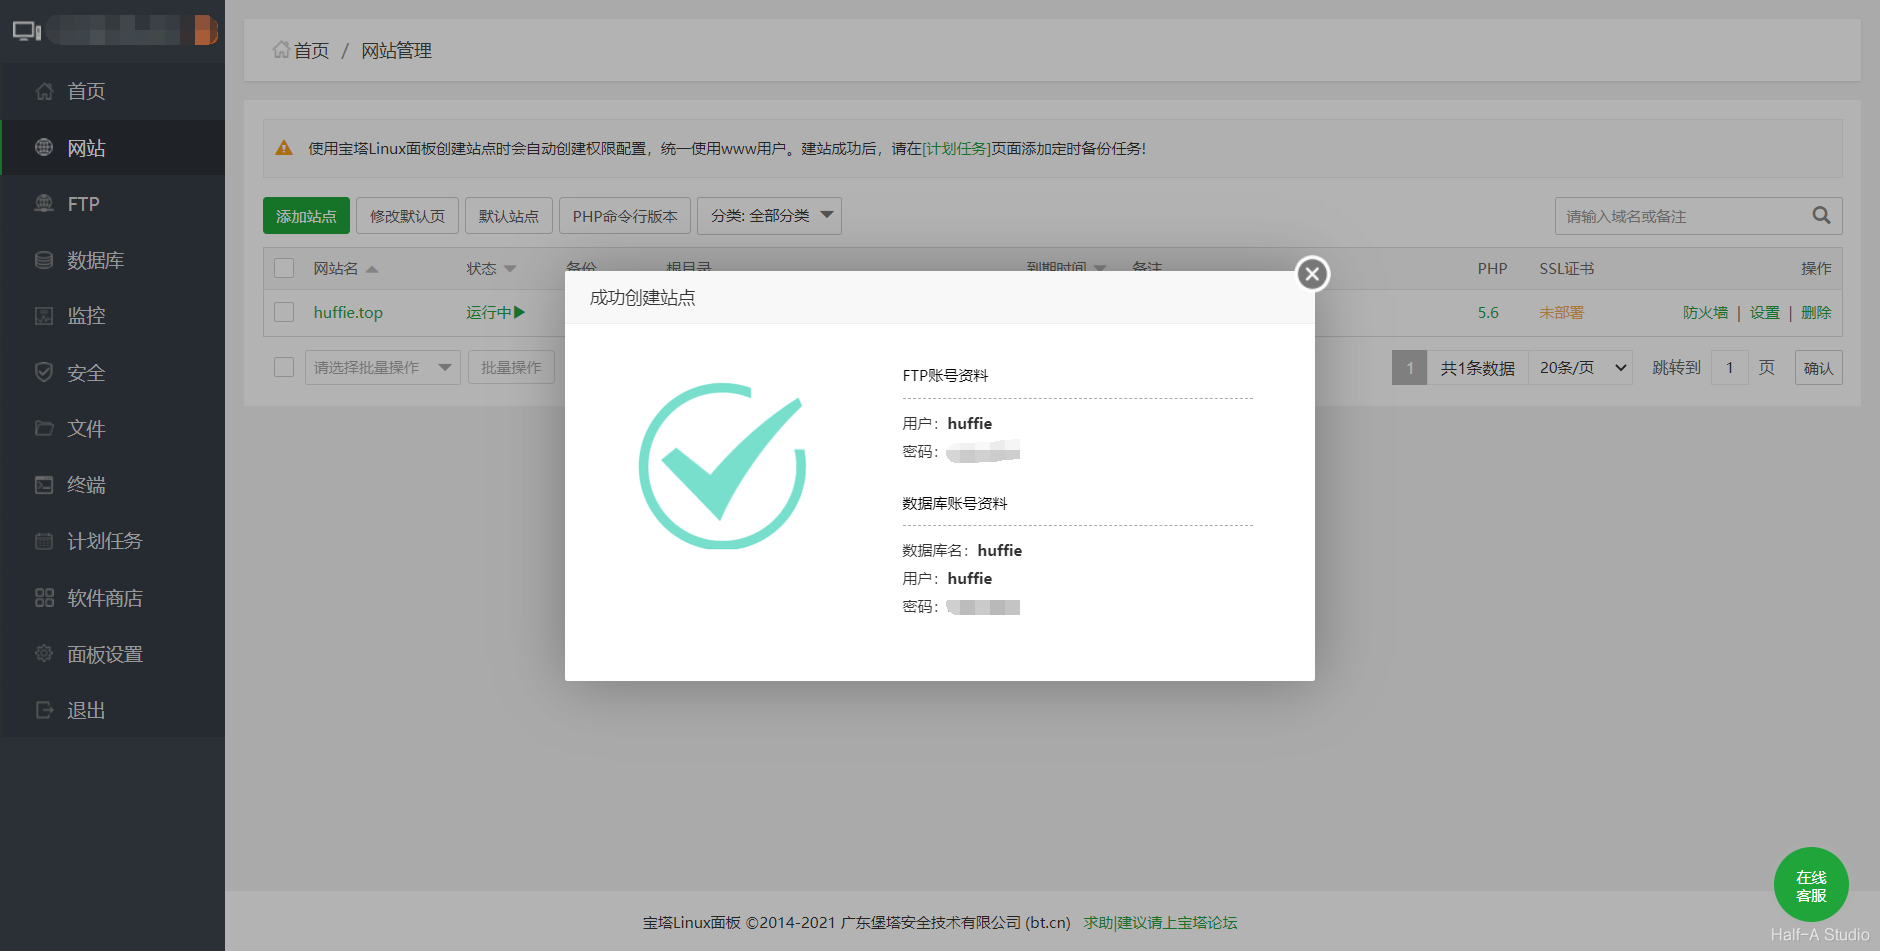 After the website is added successfully, you can enter its root directory. The remaining website setup will be performed in this root directory.
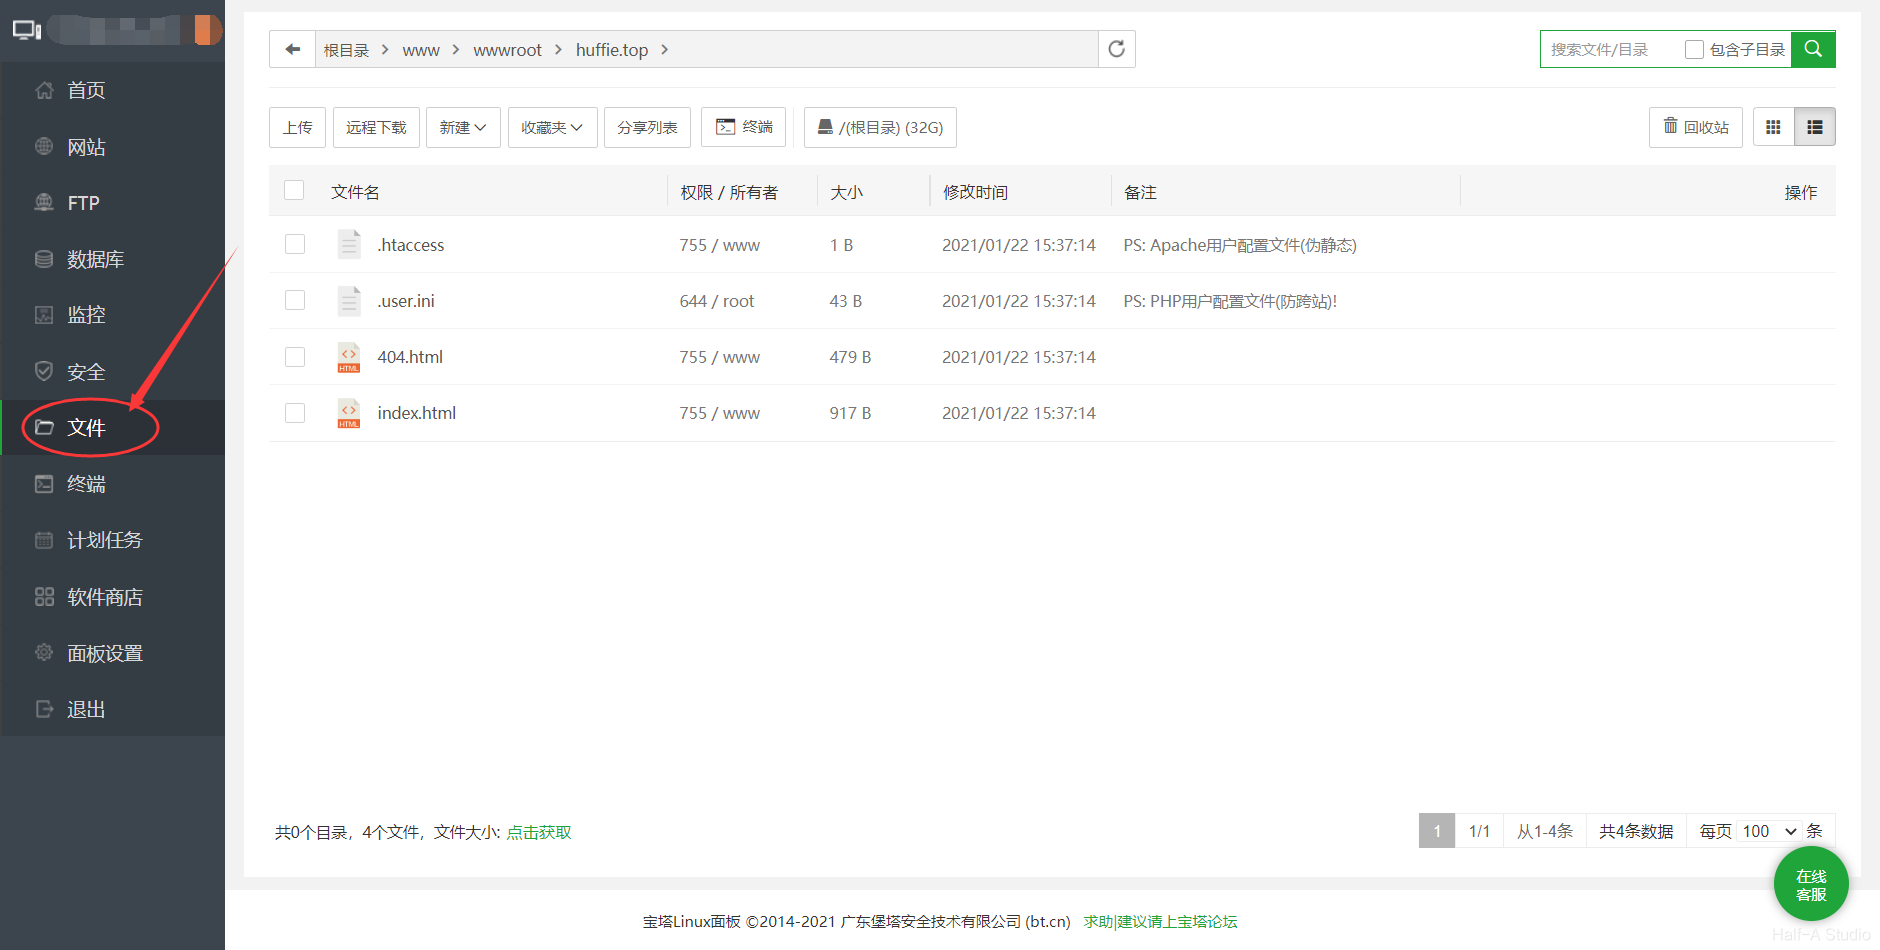
III. Installing WordPress
3.1 Uploading the WordPress Installation Package
- Go to the WordPress China website and download the ZIP installation package.
Download link: https://cn.wordpress.org/latest-zh_CN.zip
- Return to BT Panel, click Files, enter the domain name’s root directory, click Upload in the upper-left corner, and upload the WordPress installation package you just downloaded.
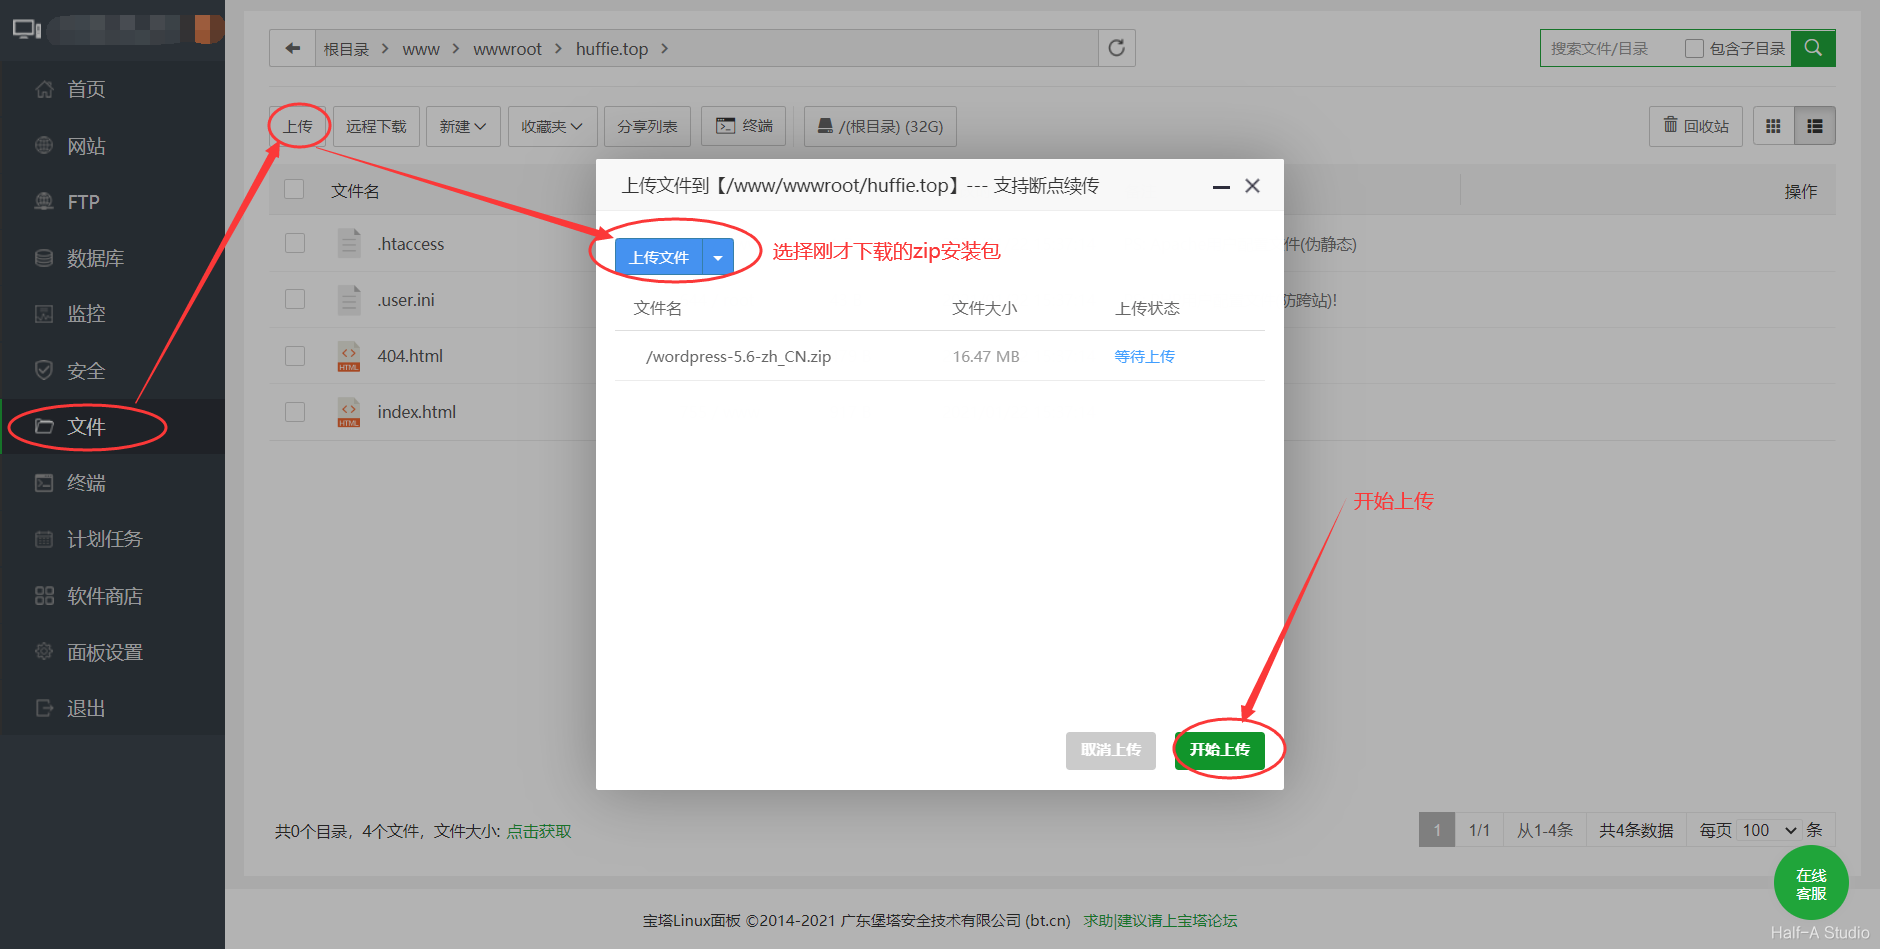
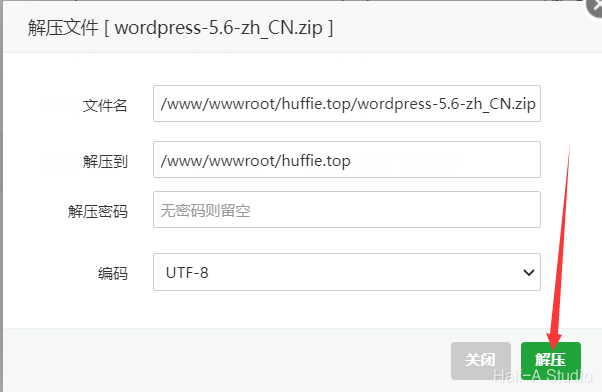
- After the upload succeeds, extract the ZIP installation package.
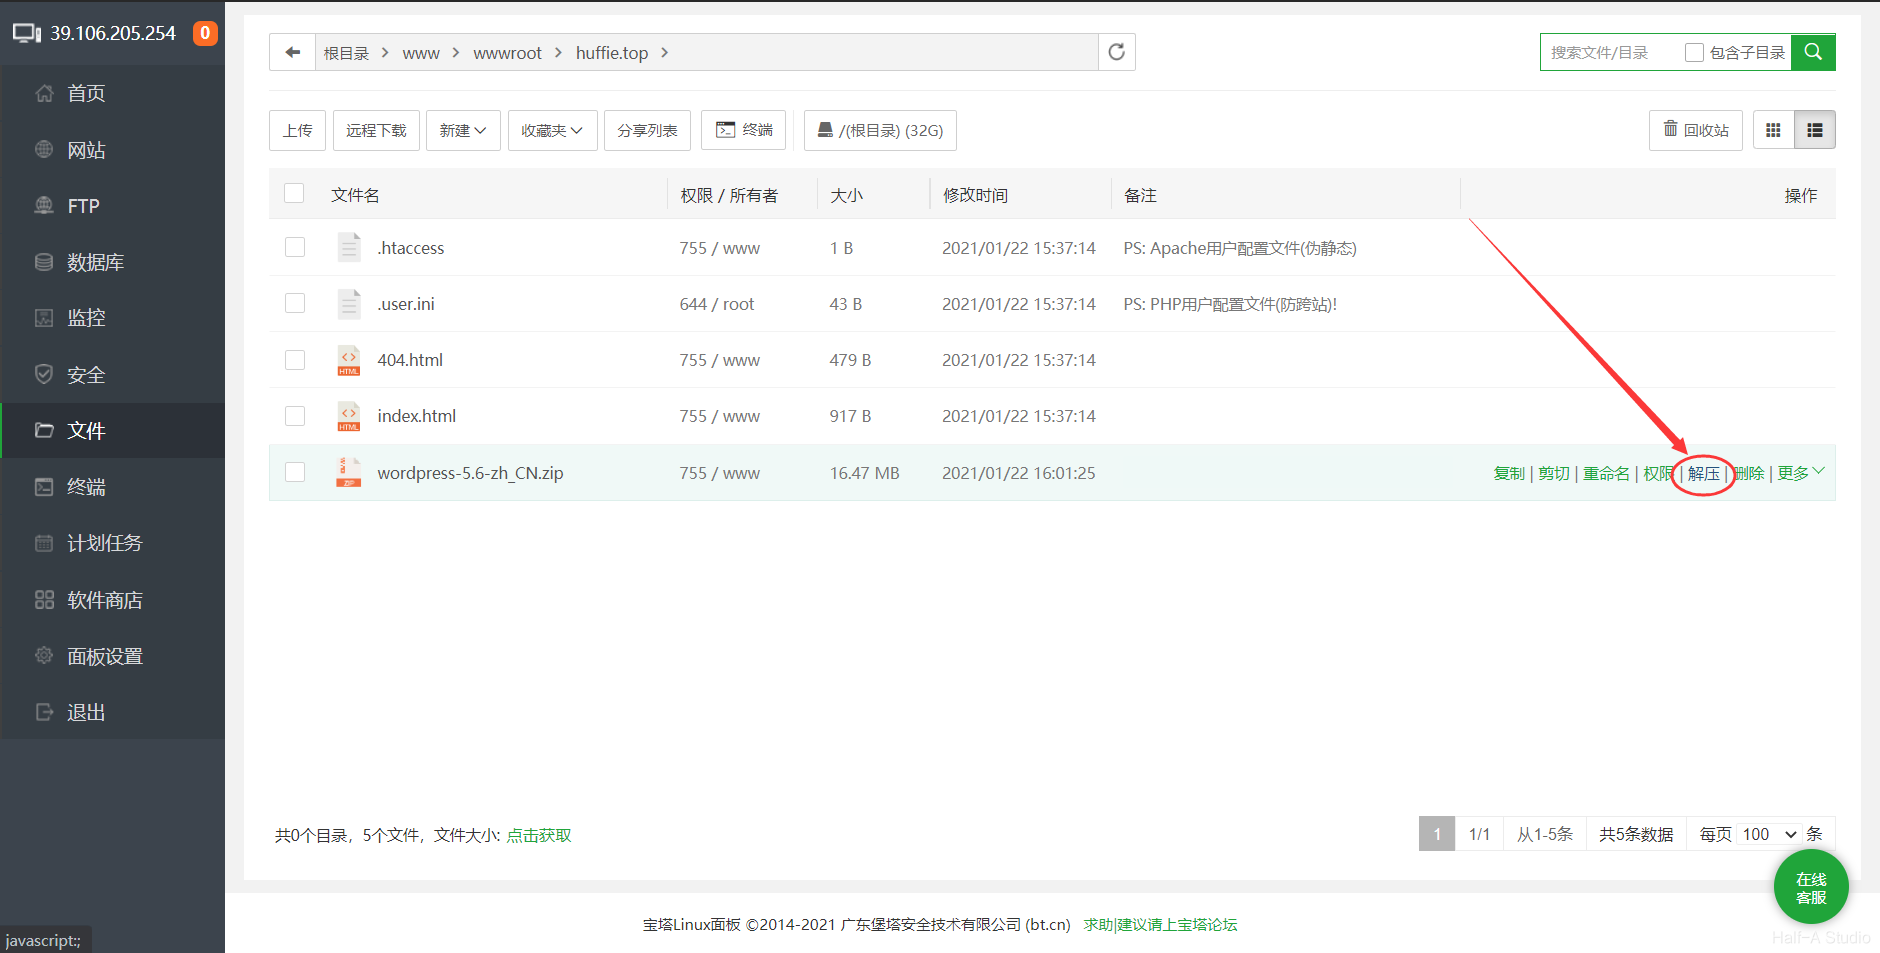
3.2 Modifying the Site Configuration File
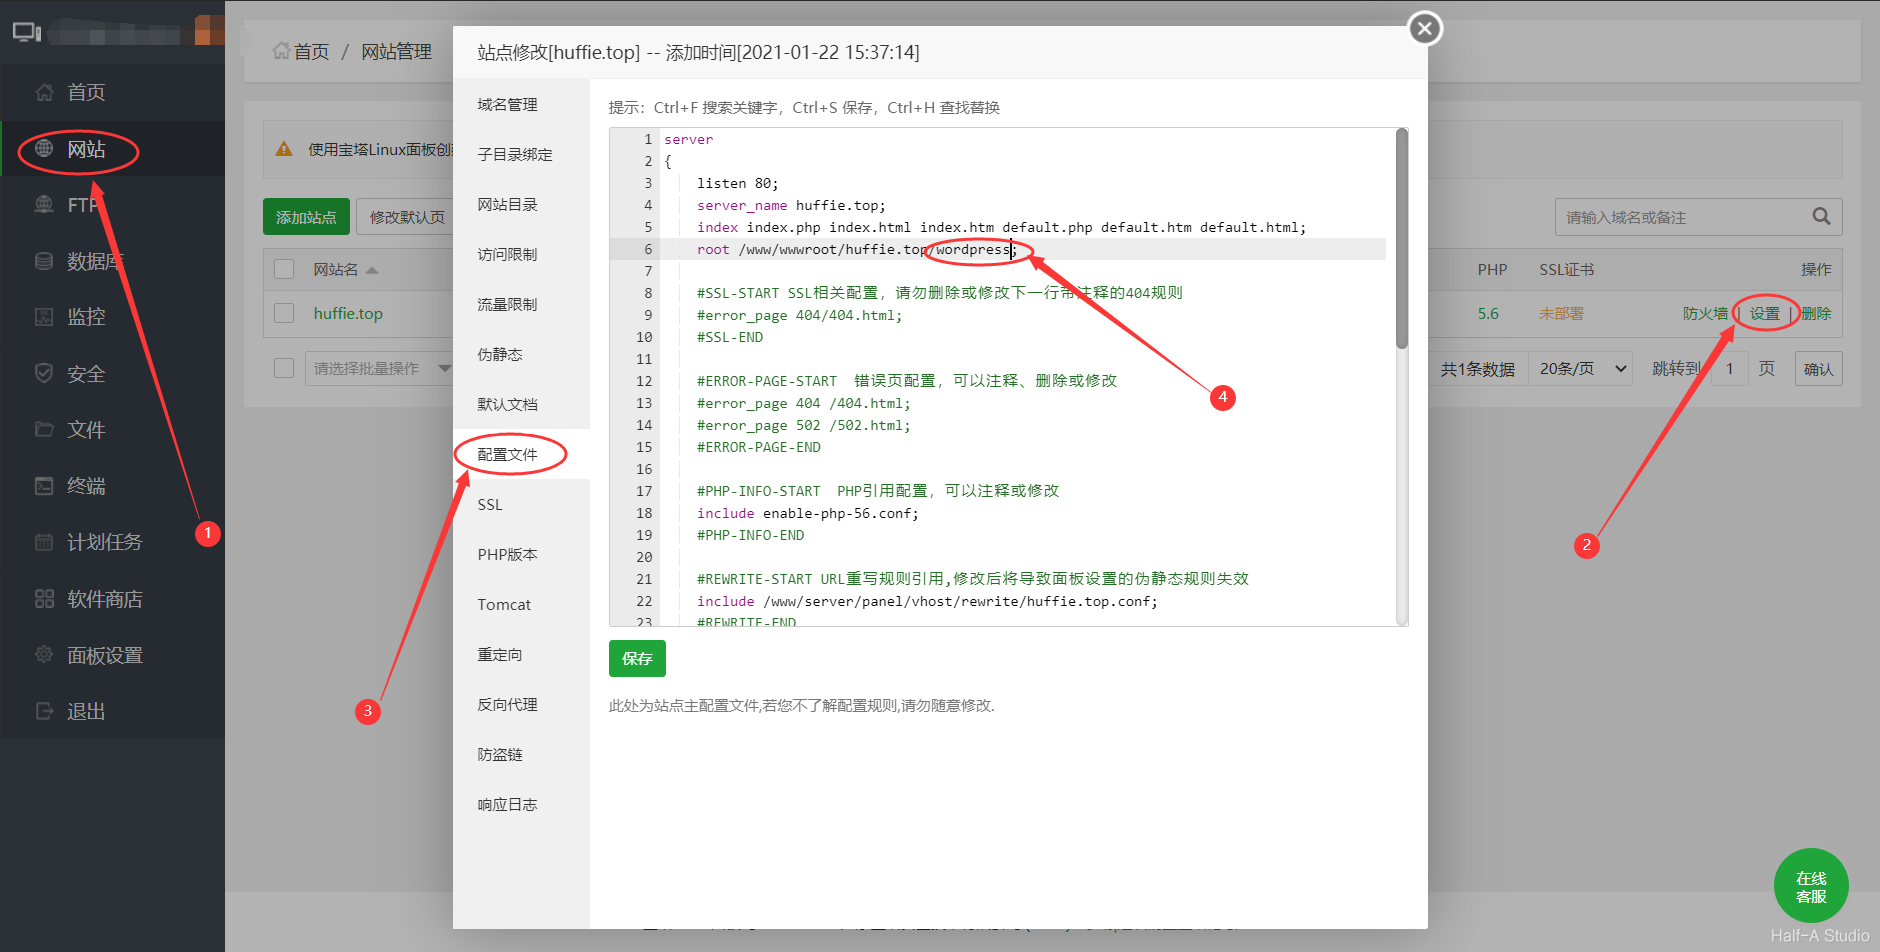
Because the installation package was extracted to /wordpress under the site directory, change the root entry in the configuration file to:
root /www/wwwroot/huffie.top/wordpress;After making the change, click Save.
3.3 Domain Name Resolution and Binding
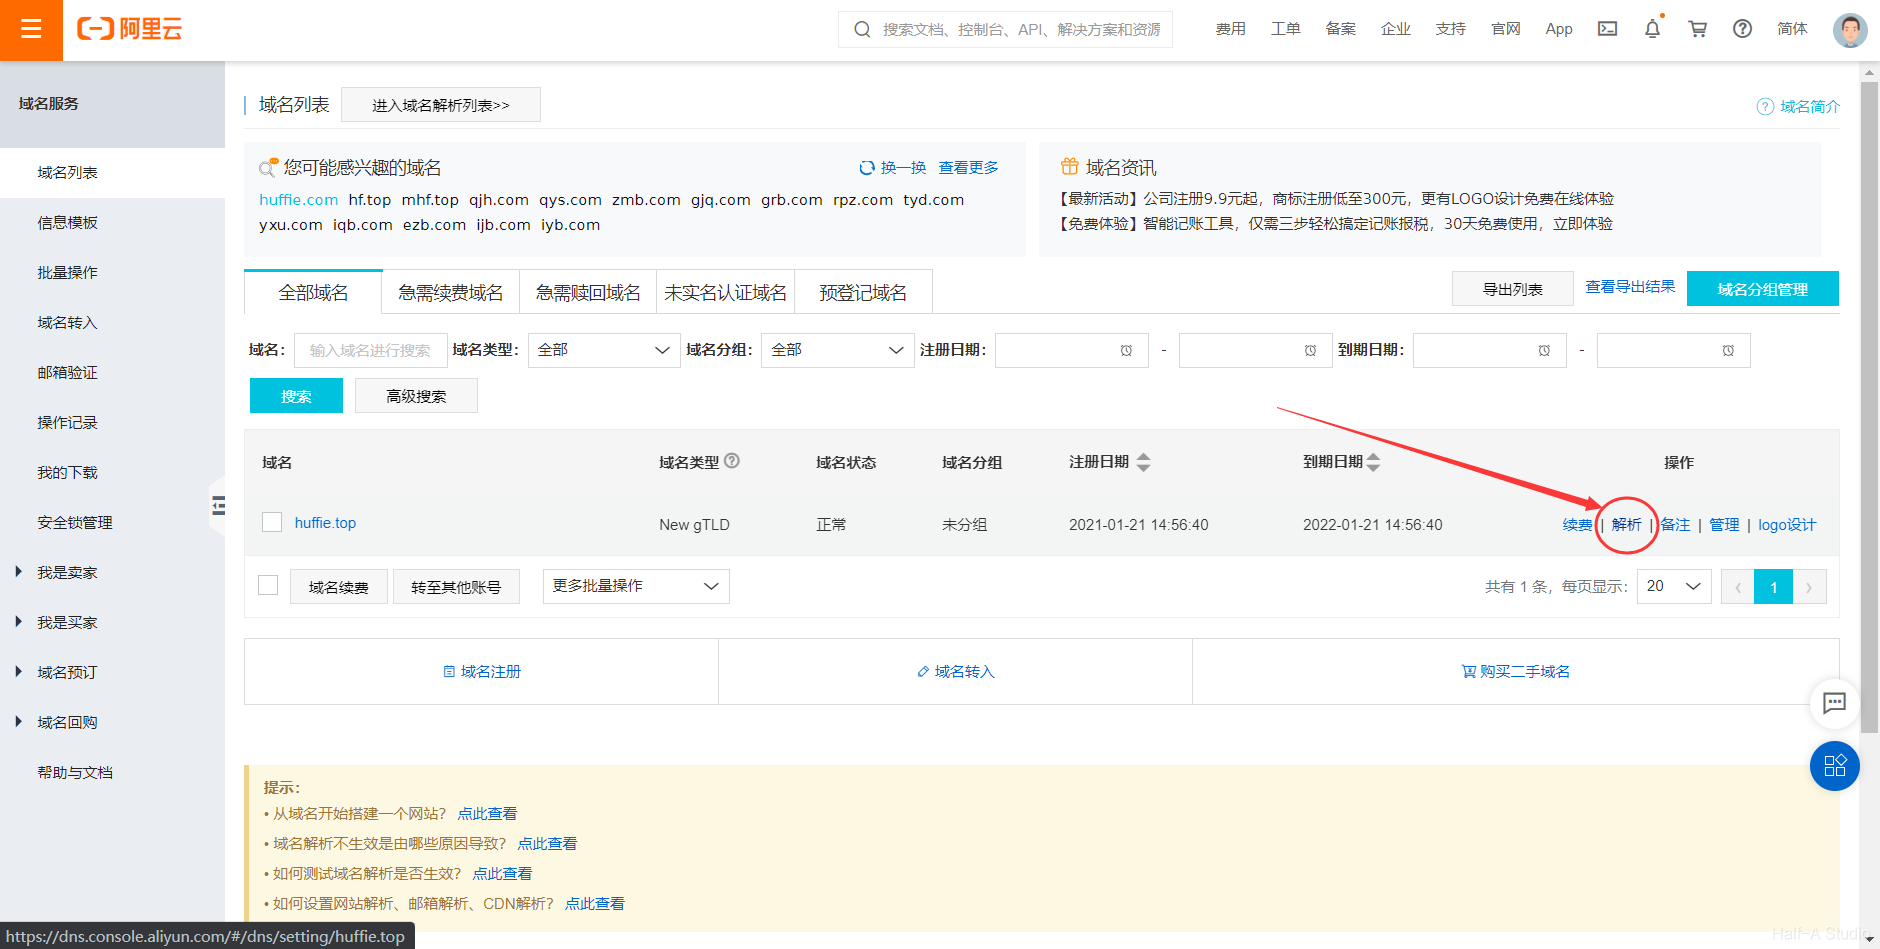
- Open the Alibaba Cloud domain name Console.
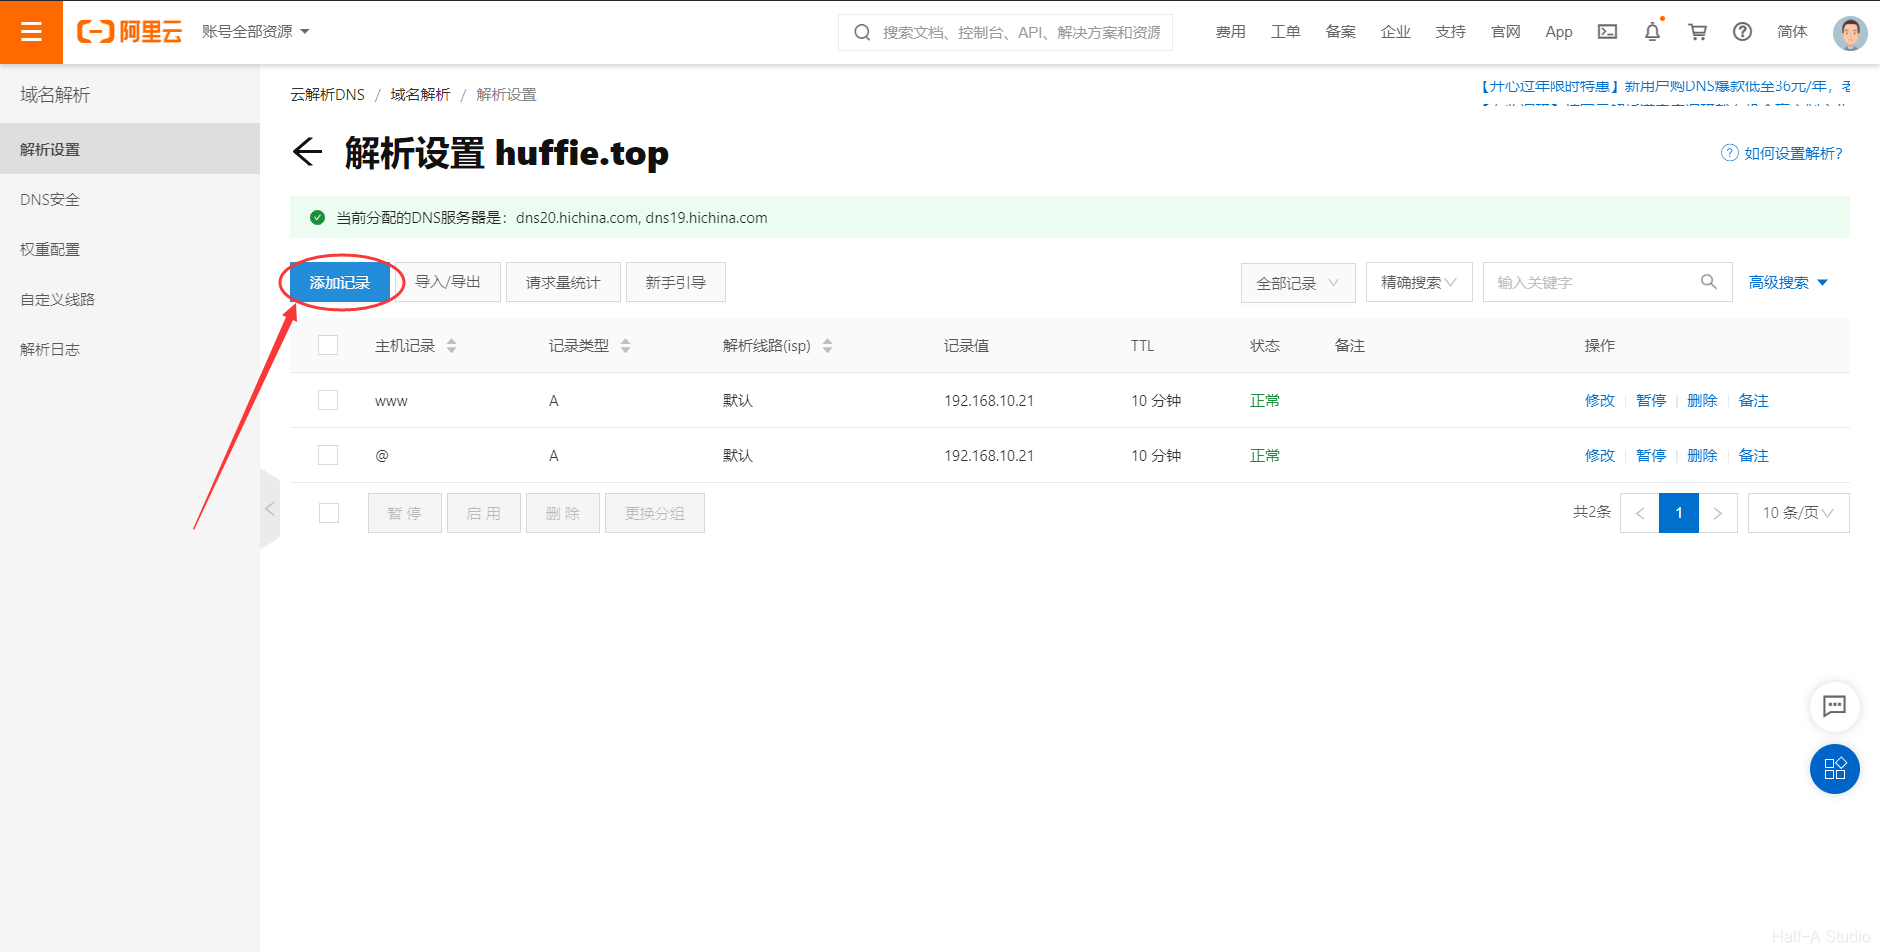
- Click Add Record.
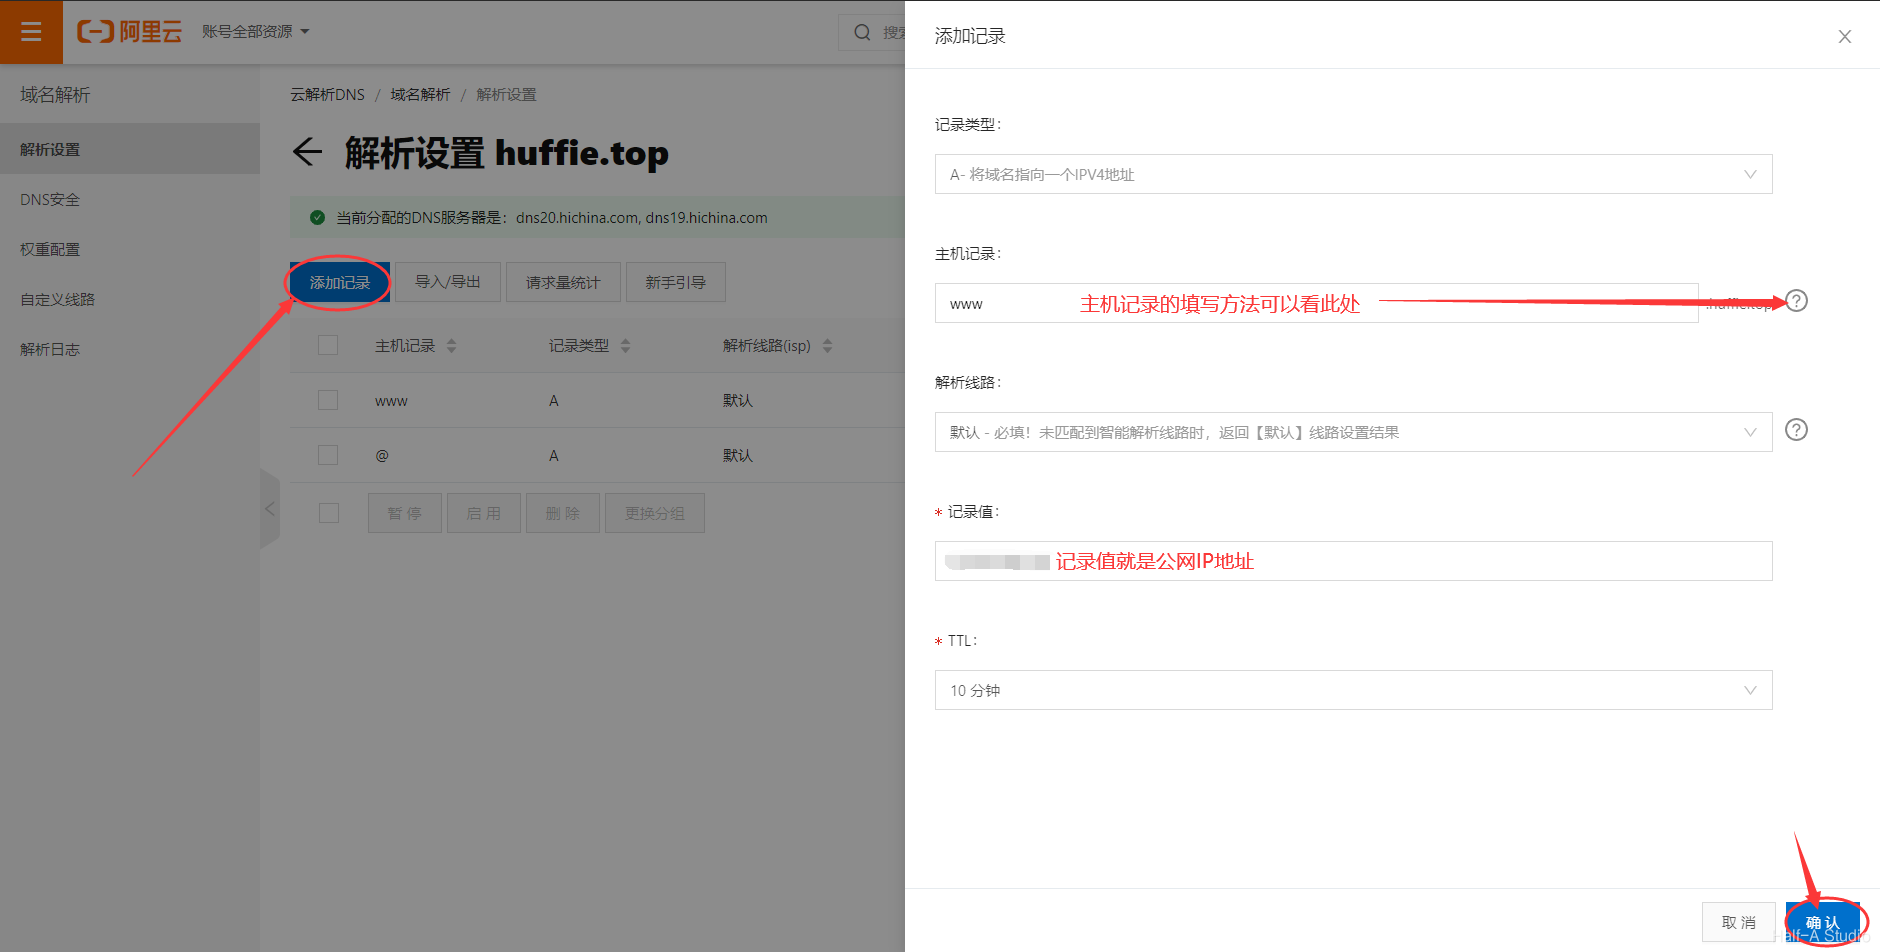 P.S. I encountered a small problem here: it kept displaying No site corresponding to your request was found on the web server! I tried many methods. In the end, I changed the PHP version, replacing 7.4 with 5.6, and it worked. I am not sure whether that was the reason. Later, after changing the version back to 7.4, I could still access the site.
3.4 Installing WordPress Online
Enter your domain name in the browser’s address bar to see the WordPress welcome page. The next step is to configure WordPress.
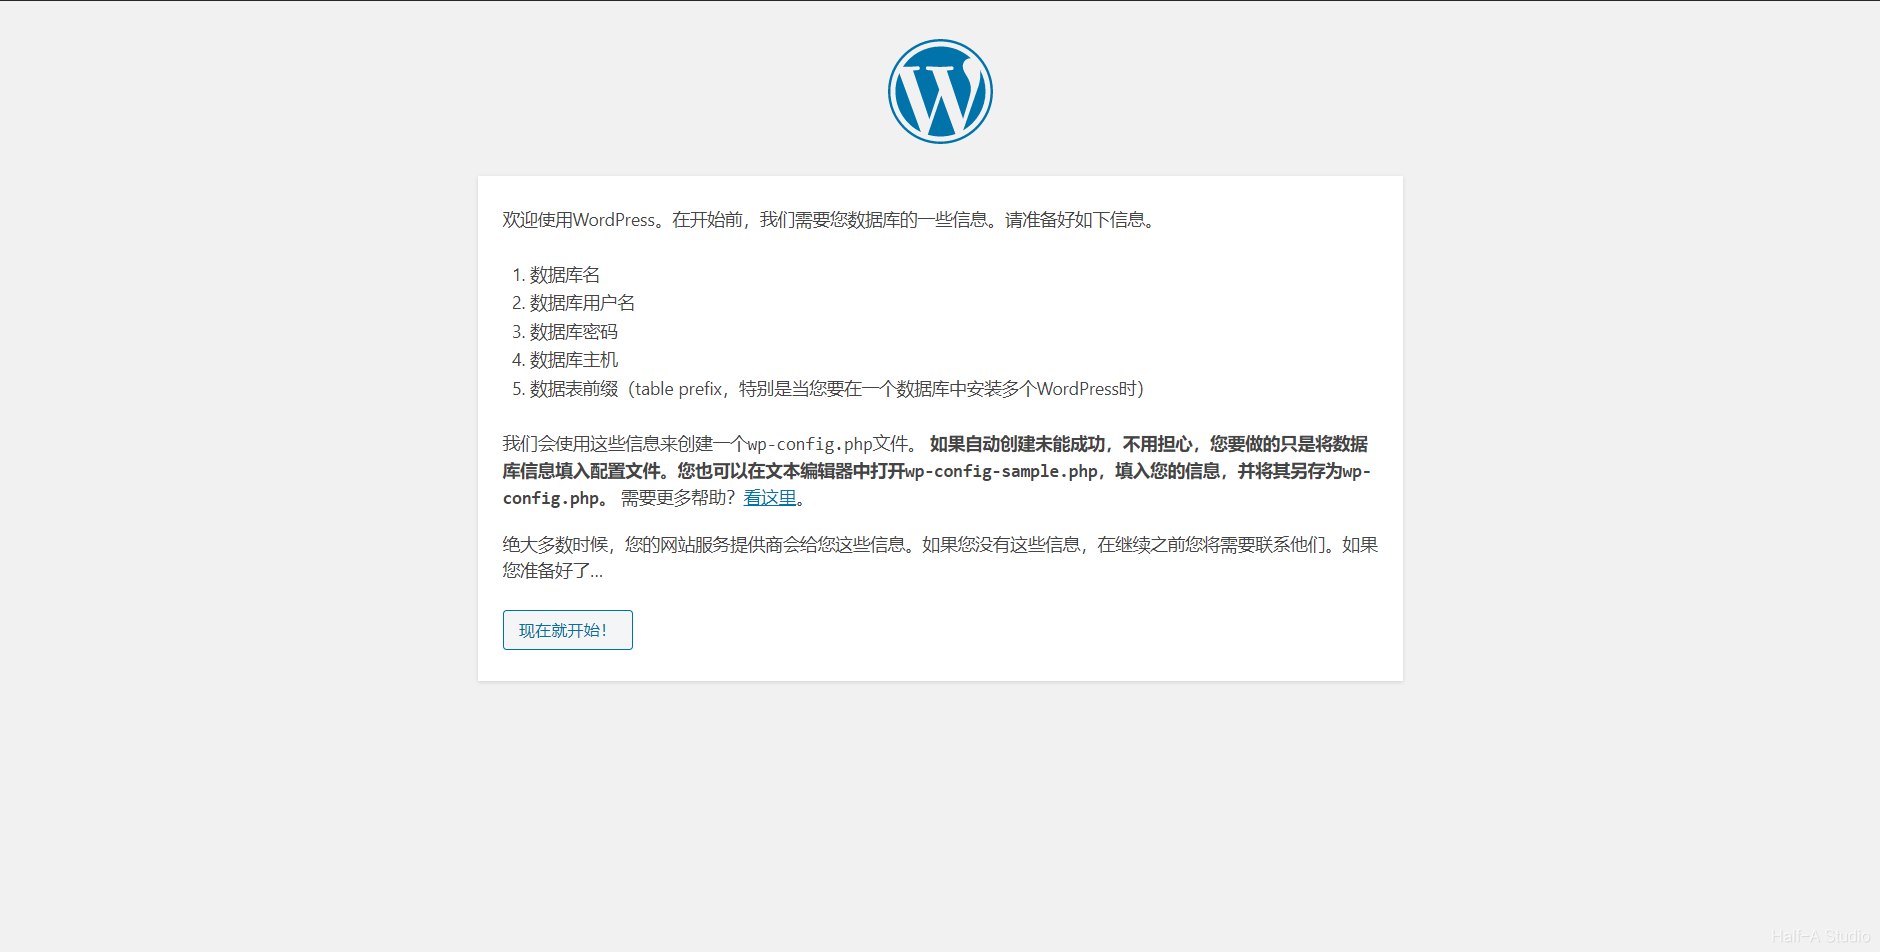
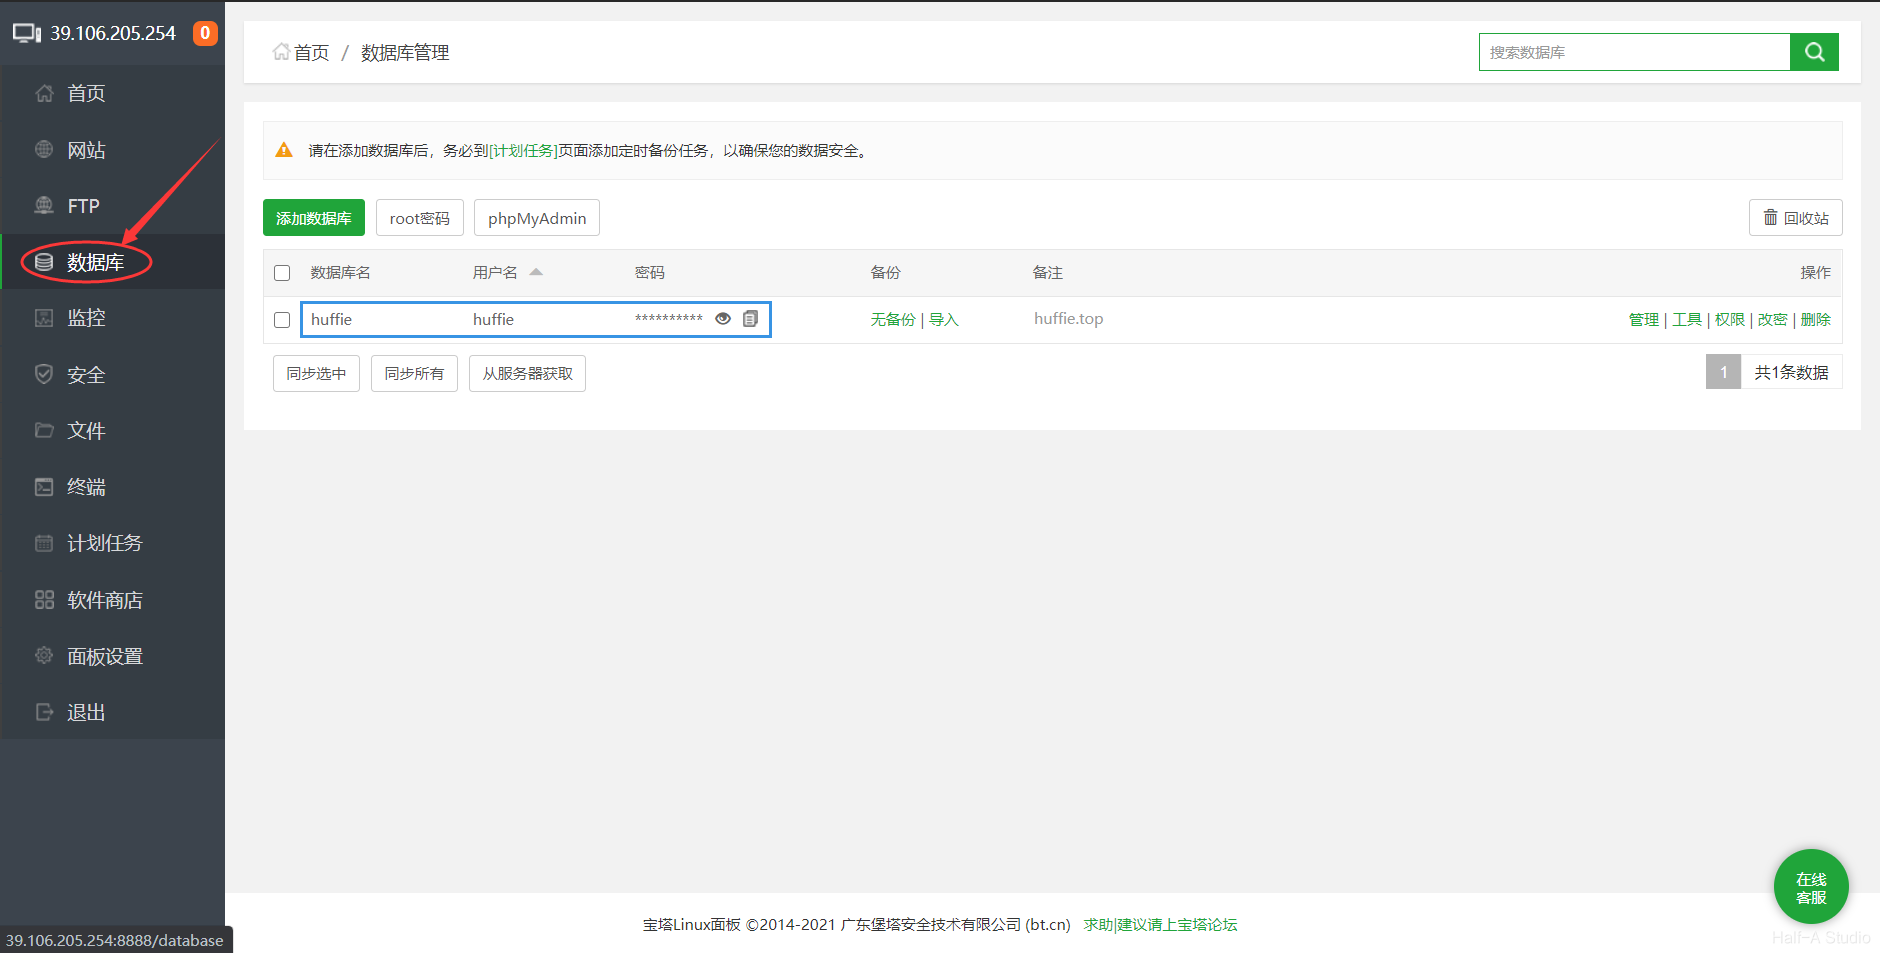
- Enter the database information
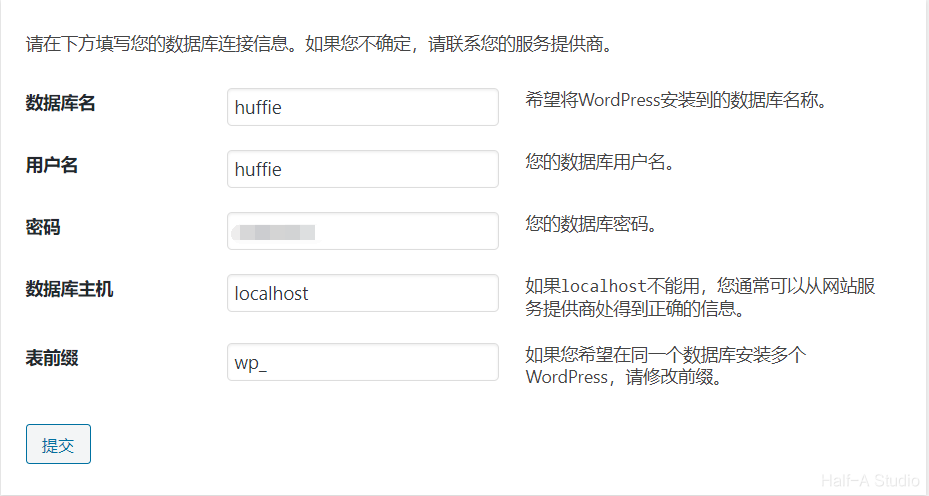
You can find the database name, username, and password in the Database section of the BT Panel Console.
 Fill in the required information, then click Submit.
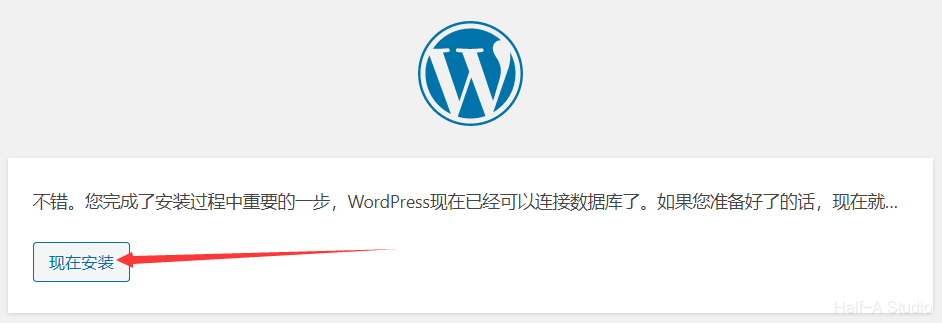
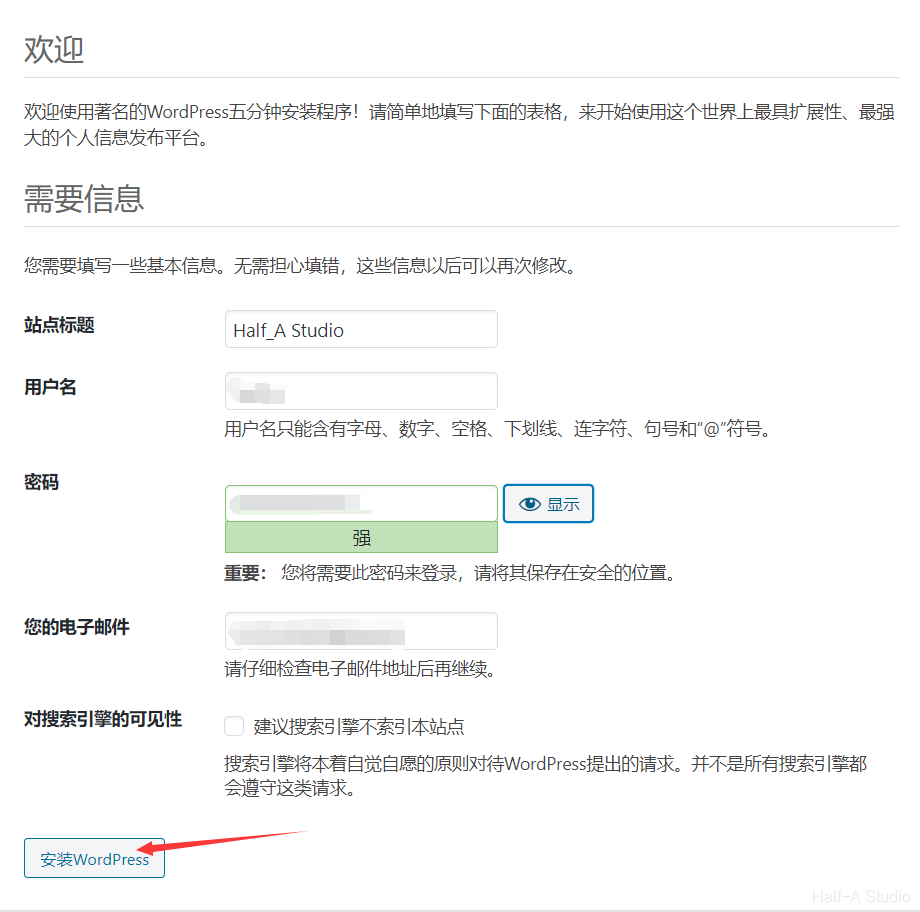
- Enter the website information
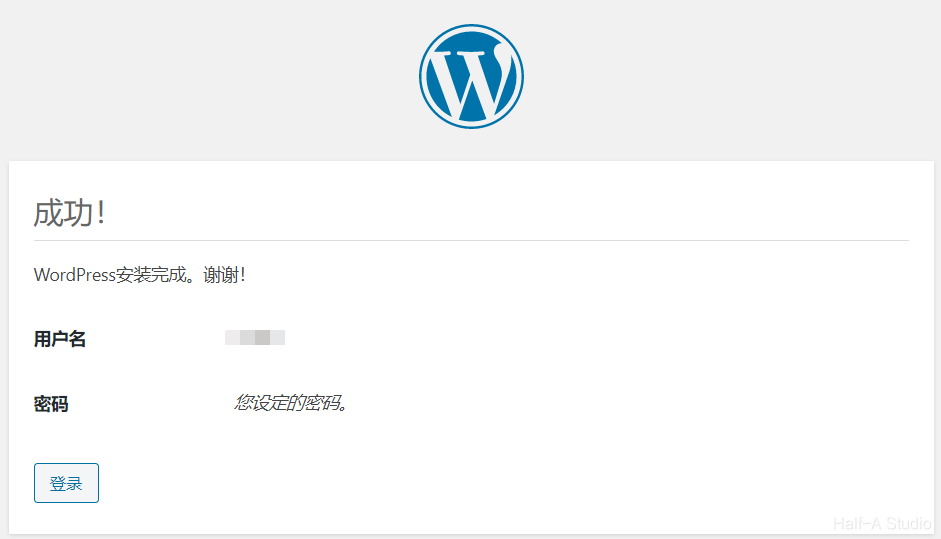
- Installation successful
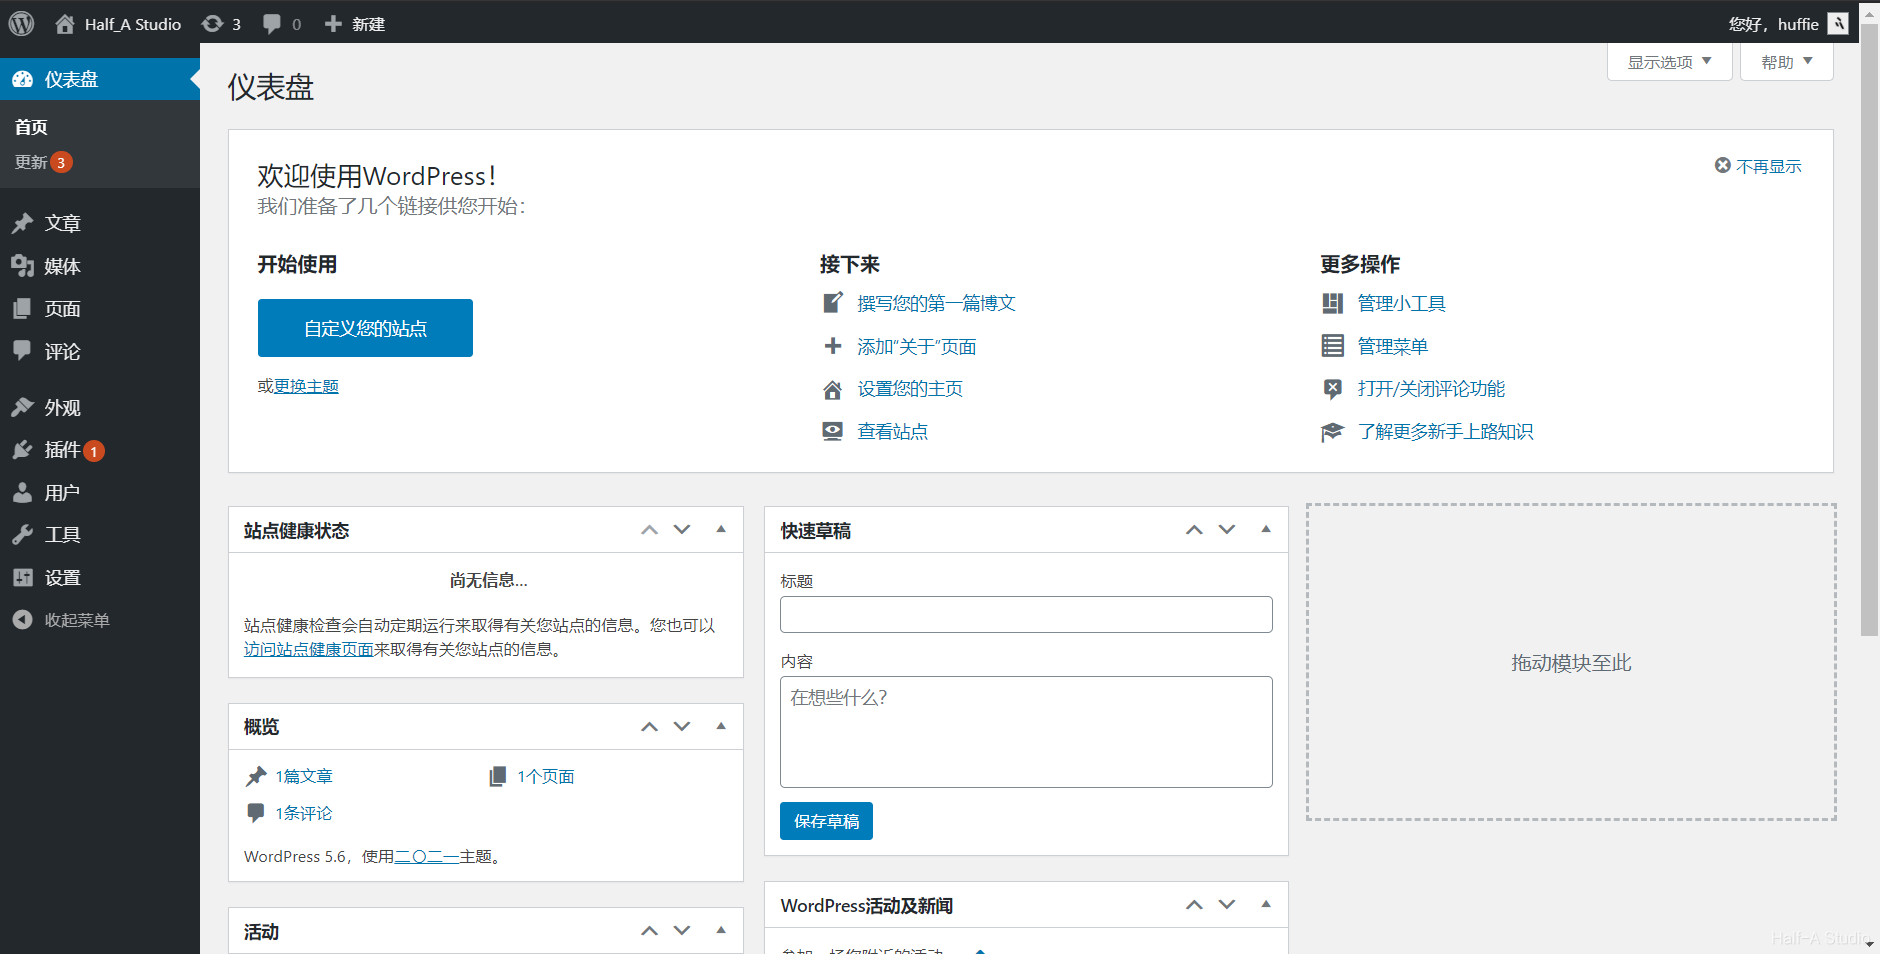
Log in to the WordPress admin dashboard, where you will see the familiar WordPress administration interface.
Comments