Contents
I. Image Color Space Conversion
1.1 Basics
- Color space conversion function: cvtColor. The constants below convert color to grayscale, grayscale to color, BGR to HSV, and HSV to BGR, respectively.
COLOR_BGR2GRAY = 6	//6彩色到灰度
COLOR_GRAY2BGR = 8	//8灰度到彩色
COLOR_BGR2HSV = 40	//40BGR到HSV
COLOR_HSV2BGR = 54	//54HSV到BGR
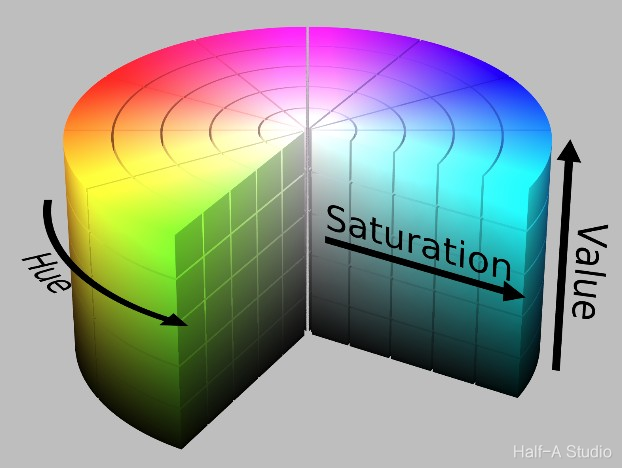
GRAY: grayscale, with only one Channel for the grayscale value BGR: the BGR color space, based on the three primary colors red, green, and blue (0
255), which are combined to form various colors HSV: the hexagonal cone model, with Hue measured in degrees (0180), Saturation in the range 0 ~ 255, and Value in the range 0 ~ 255
- Image saving function: imwrite
The first parameter is the image save path The second parameter is the image object in memory
1.2 Creating a Class
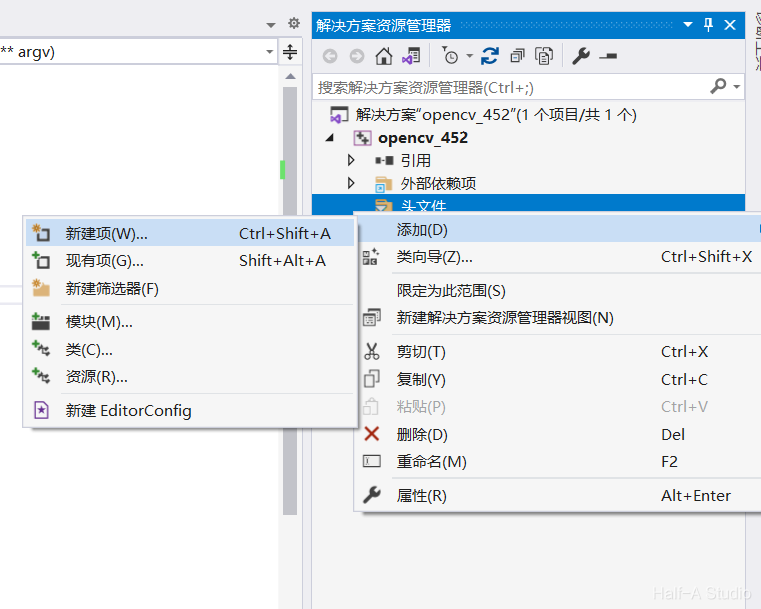
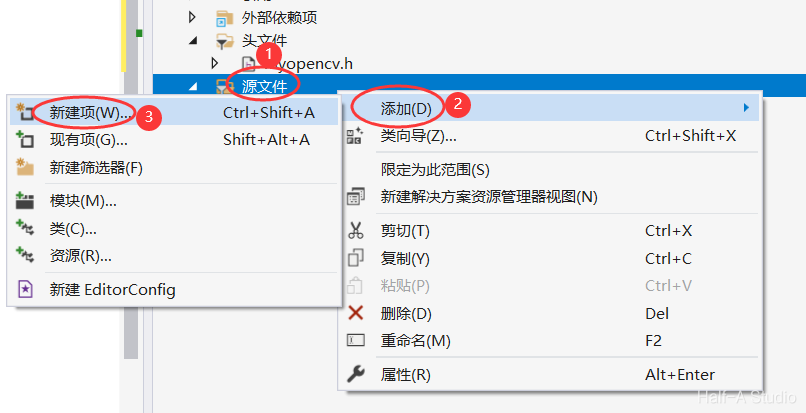
① First, add a header file.
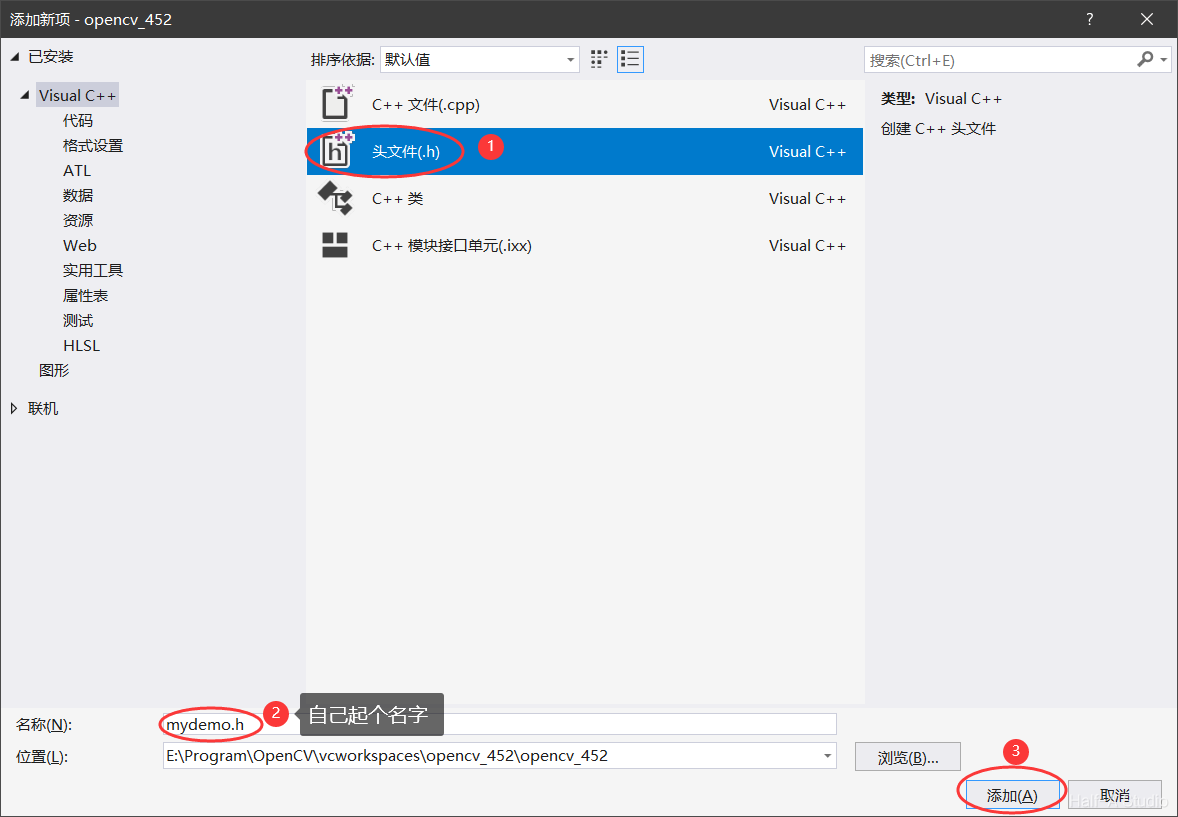
② Define a MyDemo class in the header file. The code is as follows.
#pragma once

#include <opencv2/opencv.hpp>

using namespace cv;

class MyDemo {
public:
	void colorSpace_Demo(Mat &image);

};
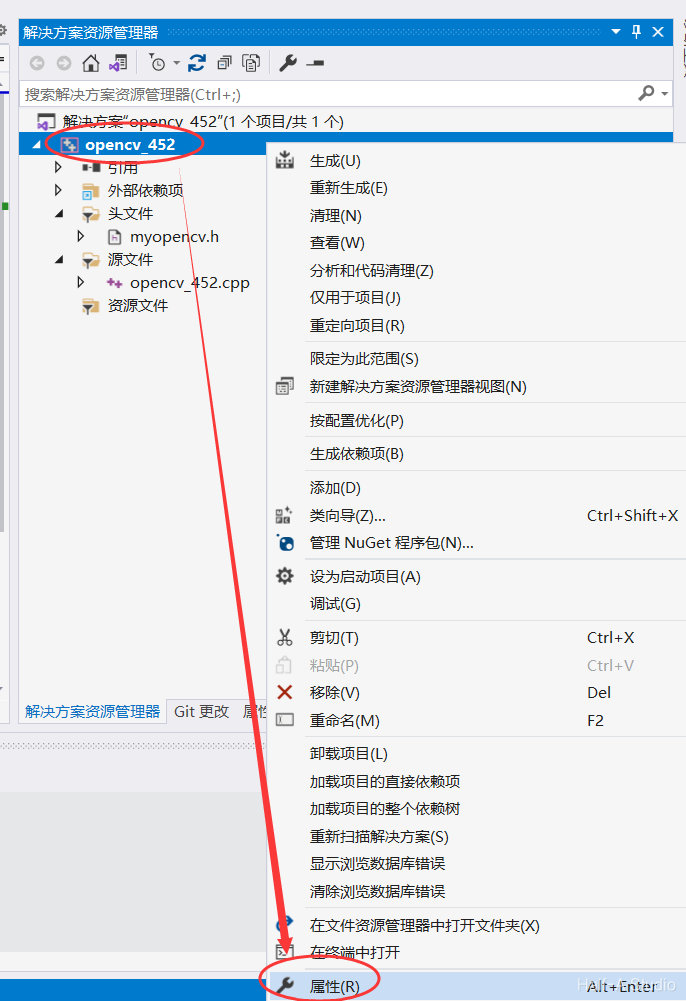
③ Add the include directory. First, right-click the project name and select Properties. After the property page opens, edit VC++ Directories->Include Directories and add the directory containing the header file as a new item, as shown.

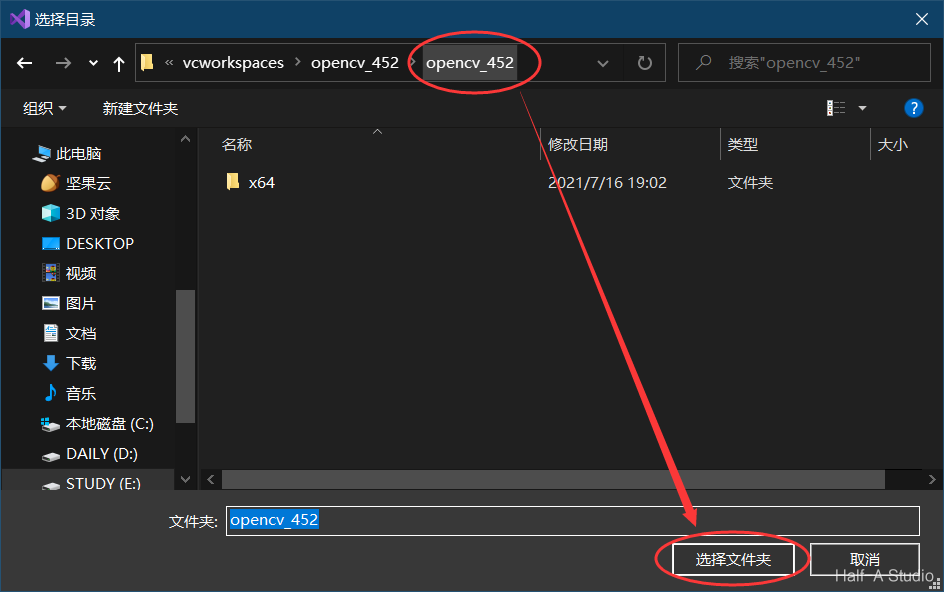
④ Create a cpp file to implement the class just defined.
#include <mydemo.h>

void MyDemo::colorSpace_Demo(Mat &image) {
	Mat gray, hsv;
	cvtColor(image, hsv, COLOR_BGR2HSV);
	cvtColor(image, gray, COLOR_BGR2GRAY);
	imshow("HSV Image", hsv);
	imshow("Gray Image", gray);
	imwrite("E:/Program/OpenCV/vcworkspaces/opencv_452/img/hsv.png", hsv);
	imwrite("E:/Program/OpenCV/vcworkspaces/opencv_452/img/gray.png", gray);
}
1.3 Writing the Main Function with an Image of Your Choice
#include <opencv2/opencv.hpp>
#include <iostream>
#include <mydemo.h>

using namespace cv;

int main(int argc, char** argv) {
	Mat src = imread("E:/Program/OpenCV/vcworkspaces/opencv_452/img/opencv.jpg");//自己找一张图片
	imshow("opencv.jpg", src);

	MyDemo demo;
	demo.colorSpace_Demo(src);

	waitKey(0);
	destroyAllWindows();;
	return 0;
}
1.4 Test Results

Tip: The three RGB parameters represent only color, while HSV represents Hue, Saturation, and Value, respectively. Therefore, to adjust an image’s brightness, first convert it to the HSV color space, adjust the brightness, and then convert it back to the RGB color space.
II. Creating and Copying Image Objects
2.1 What Is Mat
Questions about Mat
- How to manipulate a loaded image
- How to traverse and access every pixel in an image
- How to create an empty image
In OpenCV, a Mat object’s data is divided into two parts: the header and the data section. The header includes the data type and the number of channels.
2.2 Creating a Blank Image
Image creation process ① Functions used
Mat m_new = Mat::zeros(Size(8, 8),CV_8UC1);
Mat m_new = Mat::ones(Size(8, 8),CV_8UC1);
In these functions, the parameter CV_8UC1 indicates an 8-bit, unsigned char type with a Channel count of 1.
② Add the header file
Next, write a demo to try creating an image, and add the new matCreation_Demo function declaration to the header file.
#pragma once

#include <opencv2/opencv.hpp>

using namespace cv;

class MyDemo {
public:
	void colorSpace_Demo(Mat& image);
	void matCreation_Demo();	//这一行是新加的
};
③ Implement the image creation function
Add the following code to the mydemo.cpp file to implement this function, which creates a blank image.
void MyDemo::matCreation_Demo() {

	//创建空白图像
	Mat m_new = Mat::zeros(Size(8, 8),CV_8UC1);
	std::cout << "width = " << m_new.cols << "\theight = " << m_new.rows << "\tchannels = " << m_new.channels() << std::endl;
	std::cout << m_new << std::endl;

}
④ Call the function from the main function and test it
#include <opencv2/opencv.hpp>
#include <iostream>
#include <mydemo.h>

using namespace cv;

int main(int argc, char** argv) {

	MyDemo demo;
	demo.matCreation_Demo();

	waitKey(0);
	destroyAllWindows();;
	return 0;
}
The output is shown below. It is an 8x8 matrix:
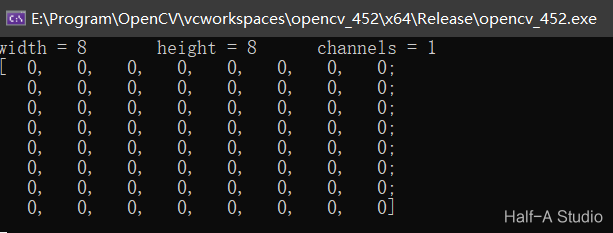
Notes:
If the number of channels is changed to 3, that is, Mat m_new = Mat::zeros(Size(8, 8),CV_8UC3);, the output becomes an 8x24 matrix, meaning that each pixel has three values:

If ones is used to initialize three channels, only the first channel of each pixel is initialized to 1, while the second and third channels are still initialized to 0.

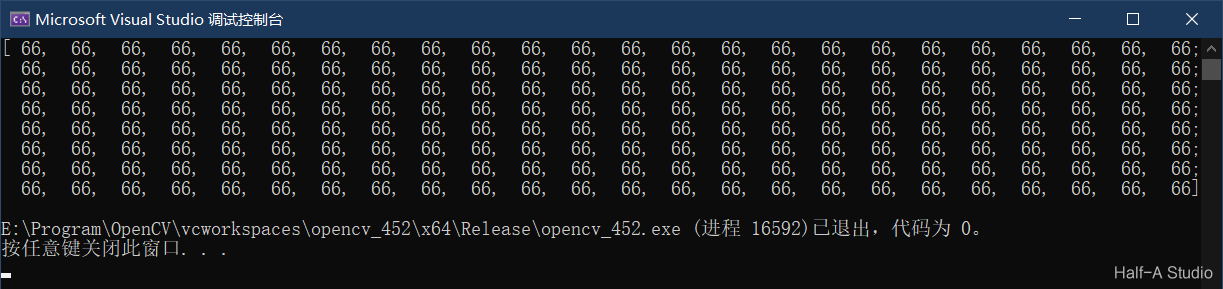
You can use the Scalar function to assign values to all pixels in the image at once. The three parameters of Scalar are B, G, and R
void MyDemo::matCreation_Demo() {

	//创建空白图像
	Mat m_new = Mat::ones(Size(8, 8),CV_8UC3);
	m_new = Scalar(66, 66, 66);
	std::cout << m_new << std::endl;

}
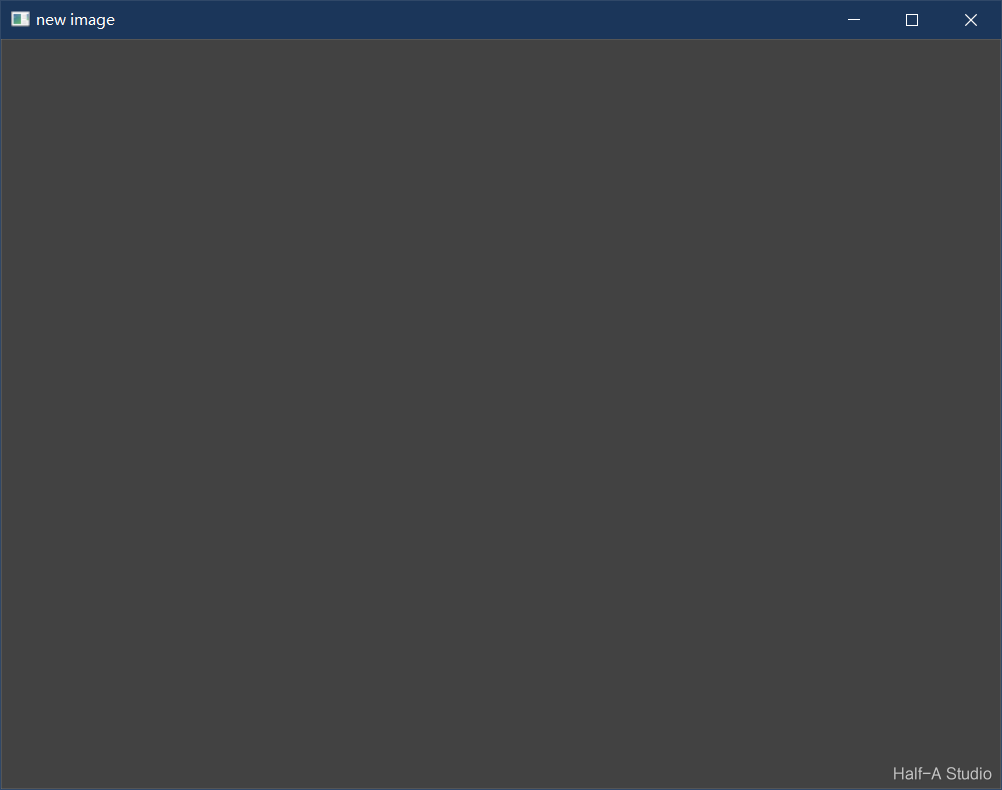
Where is the image? Just now, we used io to print the image’s pixel values one by one in the console. Of course, we can also output it as an image. Simply replace cout with imshow.
void MyDemo::matCreation_Demo() {

	//创建空白图像
	Mat m_new = Mat::ones(Size(800, 600),CV_8UC3);
	m_new = Scalar(66, 66, 66);
	imshow("new image",m_new);

}
This is the image we generated.
2.3 Copying an Image
When assigning a Mat object, the operation is equivalent to having two pointers point to the same memory space. A true copy occurs only through cloning and copying.
① Cloning: clone
m_clone = image.clone();② Copying: copyTo
image.copyTo(m_copy);
Comments