Contents
I. Working with Posts
1.1 Overview
(1) Website Content
Content is the most important part of a website. Users visit your website because of its content. In WordPress, content is mainly divided into two parts: posts and pages.
- Posts: Used to publish the website’s main content (for example, on a blog, blog posts are published under Posts)
- Pages: Used to publish the website’s other content (for example, on a blog, information about the blogger or website is published under Pages)

(2) Website Planning
(1) Separate the website’s main content from its other content (2) Organize the main content into categories (3) There is no need to define tags in advance
Categories: Classify posts by content Tags: Tags can be understood as markers. By adding a marker to a post, WordPress can quickly filter for posts with that marker when you need to view them.

1.2 Posts
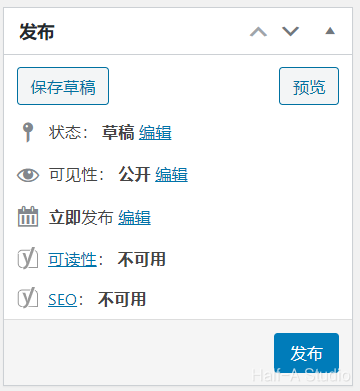
- On the right, you can see information such as the post’s publication details, status, categories, tags, and featured image
- Click Screen Options in the upper-right corner to see more information. You can select all the checkboxes for now and look at what each one does later. (Your options may be different because different plugins are installed; there is no need to worry about this.)

- Title: From top to bottom, the first field is the title of the post content. There is no need to say more about it here.
- Add Media: Upload images and other files and insert them at the cursor position in the post
- Excerpt: Below the post content, you can see the field for entering the post excerpt. The excerpt is an overview of the post’s main content. It is displayed in the website’s post list so users can quickly understand the main content and read further if they are interested.
- Send Trackbacks: If you have used or referenced someone else’s post, you can enter the ulr here to notify them. This feature is rarely used today.
- Custom Fields: If you need to add more content that cannot be added in the main body, you can do so with Custom Fields.
- Discussion: Select Allow Comments to allow comments; leave it unselected to prevent users from commenting
- Comments: Add or manage comments
- Slug: Modify the link URL so that it better meets search engine indexing requirements
- Tags: Add markers to a post. If you want to find the post in the future, you only need to use its tags.
- Featured Image: Equivalent to the post’s thumbnail
II. Installing Plugins
Plugins can add, modify, or remove functionality from a WordPress site. WordPress provides many ways to install plugins. You can install them online, manually upload plugin packages, or install them by configuring files directly.

- To install a plugin online, look for one under WordPress’s Featured, Popular, or Recommended sections, or search for one. Once you find a suitable plugin, click Install.
 2. Manually install a plugin: When online plugin installation fails, or when you need to install a plugin that is not in the WordPress plugin directory, download the plugin package from the corresponding website, click Upload Plugin, and select the plugin package that you downloaded manually.

- Install an extracted plugin: If manual plugin installation still produces an error that cannot be resolved, extract the downloaded zip archive and place the entire folder in the wp-content/plugins/ folder
3.1 Media Library
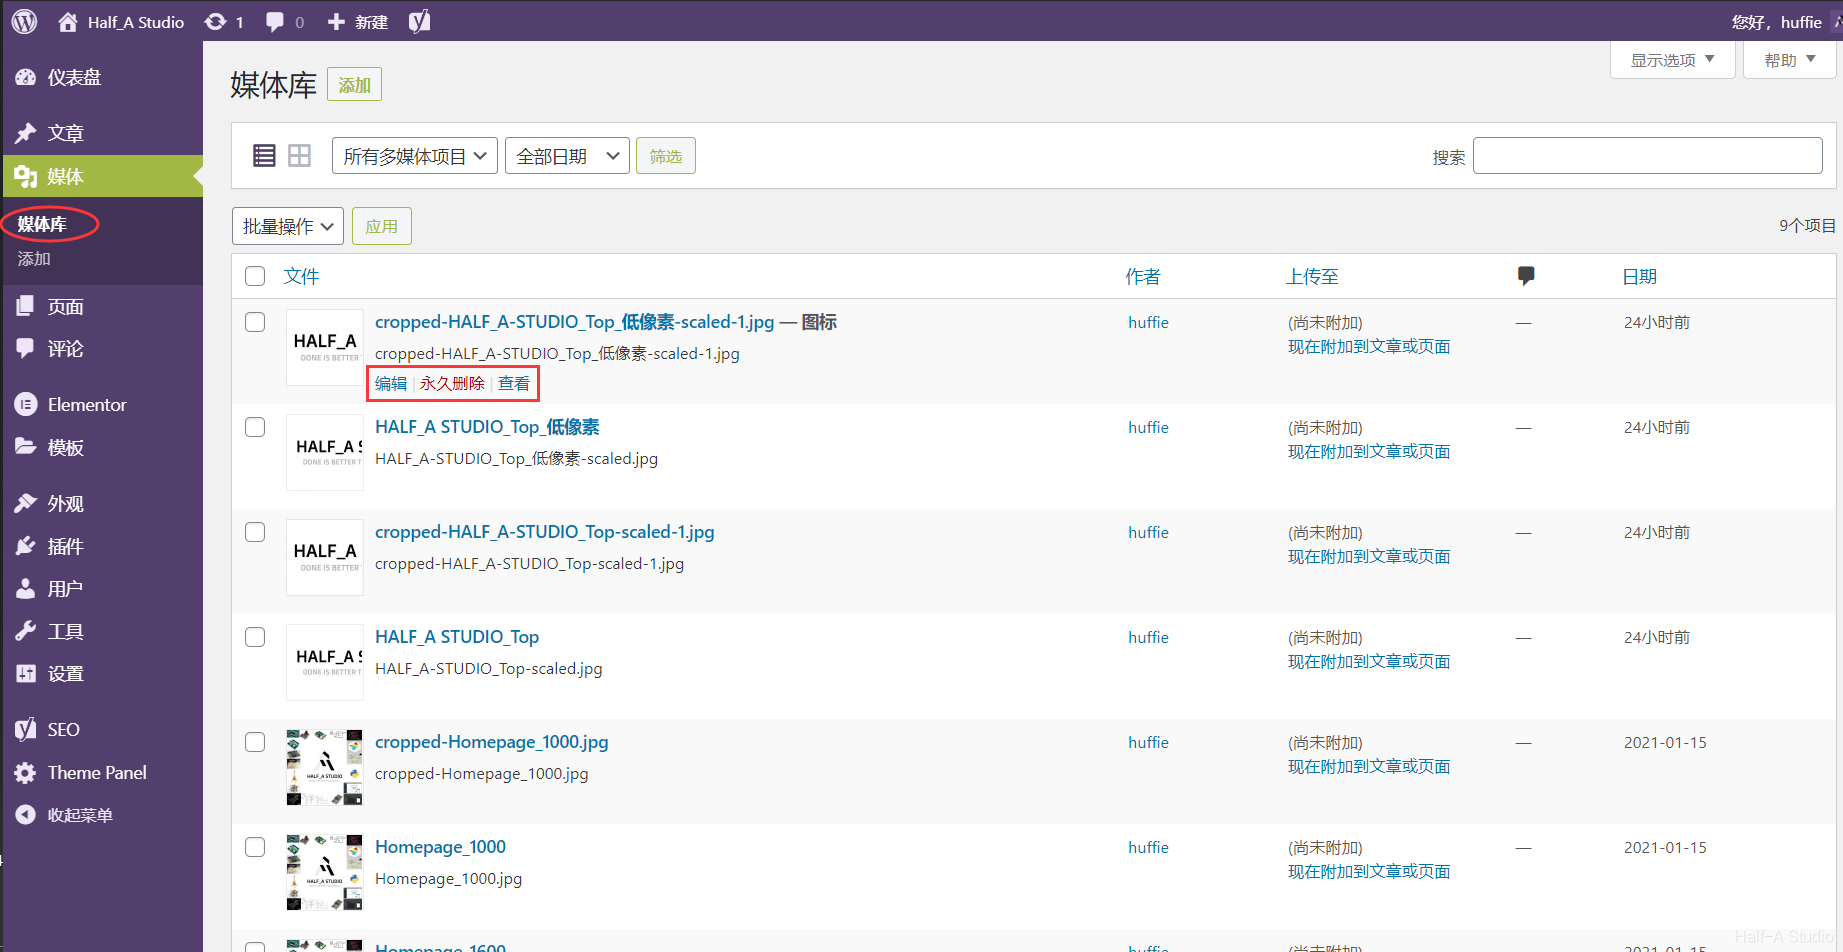
The Media Library is mainly used to manage attachments that you upload through WordPress, such as images, videos, and other files. Click the upper-left corner to switch views (list/thumbnail).
(1) Managing Media Files
- Edit: Modify an image’s title, caption, and alternative text. Alternative text is used in place of the image when the image cannot be displayed properly.
- Delete Permanently: Deleting media from the Media Library does not affect media that has already been added to posts
- View: View the image as a web page
(2) Adding Media Files
- Files can be uploaded here, with a maximum allowed upload size of 2M
- Common image, document, and archive formats can all be uploaded. You can upload files here for users to download.

3.2 Managing Comments
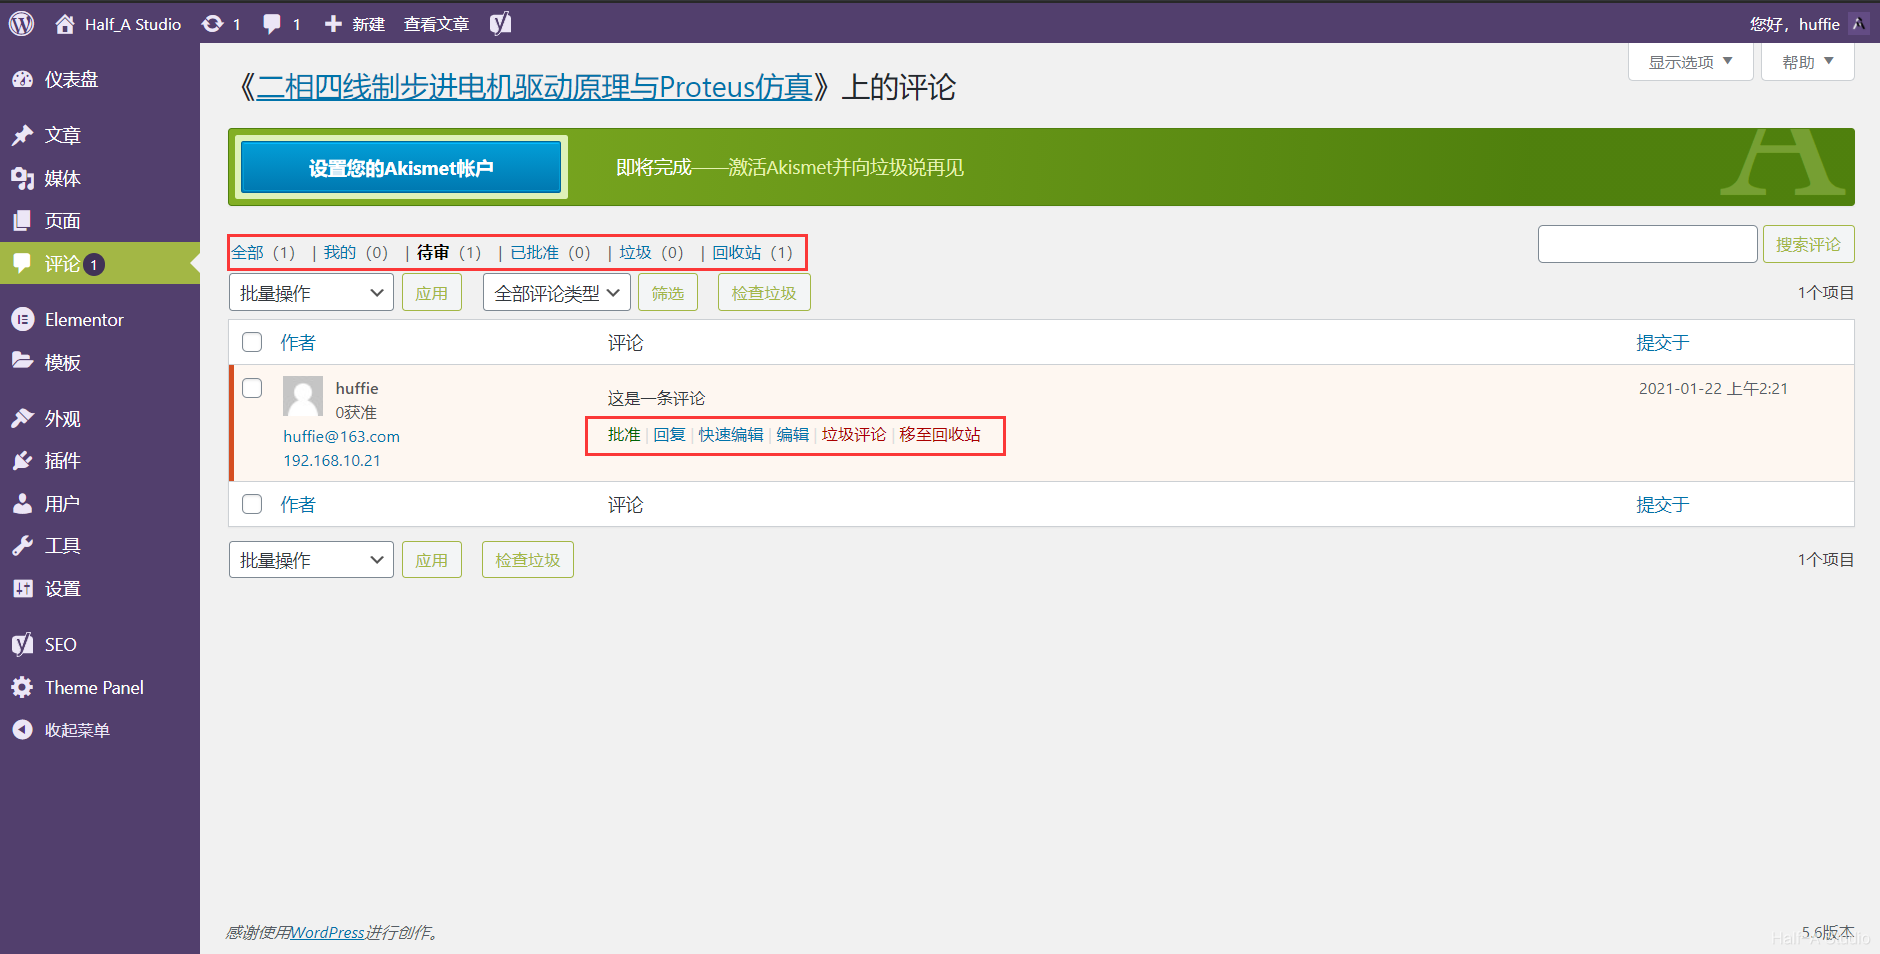
- From left to right, the list shows the user who posted the comment, the comment content, the post on which the user commented, and the comment time.
- You can manage comments from the comment content area. The available actions are:
(1) Unapprove/Approve: With WordPress’s default settings, a comment posted by a user is displayed on the web page only after it has been approved
(2) Reply: Reply to the user’s comment
(3) Edit: Modify the user’s comment
(4) After Mark as Spam or Move to Trash is used, the comment will not be displayed on the web page.
3.3 User Management
(1) Add New User
You can add users to the website here. Users are generally not added manually. Manual user creation is usually used only to add administrators, while regular users typically register through a dedicated registration channel.
Enter the username, email, first name, last name, and password, then select a user role to finish adding the user.

(2) Your Profile
Click Profile to view your own profile.
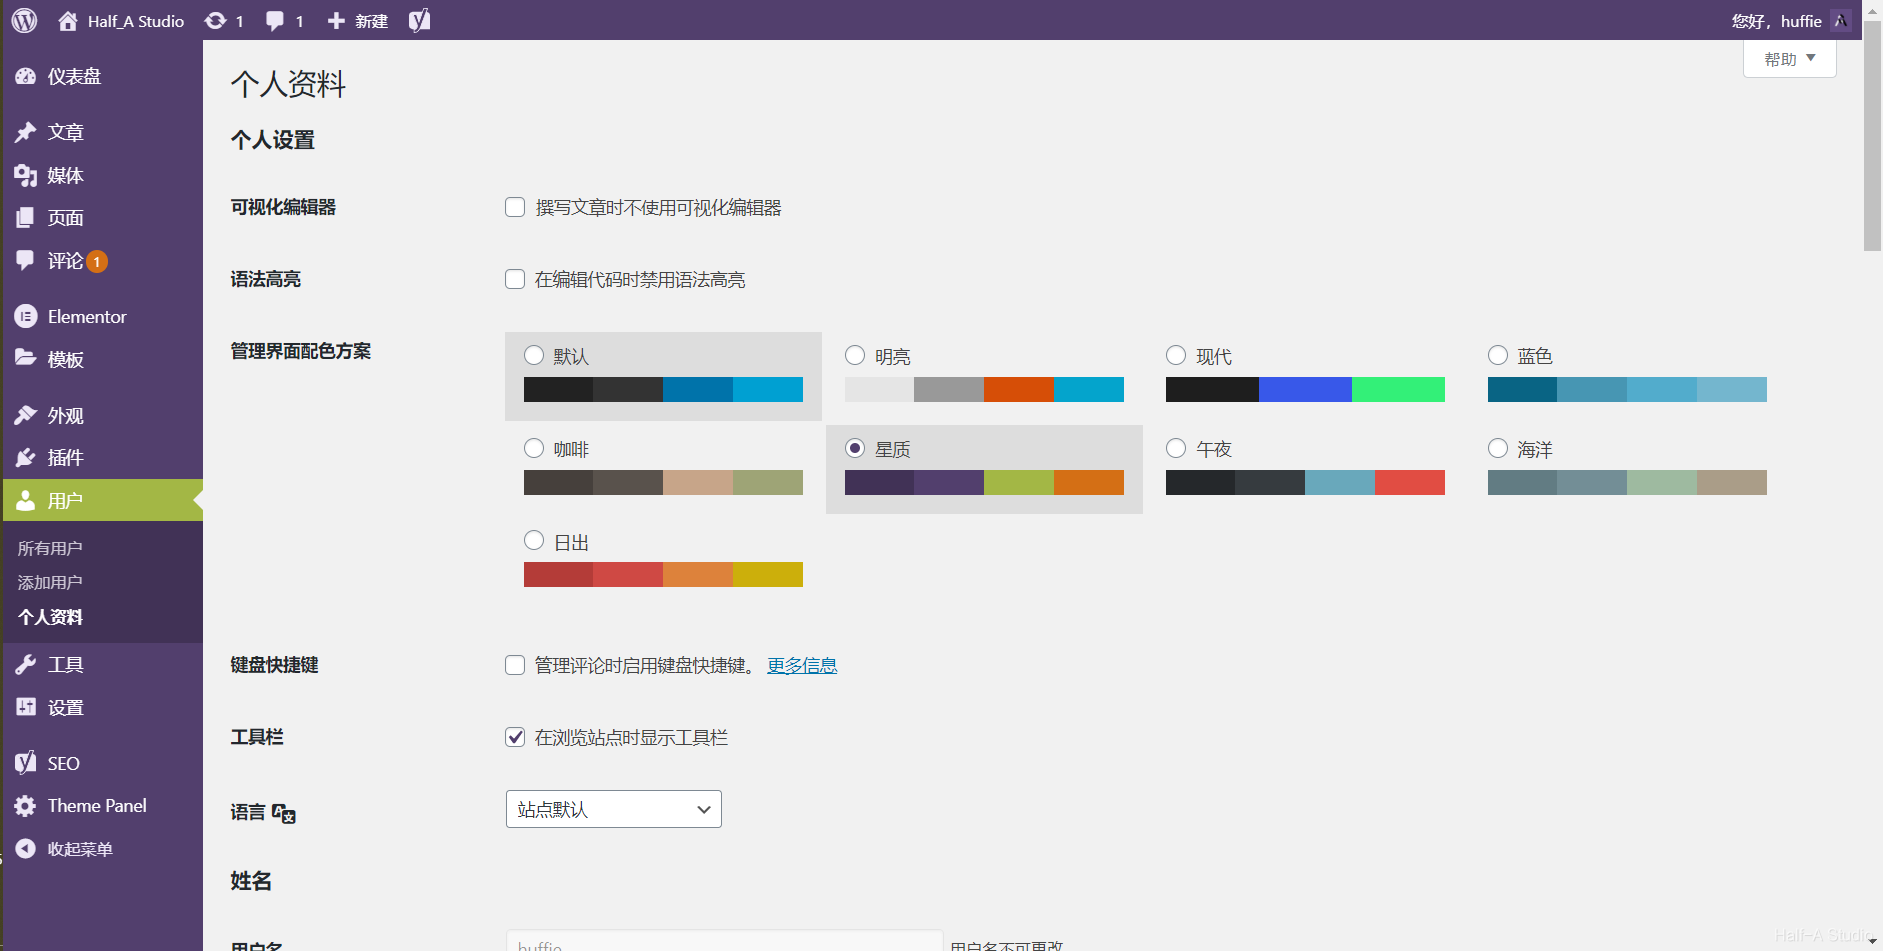
- Visual Editor
Without the Visual Editor:
 With the Visual Editor

- Admin Color Scheme: The colors on the left and top of the admin interface
- Toolbar: After logging in, open your own website and you will see a toolbar at the top.
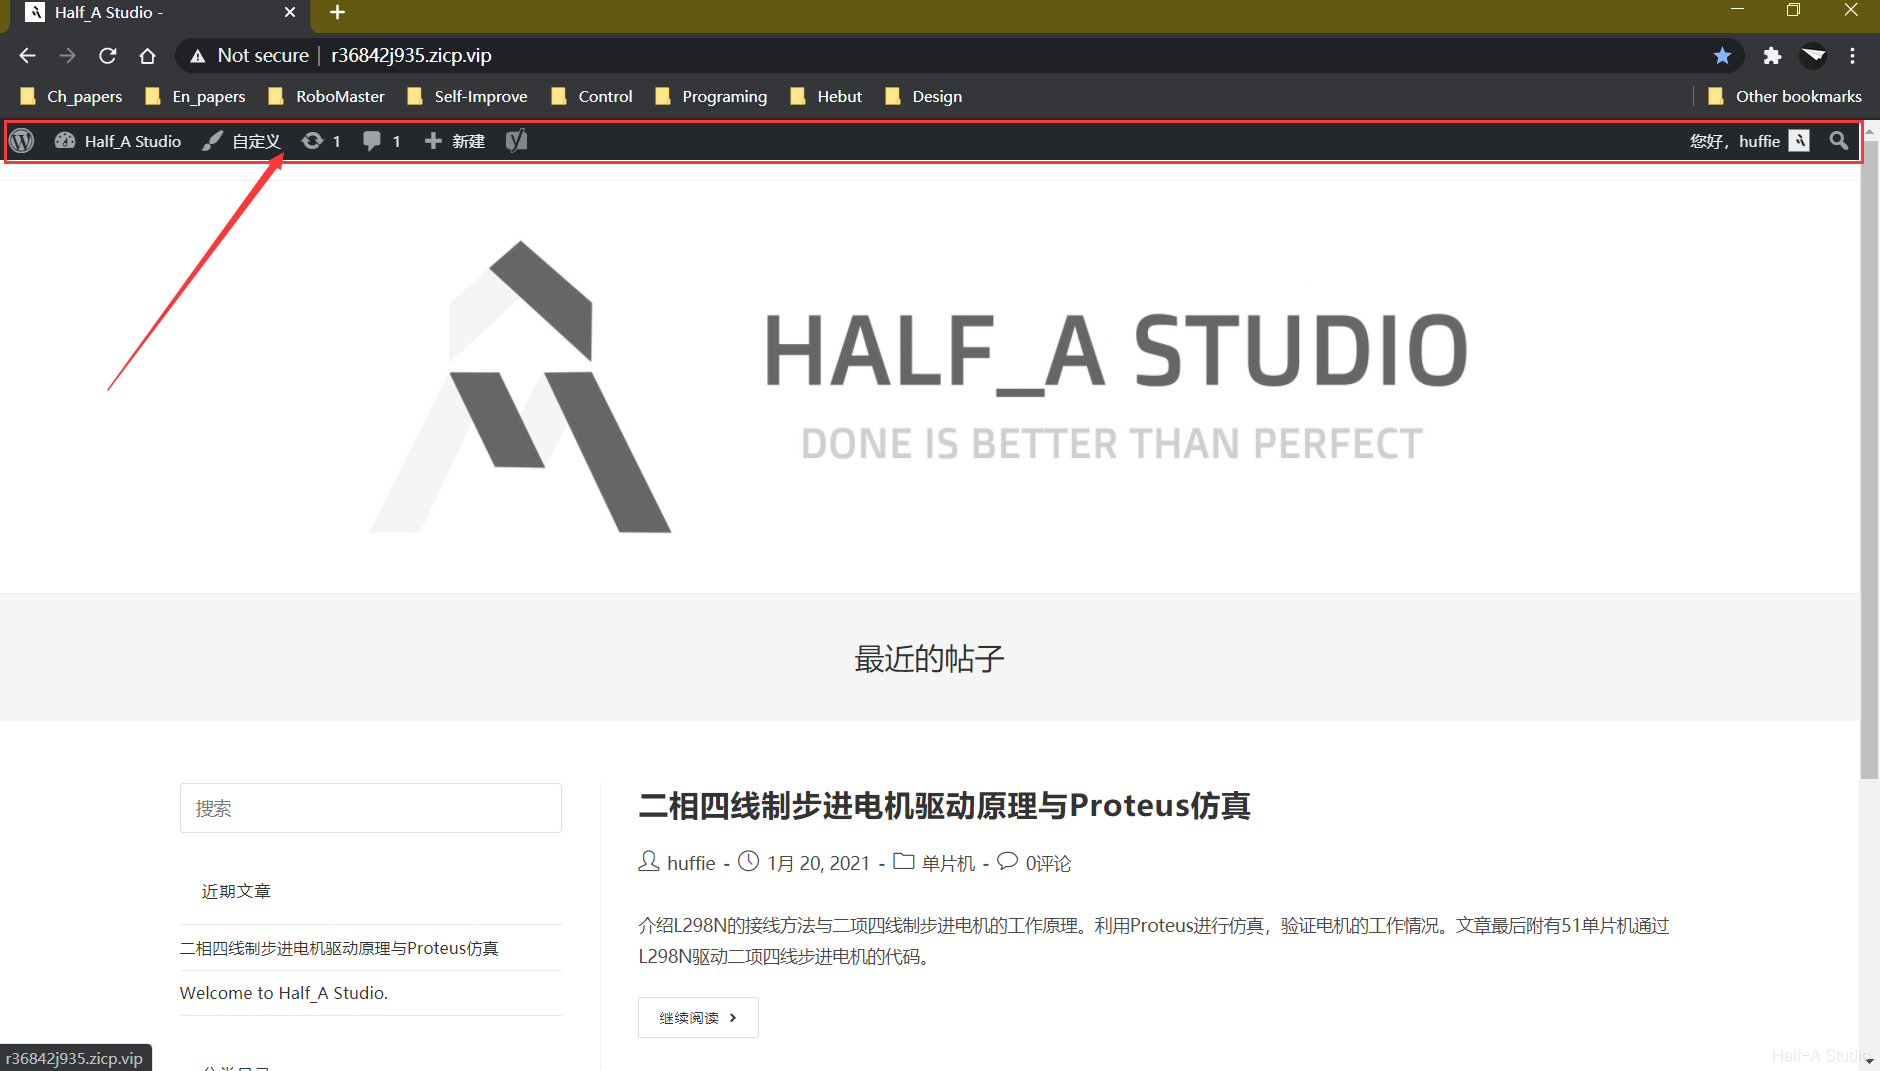
- Profile Picture: Register an account on the Gravatar website and set a profile picture. When you register as a member of a WordPress website using the same email account, WordPress retrieves the profile picture from the Gravatar website based on the email account information
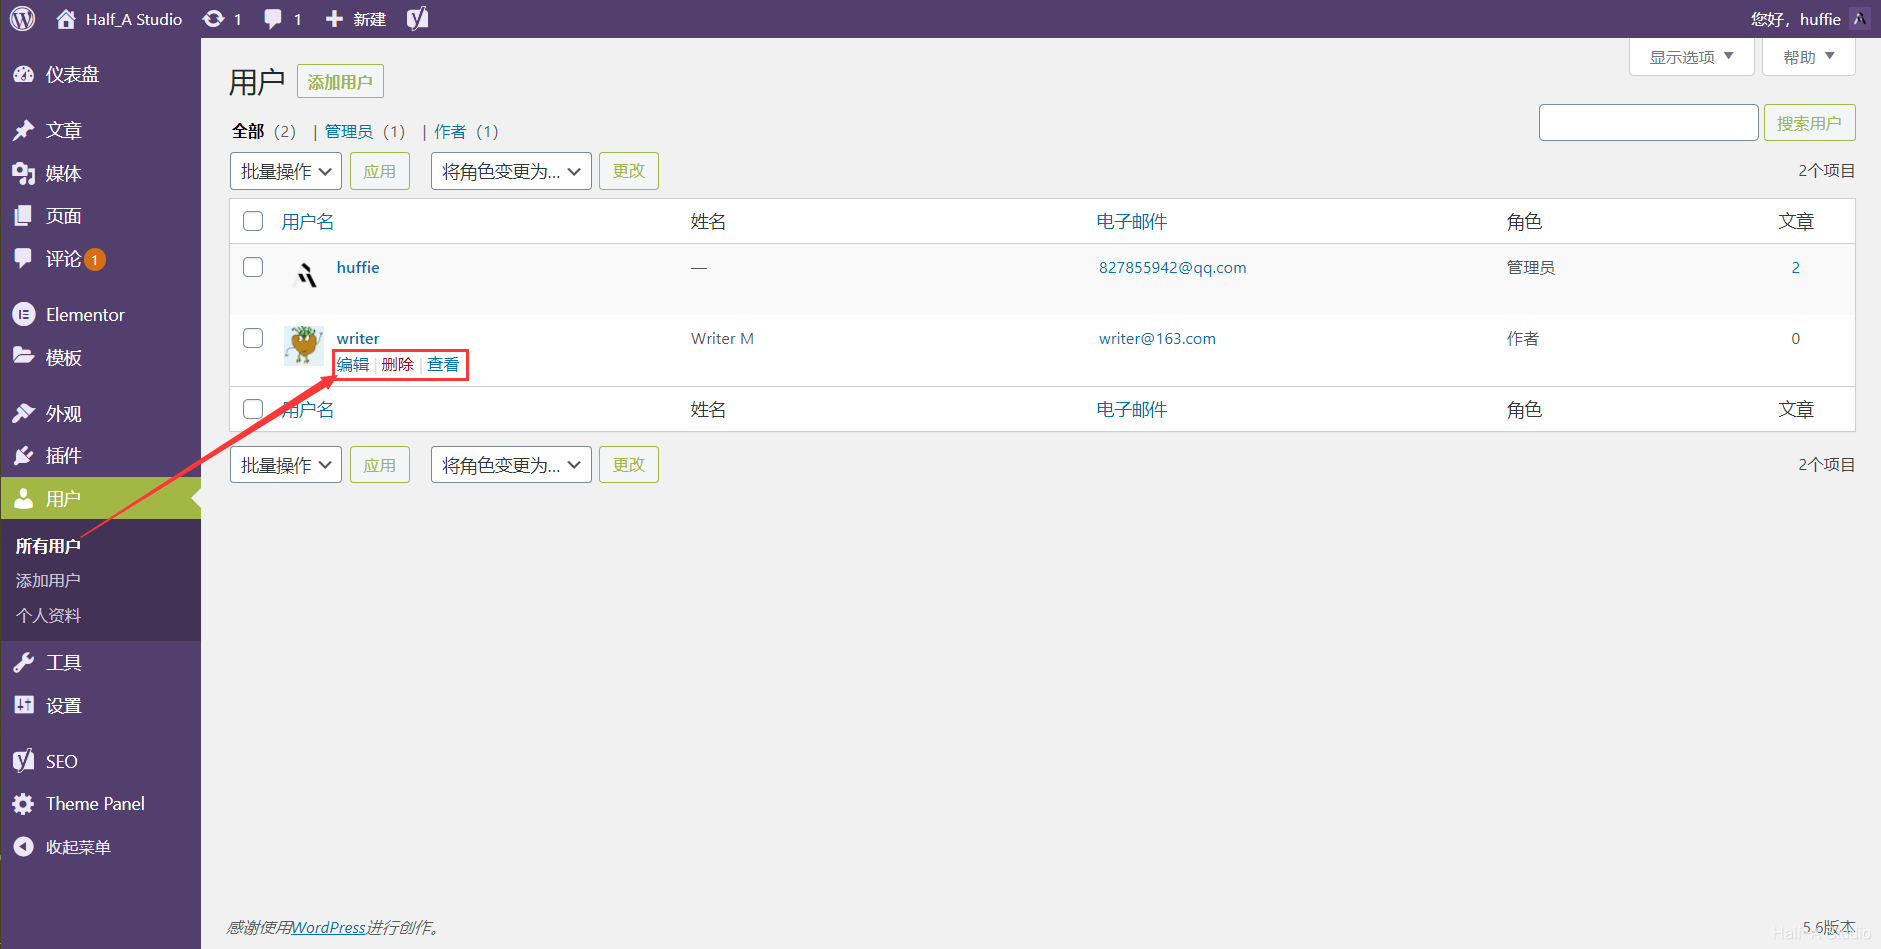
(3) Managing Users
You can manage all users of this website on the All Users page.
Insert image description here
3.4 Tools
(1) Press This
Drag the button to the bookmarks bar to add this tool. When you open someone else’s website, click the Press This button to copy the page’s title, content, images, and other elements into a post.
(2) Direct Link
Similar to Press This, click the Direct Link button to display a field at the top where you can enter a URL. Find the web page you want to clip, then copy its URL into this field to generate a post.
(3) Import and Export
Import lets you import your own posts, comments, and other content from other blogging platforms and websites into this website. Export creates an XML file that stores the website’s content.
3.5 Appearance
(1) Themes
- Purpose of Themes Switching to a different theme changes the website’s visual appearance. The website content that users see also changes. The site’s functionality changes as well.
- How to Install Themes
Click Add New Theme to open the installation page, where you can install themes.
(1) Online installation: Select a theme from WordPress’s Featured, Popular, Latest, or other sections, or search for a theme to install. After installation, click Live Preview to see how the website looks with the new theme. Click Activate to switch themes.
 (2) Manual installation: Download the theme locally, click Upload Theme, select the downloaded theme zip file, and click Install Now.
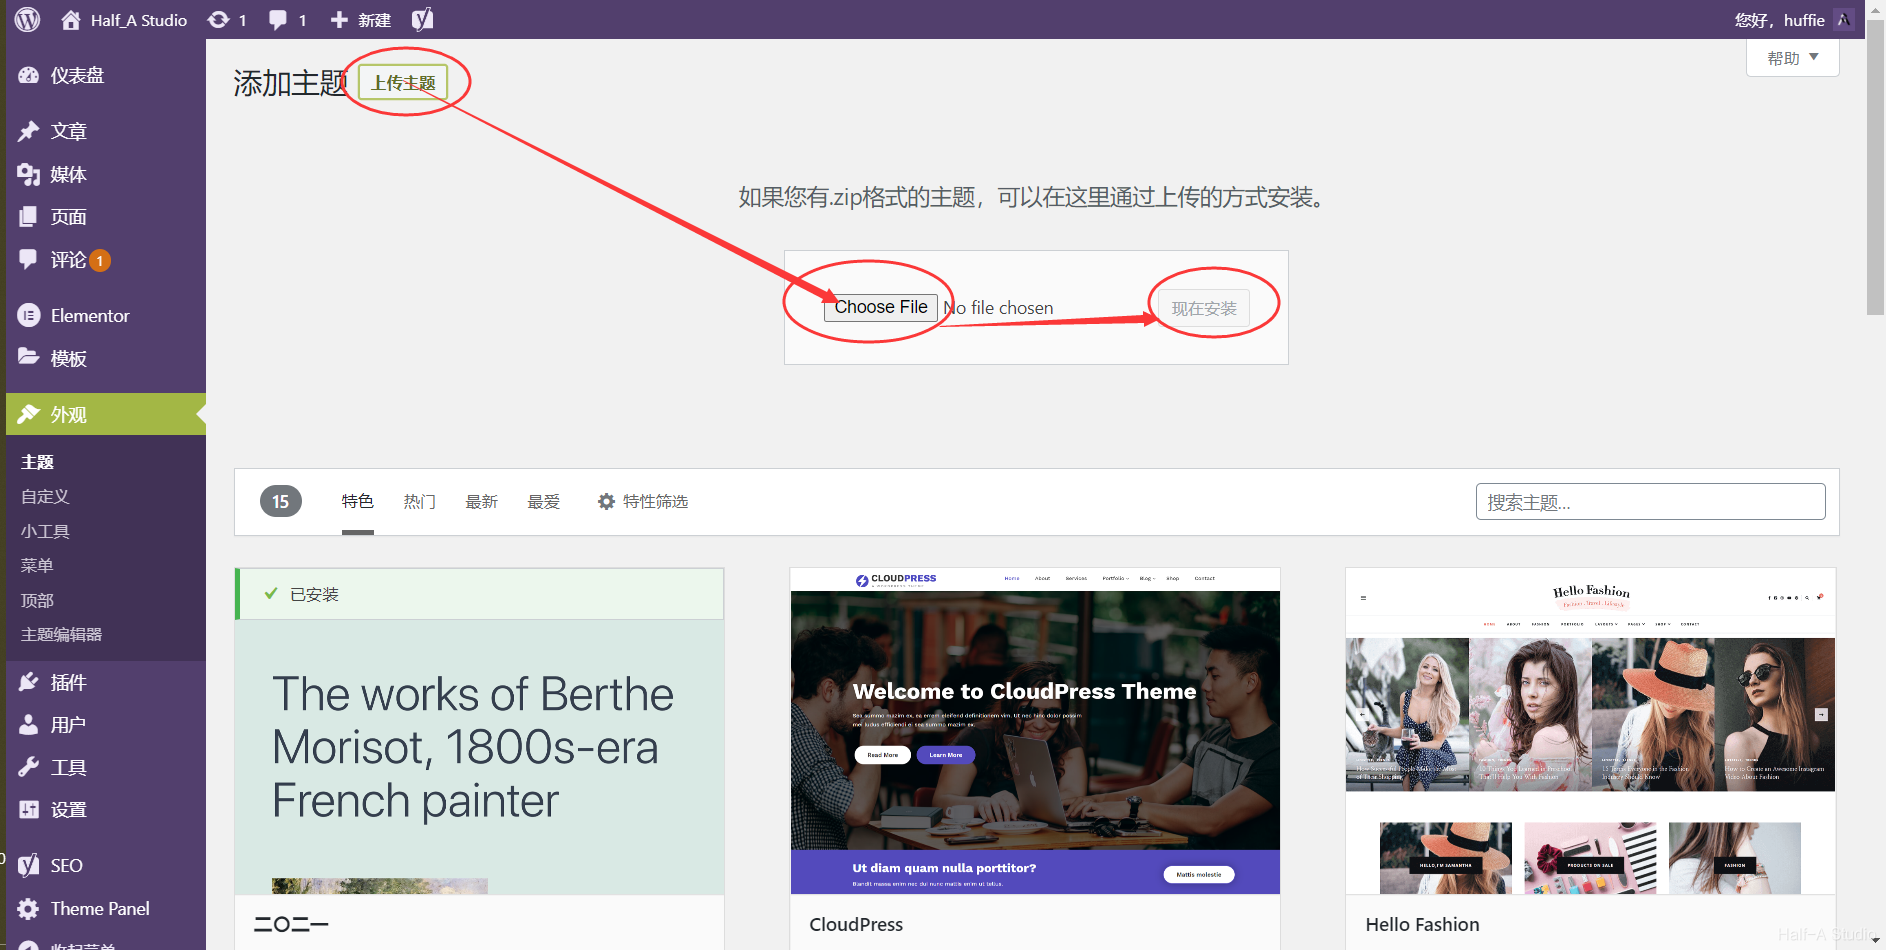 (3) Direct installation: Place the extracted theme folder directly in the wp-content/themes/ folder. Return to the Themes page and refresh it to see the theme you just installed.
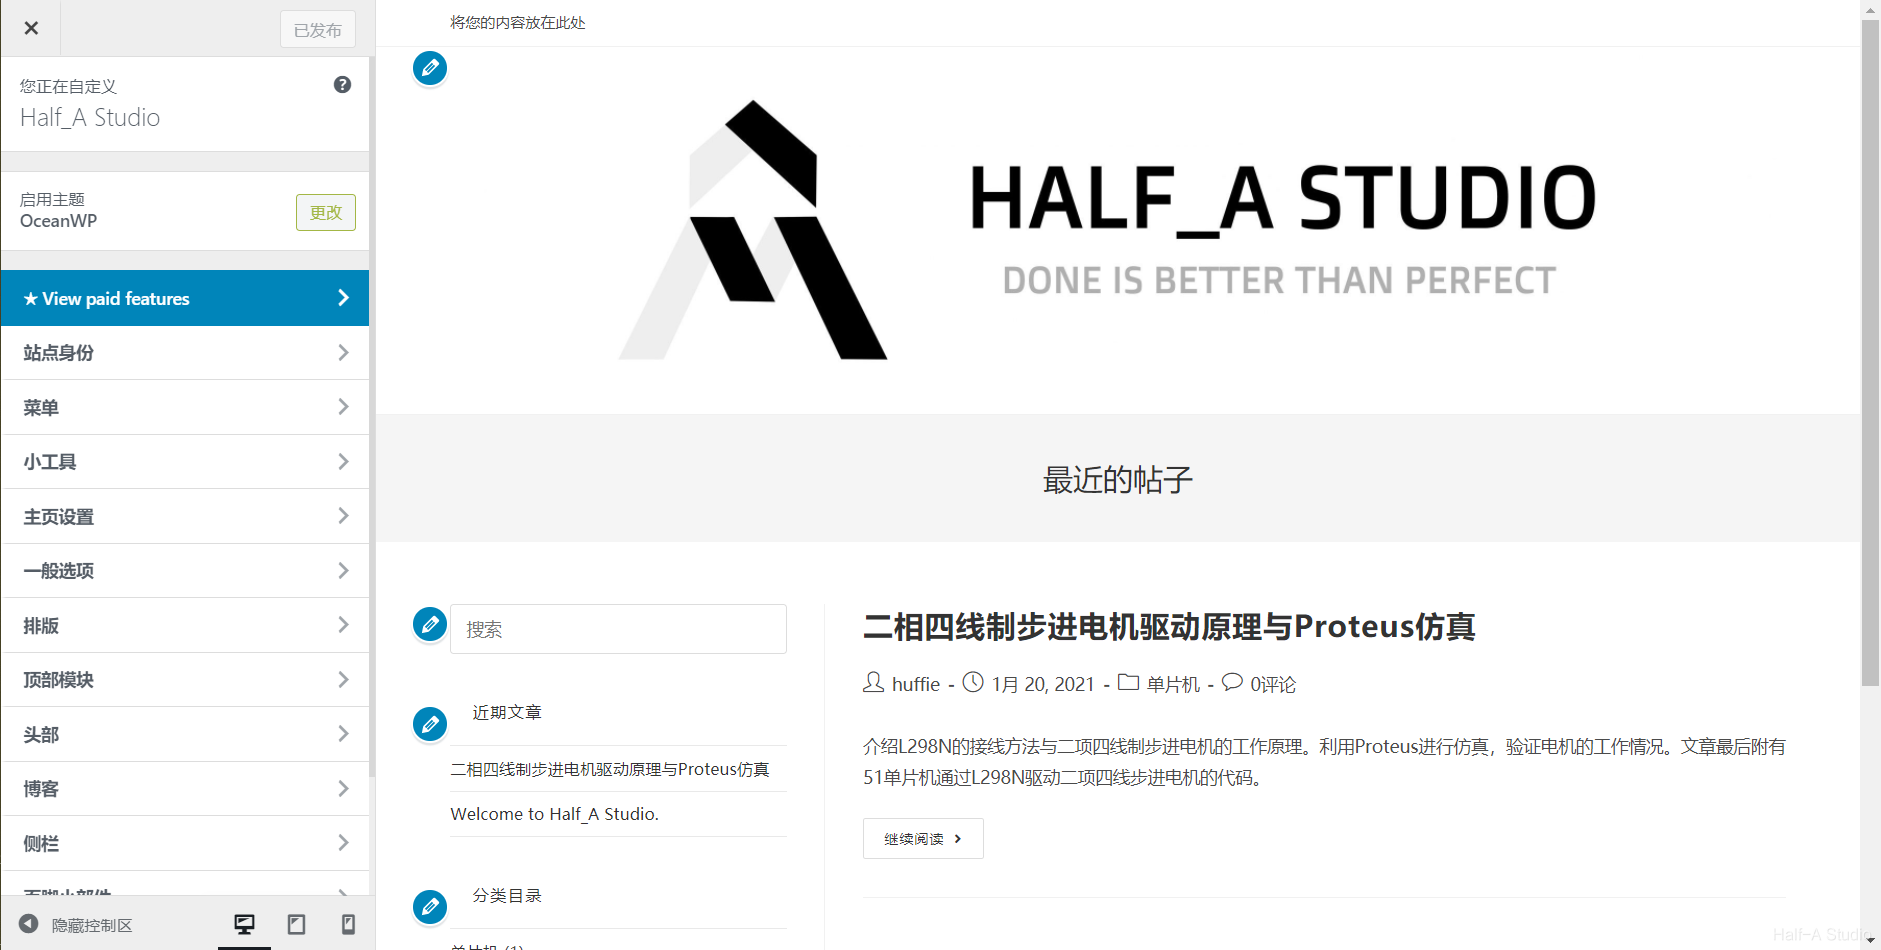
 - Customize a Theme
After clicking Customize, you can see the customization sections on the left (different themes have different sections) and a live preview on the right.
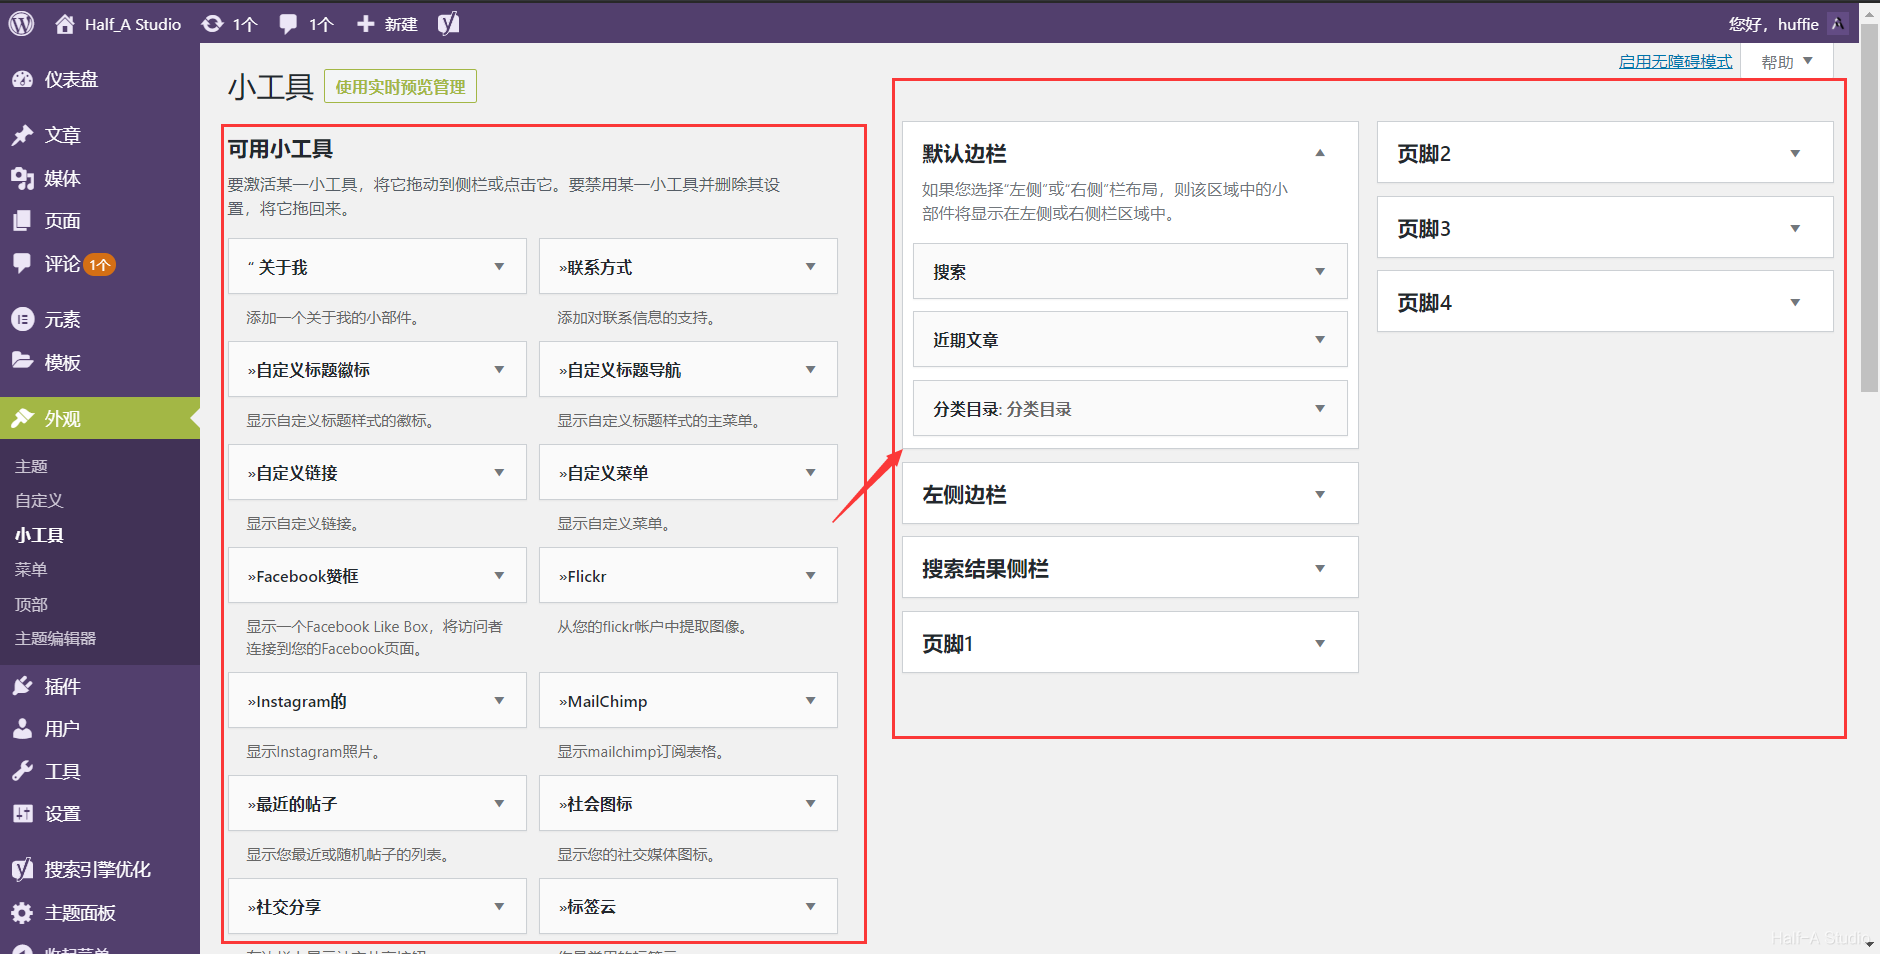
(2) Widgets
Some themes do not provide this feature. Whether it is available depends on the theme.
- On the right side of the Widgets screen, you can see several containers. Modifying these containers changes how the web page looks.
- The available options on the left side of the Widgets screen can be dragged into the containers on the right for use.
3.6 Settings
(1) General Settings
- Site Title: The website’s name
- Tagline: Usually displayed next to the website’s title
- The WordPress Address and Site Address generally use their default values
- Email Address: The email address used to receive site-related notifications
- Membership: Whether the website allows other people to register
- New User Default Role: Considering permissions and security, the Subscriber role is sufficient.
- ICP Filing Number: You can enter the website’s filing number. Whether it is displayed on the website depends on the theme.

(2) Writing Settings
- Default Post Category: If no category is selected when publishing a post, WordPress automatically places the post in the category set here
- Update Services: When new content is published, WordPress automatically notifies the URLs entered under Update Services. (Mainly used for search optimization)

(3) Reading Settings
- Your Homepage Displays: By default, the latest posts are displayed. Selecting a static page lets you set a page published through the admin interface as the site’s homepage
- Syndication Feeds Show the Most Recent: How many items are displayed per page when users subscribe to our website’s content

(4) Discussion Settings
Attempt to Notify Any Blogs Linked to from the Post: When publishing a post, if the post content contains a link and this option is selected, the other party is notified that our link points to them. (Generally not used.)

(5) Media Settings
After an image is uploaded, WordPress automatically creates versions of the image at different pixel sizes.
(6) Permalinks
Switching between different link structures changes the web page’s URL. The main reason for changing it is search engine optimization. Using the post name is generally better.
 Custom Structure
| Code | Purpose |
|---|---|
| %post_id% | Content ID |
| %postname% | Content name |
| %year% | Publication year |
| %monthnum% | Publication month |
| %day% | Specific day |
Comments