I. Windows Setup
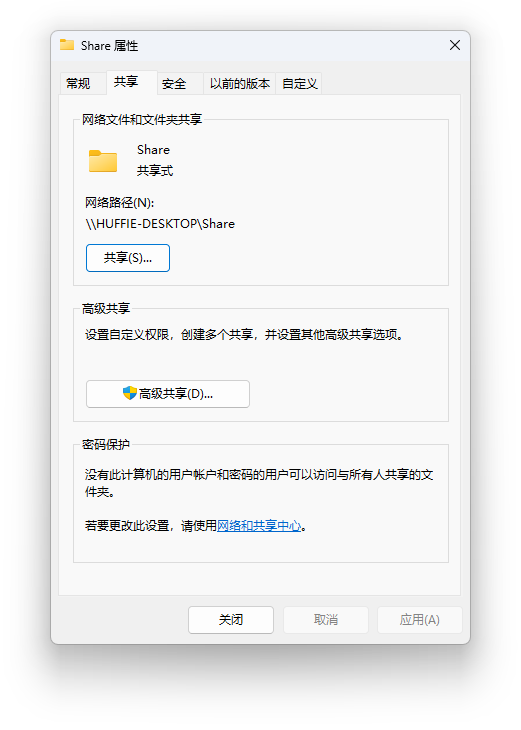
Create a new folder in the desired location, then right-click it and select Share to set it as a shared folder.
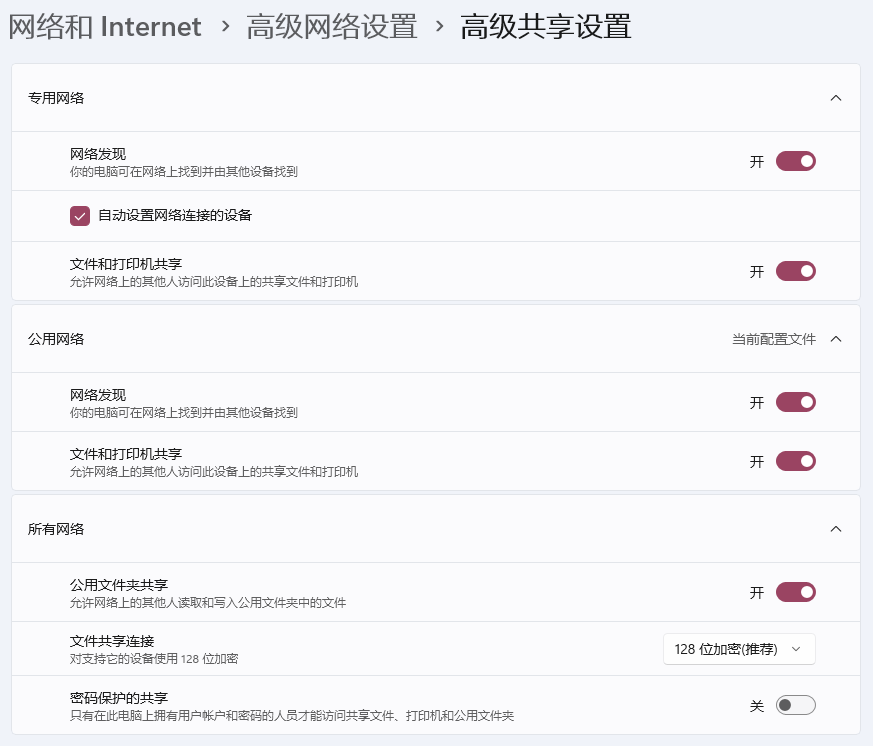
Next, open Settings > Network & Internet > Advanced network settings > Advanced sharing settings and configure it as shown below. Most importantly, enable both options under Public networks, enable sharing under All networks, and disable password-protected sharing.
II. Ubuntu Setup
2.1 Temporary Mount
Use the following command to mount the folder:
sudo mount -t cifs //192.168.3.67/home/Share ~/Share -o username='admin',password='123456',dir_mode=0777,file_mode=0777,vers=2.02.2 Automatic Mount
sudo gedit /etc/fstabAdd the following line at the end in the format shown below:
//192.168.1.143/home/Share ~/share cifs defaults,username=admin,password=123456,dir_mode=0777,file_mode=0777,vers=2.0 0 2
Comments