Contents
Overview
This experiment uses an ESP8266 NodeMCU
Hardware
Flashing the 8266 firmware
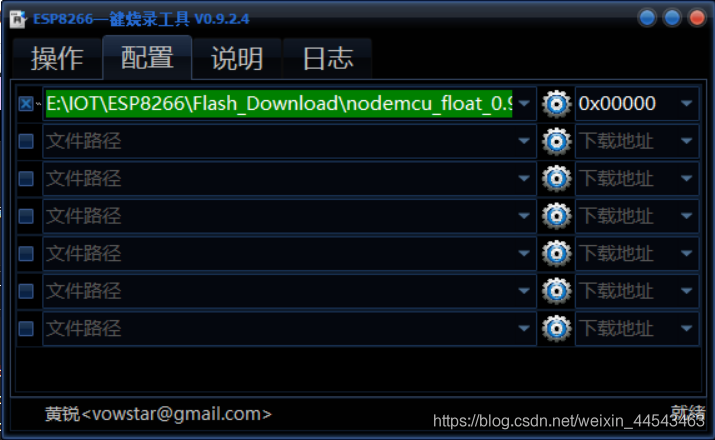
The firmware flashed is the official NodeMCU firmware. Open the official ESP8266Flasher, select the NodeMCU firmware in the Config tab, and set the flash address to 0x00000.
Downloading the ESP8266 board package in Arduino IDE
Open Arduino IDE, and under File > Preferences > Additional Boards Manager URLs, enter:
http://arduino.esp8266.com/stable/package_esp8266com_index.json
 Then open Tools > Board > Boards Manager, type esp8266 in the search box, select the board package you want from the results below, and click Install. (The download is slow; a VPN helps.)
 That finishes the hardware setup. Next you can program the ESP8266 with Arduino IDE.
Installing the MQTT library
Because this program involves MQTT, you also need an MQTT library for the sketch to compile. Open Sketch > Include Library > Manage Libraries. There are many MQTT libraries to choose from; I use PubSubClient.

ESP8266 program design
The code is not long; it is pasted below.
#include <ESP8266WiFi.h>
#include <PubSubClient.h>
WiFiClient espClient;
PubSubClient client(espClient);
const char* wifissid = "Wifi_SSID"; //自己家WIFI
const char* password = "Wifi_Password"; //自己家WIFI密码
const char* mqtt_server = "***,***,***,***";//MQTT服务器地址
const char* mqtt_id = "827855942_ESP";//MQTT ID需要唯一,这里我设置成自己的QQ号+_ESP
const char* Mqtt_sub_topic = "827855942_ESP";   //ESP8266订阅的topic,其他客户端向此topic发送信息时ESP8266会收到,设成自己的QQ号+_ESP
const char* Mqtt_pub_topic = "827855942";  //ESP8266发布消息的topic,上报消息给手机APP的TOPIC,设成自己的QQ号
long lastMsg = 0; //定时用的

void setup() {
  pinMode(2, OUTPUT);
  Serial.begin(115200);//设置波特率
  setup_wifi();//初始化wifi
  client.setServer(mqtt_server, 1883);//设定MQTT服务器与使用的端口,1883是默认的MQTT端口
  client.setCallback(callback); //设定回调方式,当ESP8266收到订阅消息时会调用此方法
}

//初始化Wifi
//连接成功后可在串口监视器看到ESP8266的IP地址
void setup_wifi() {
  Serial.println();
  Serial.print("Connecting to ");
  Serial.println(wifissid);
  WiFi.begin(wifissid, password);
  while (WiFi.status() != WL_CONNECTED) {
    delay(500);
    Serial.print(".");
  }
  Serial.println("");
  Serial.println("WiFi connected");
  Serial.println("IP address: ");
  Serial.println(WiFi.localIP());
}

//回调函数,参数固定不能改
//payload内容可以是任意的,此程序中传递的是JSON数据
void callback(char* topic, byte* payload, unsigned int length) {
  String msg="";
  String LED_set = "";
  Serial.print("Message arrived [");
  Serial.print(topic);
  Serial.print("] ");
  //msg中存放的就是传递过来的json数据,此处为{"set_led":1}格式
  for (int i = 0; i < length; i++) {
    msg+= (char)payload[i];
  }
  Serial.println(msg);
  if(msg.indexOf("led"))  //判断是否是要设置LED灯
  {
    //取出LED_set数据 并执行
    LED_set = msg.substring(msg.indexOf("led\":")+5,msg.indexOf("}"));
    digitalWrite(2,!LED_set.toInt());
  }
}

//断线重连
void reconnect() {
  while (!client.connected()) {
    Serial.print("Attempting MQTT connection...");
    if (client.connect(mqtt_id)) {
      Serial.println("connected");
      //连接成功以后就开始订阅
      client.subscribe(Mqtt_sub_topic,1);
    } else {
      Serial.print("failed, rc=");
      Serial.print(client.state());
      Serial.println(" try again in 5 seconds");
      delay(5000);
    }
  }
}

void loop() {
  //MQTT是否连接,若未连接则重连
  if (!client.connected()) {
    reconnect();
  }
  client.loop();
  long now = millis();//运行时间
  if (now - lastMsg > 2000) {
    lastMsg = now;
    //打包发送数据给pubtopic
    String json = "{\"temperature\":"+String(analogRead(A0))+"}";
    client.publish(Mqtt_pub_topic,json.c_str());
  }
}
App section
Create a project
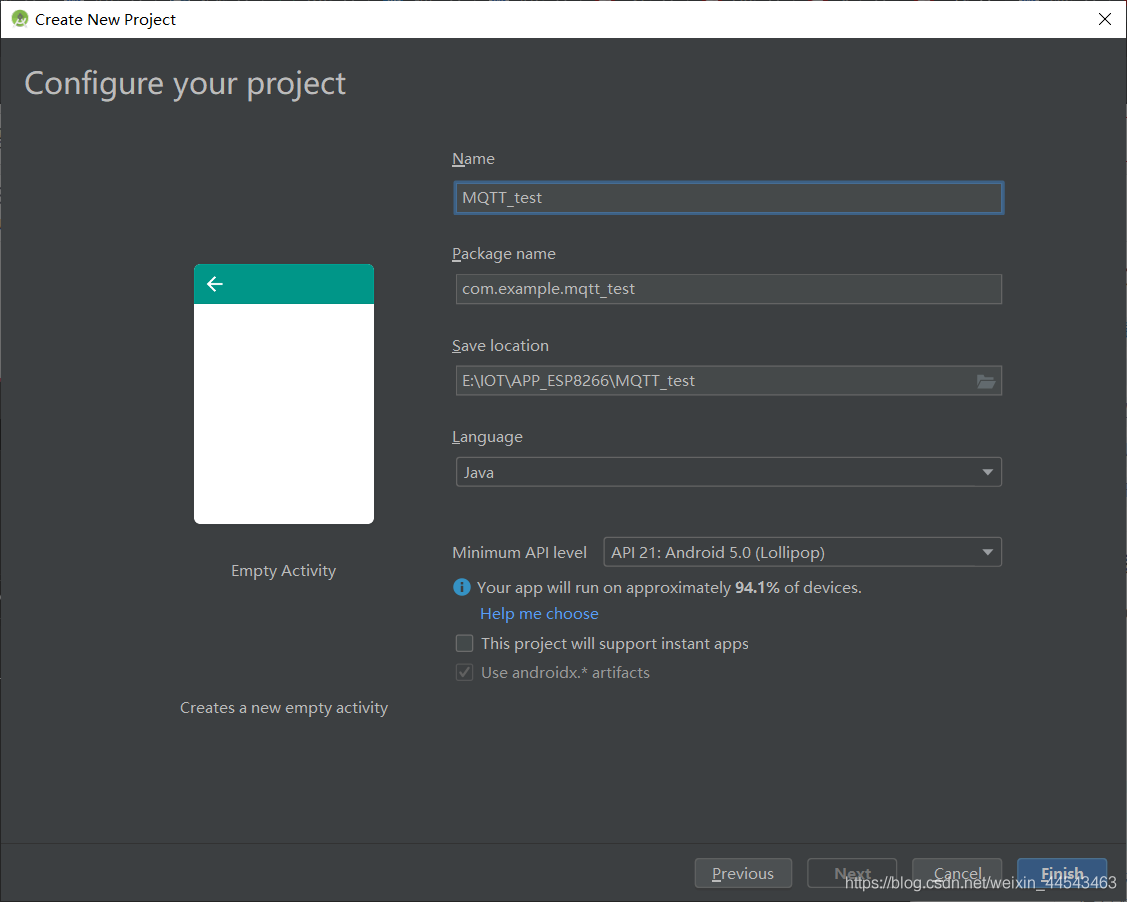
Start a new Android project. I chose Empty Activity, with any name, language java, and an Android version less than or equal to the phone’s Android version. (Prefer debugging on a real device; emulators have too many bugs.)
UI design
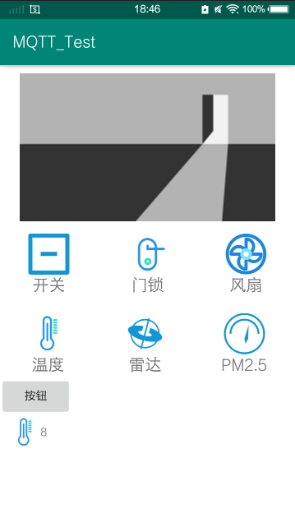
Open the activity_main.xml file under app-res-layout and design the UI.
Common snippets are listed below.
java android:orientation="vertical" //设置线性布局方向 android:background="#FFFFFF" //设置背景色 android:src="@drawable/pic" //ImageView下添加图片 android:layout_margin="10dp" //设置距离父空间边缘距离 android:id="@+id/image_1 //设置id android:layout_weight="1" //布局内设置权重 android:gravity="center_vertical" //布局内设置垂直居中
Main program design
Open MainActivity.java and write the program.
- The OnCreate function is the first place that runs after the program opens.
- Port the
Mqtt_init()function - Port the
startReconnect()function - Port the
publishmessageplus()function - Add the following in OnCreate
  Mqtt_init();
  startReconnect();
  handler = new Handler() {
Note: after each small step, flash to a real device and debug, to avoid painful bug hunts
- Button click event
button_1 = findViewById(R.id.button_1); //寻找XML里面真正的ID,与自己初始化的变量绑定
button_1.setOnClickListener(new View.OnClickListener() {
	@Override
	public void onClick(View v) {
	//这里是单击之后执行的地方
	//在当前ativity 显示内容为hello的短时间弹窗
	Toast.makeText(MainActivity.this,"hello",Toast.LENGTH_SHORT).show();
	}
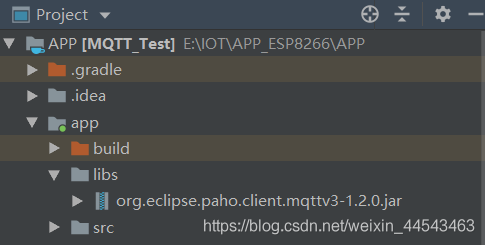
});- Import the JAR package Copy the MQTT JAR into the app’s libs folder Right-click the JAR → Add as Library → OK
That completes basic communication between the app and the ESP8266.
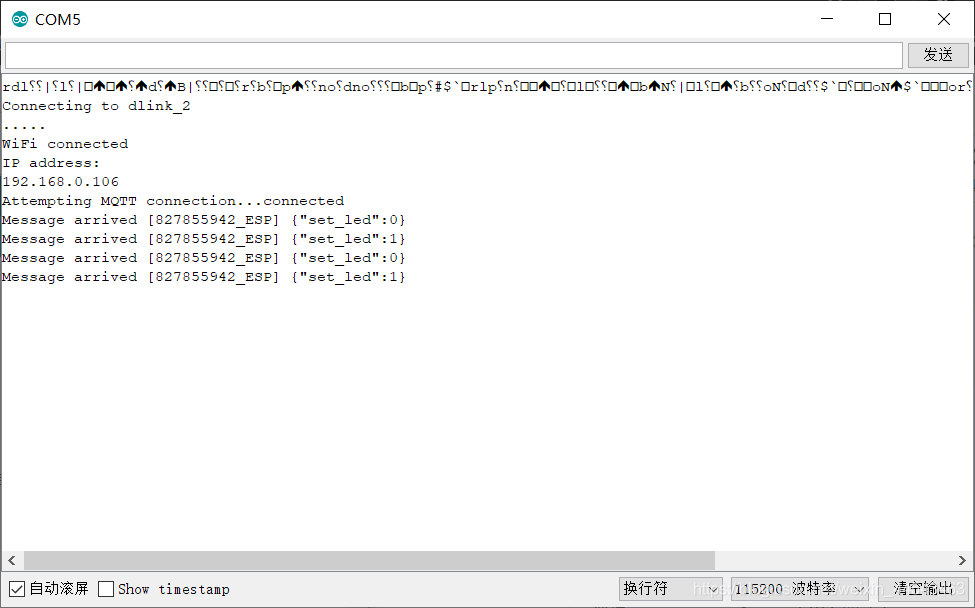 Thanks to Zheng Ge, Bilibili uploader Azheng Langge Ligelang, for the expert’s tutorial.
Comments