Contents
I. Software Preparation
1.1 Download and Extract OpenCV
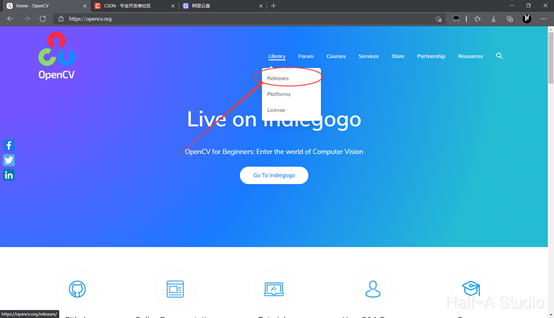
I recommend downloading the Windows installer from the official OpenCV website.
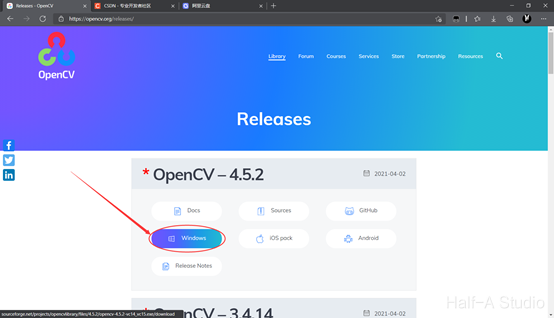
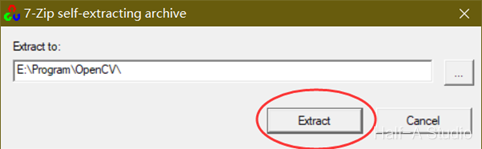
After the download is complete, double-click the file to run it. Make sure to extract it to an English-only path. Wait for the extraction to finish.
1.2 Download and Install Visual Studio
I am using Visual Studio 2019 Professional here. You can download it from the official website. Other versions of VS will also work; there are no specific requirements.
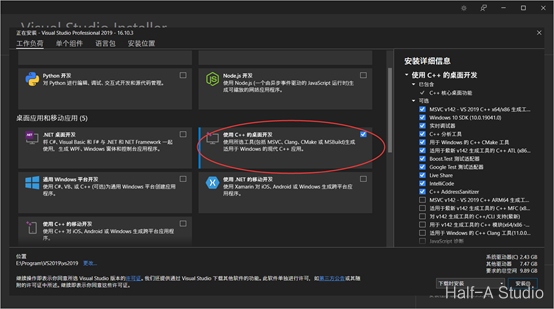
During installation, select Desktop development with C++, then change the installation location. You can leave the other settings at their defaults.
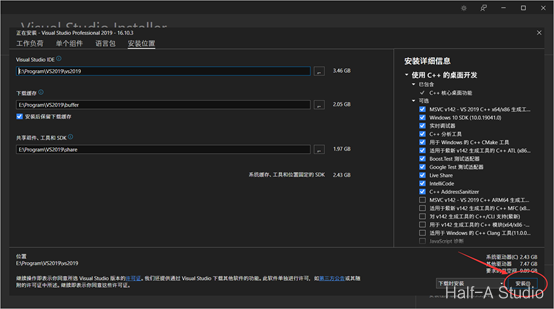
After installation, if you need a VS2019 Pro registration key:
NYWVH-HT4XC-R2WYW-9Y3CM-X4V3Y
II. Configure the OpenCV Environment
2.1 Create a Project
Create a new console project.
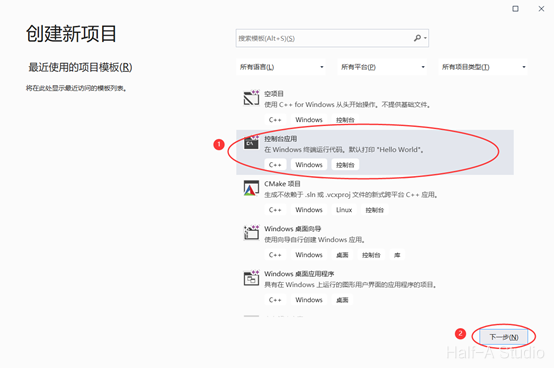
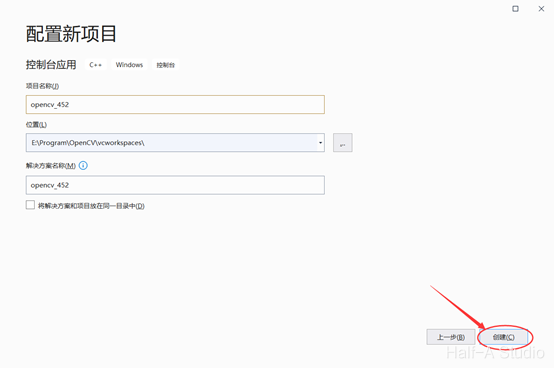
Set the configuration to Release and the platform to x64, as shown below.

2.2 Configure Properties
Open View > Other Windows > Property Manager (in other versions of VS, this may be View > Property Manager).
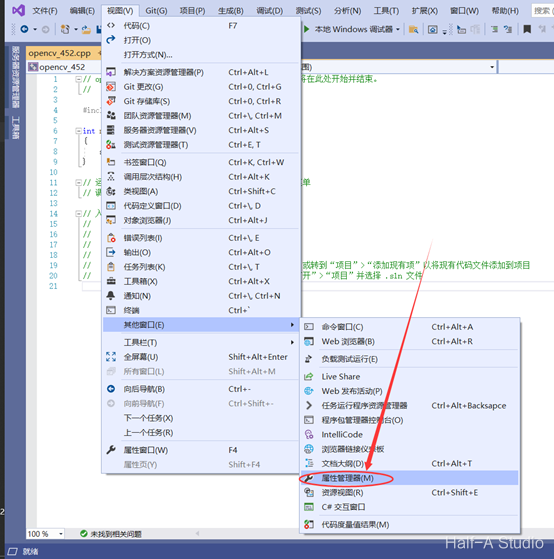
In Property Manager, right-click “Microsoft Cpp x64 user” and select Properties to open its property pages.
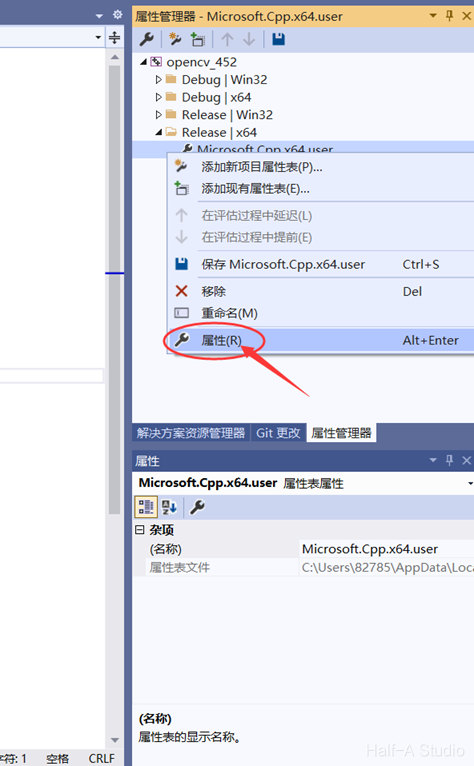
① Configure VC++ Directories > Include Directories

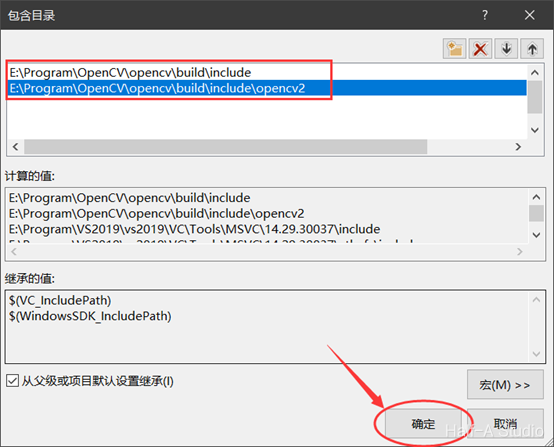
Add two new lines on the edit page. The first is the opencv/build/include directory under the extracted OpenCV folder, and the second is the opencv/build/include/opencv2 directory. After adding them, click OK to return to the property pages.

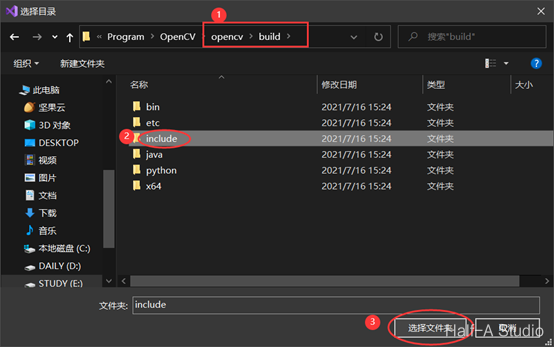

② Next, configure VC++ Directories > Library Directories
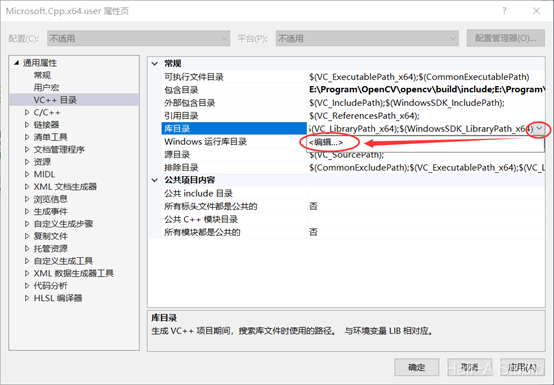
Add opencv/build/x64/vc15 on the edit page. After adding it, click OK again to return to the property pages.
If you are using VS2019, the latest vc15 is a better choice. If you are using an earlier version, you can select the vc14 directory.
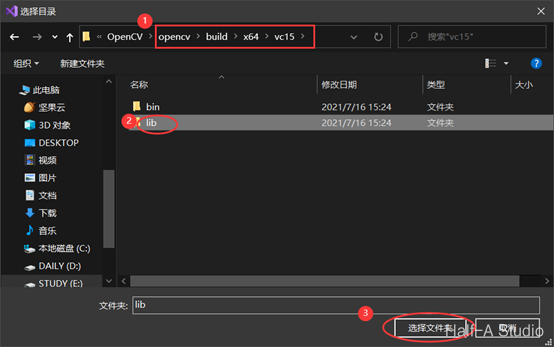
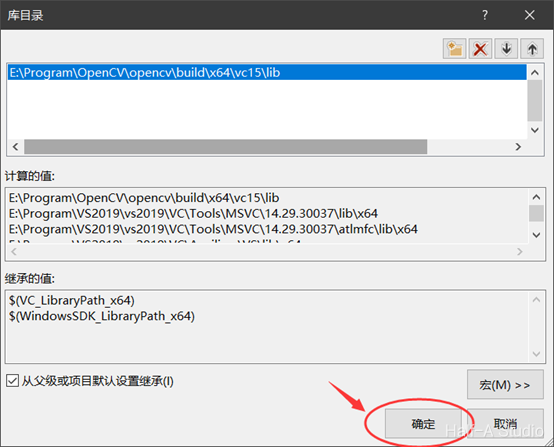
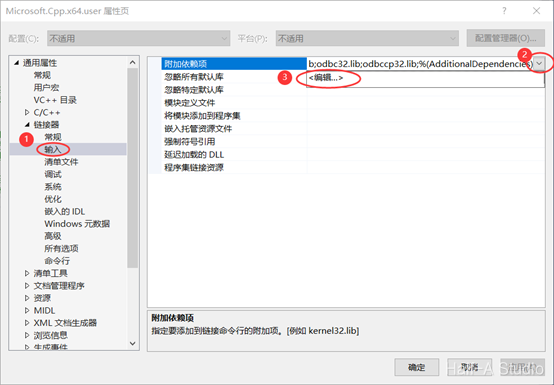
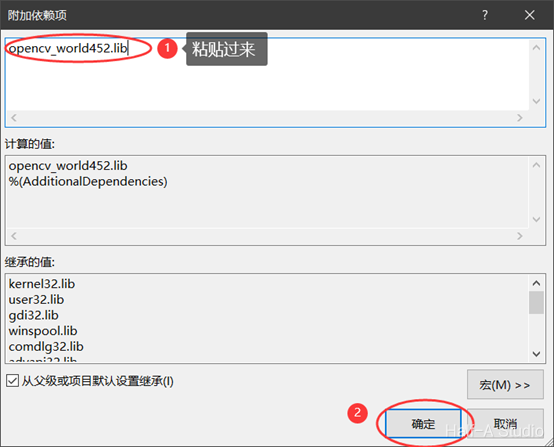
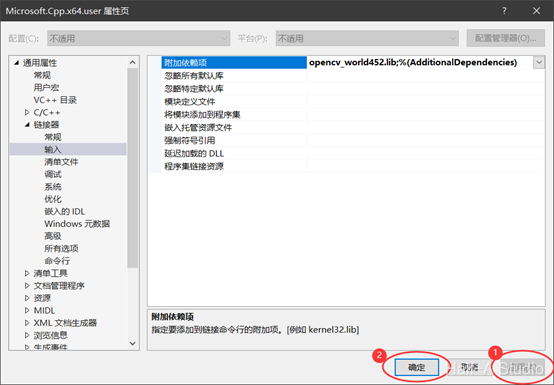
③ Next, configure Linker > Input > Additional Dependencies
Copy the name of the lib file for the Release version and paste it into the edit field.
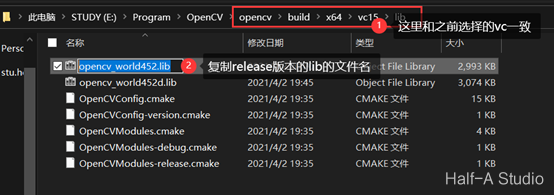
After completing the configuration above, click Apply > OK in the lower-right corner.
2.3 Configure Environment Variables
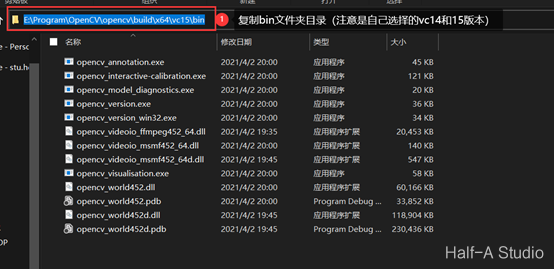
Copy the bin folder path.
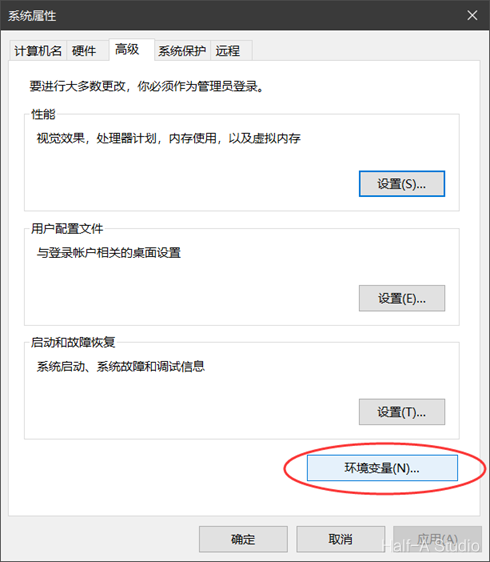
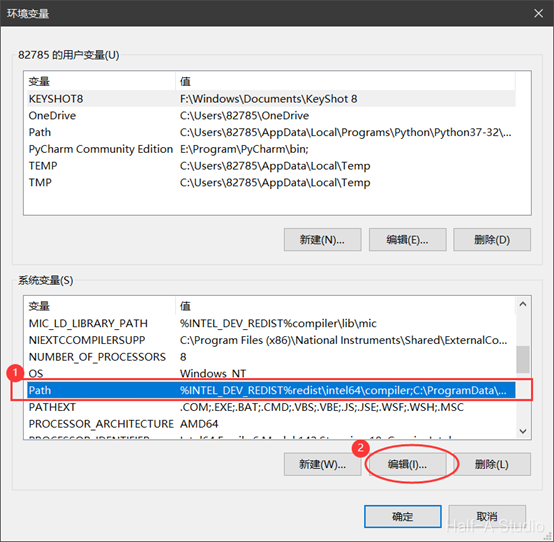
Return to the desktop, right-click Computer > Properties > Advanced system settings, and open Environment Variables.

Find Path under System variables and click Edit.
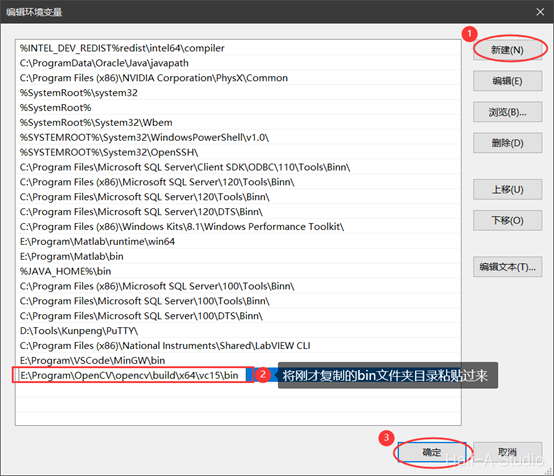
Add a new entry, paste in the bin folder path you just copied, and then click OK.
Close Visual Studio, then reopen it.
III. Test Program
Add the following code to the cpp file you created:
#include <opencv2/opencv.hpp>
#include <iostream>

using namespace cv;

int main(int argc, char** argv) {
	Mat src = imread("F:/NutStore/Documents/素材库/Logo/Huffie.jpg");//自己找一张图片
	imshow("input", src);
	waitKey(0);
	destroyAllWindows();;
	return 0;
}
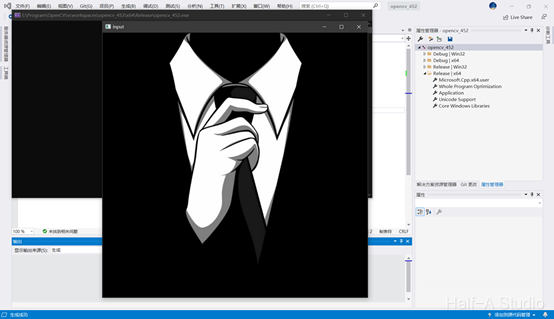
Then build the solution. If there are no errors, congratulations! If an error occurs, study and search for its cause on your own, or carefully check each step above.

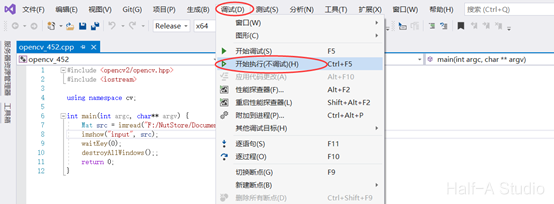
Test > Start Without Debugging
Comments