Contents
This article covers the process of creating a robot path after the mechanical model has been built and the robot system has been created. The initial interface is shown below:
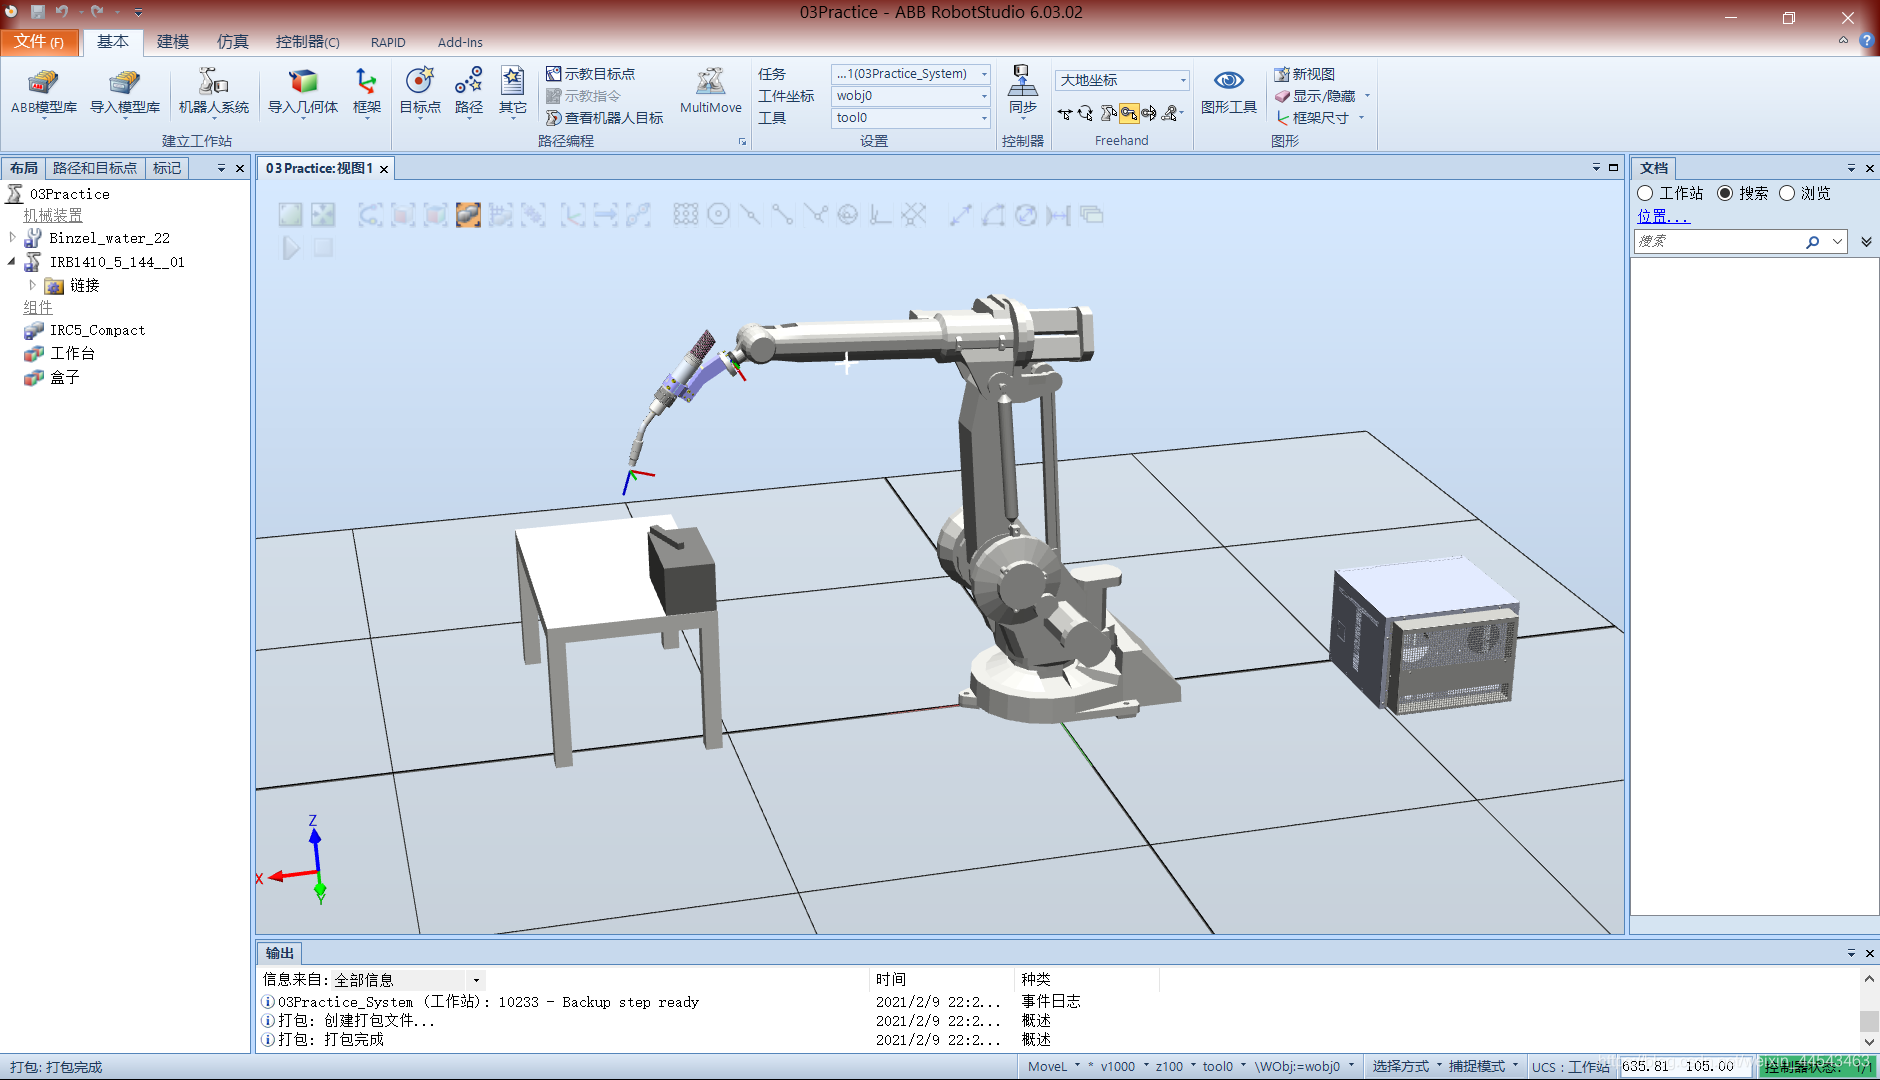
The project files have been uploaded to a cloud drive They include the initial project file (03Practice_init.rspag), the completed project file (03Practice.rspag), and model files. Link: https://pan.baidu.com/s/1f0RL-iLBm2Kxd0NbLduv0Q Extraction code: rs03
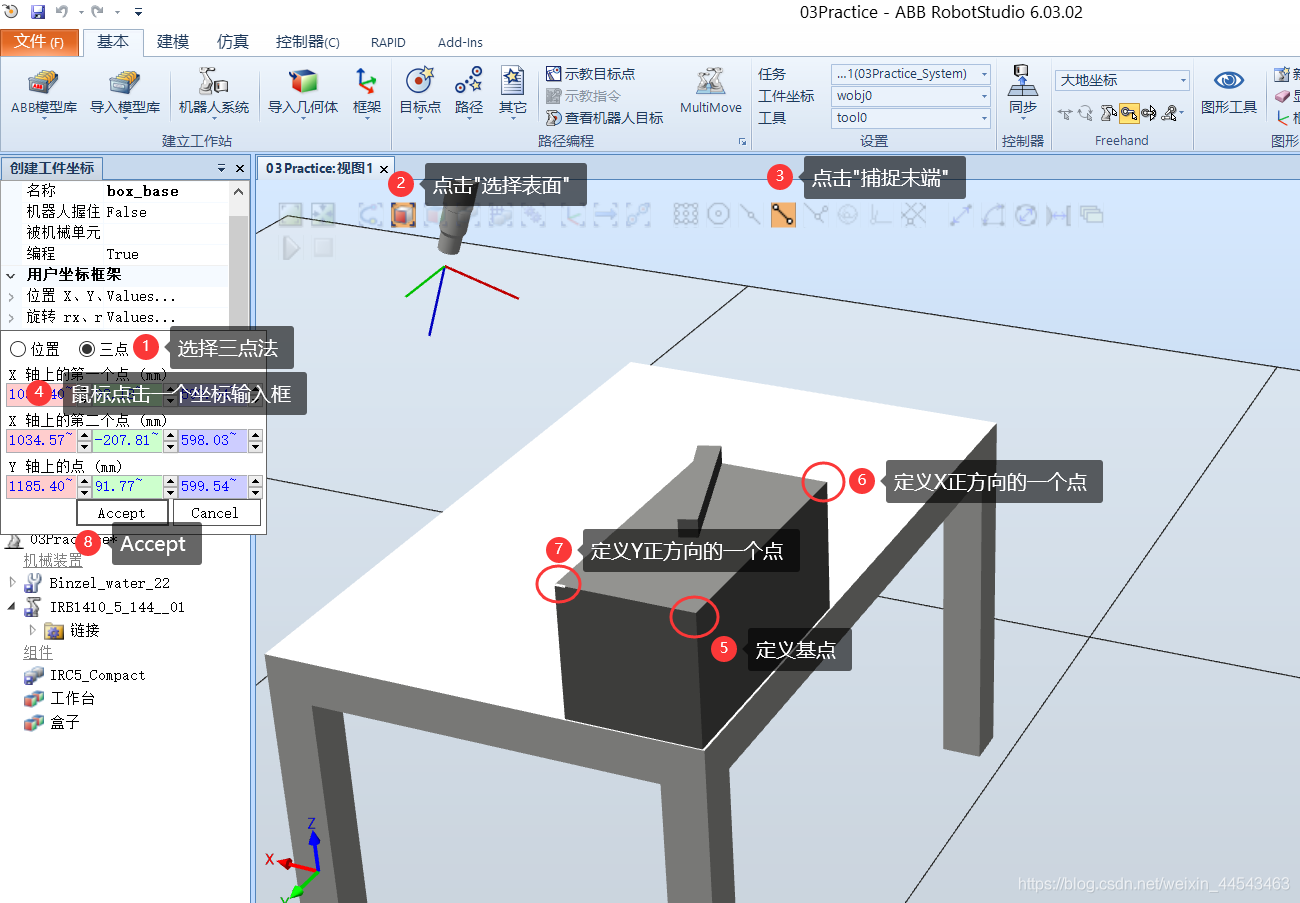
Creating the WorkObject Coordinate System

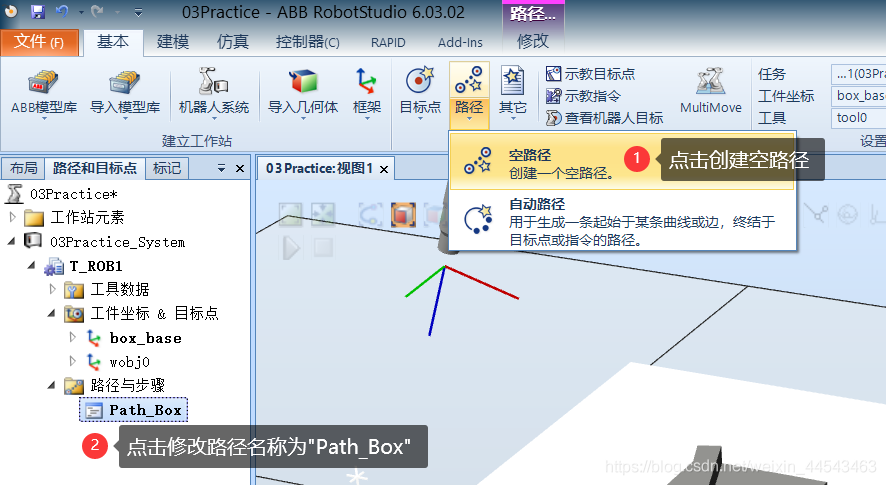
Creating the Robot Path
- First, create an empty path.
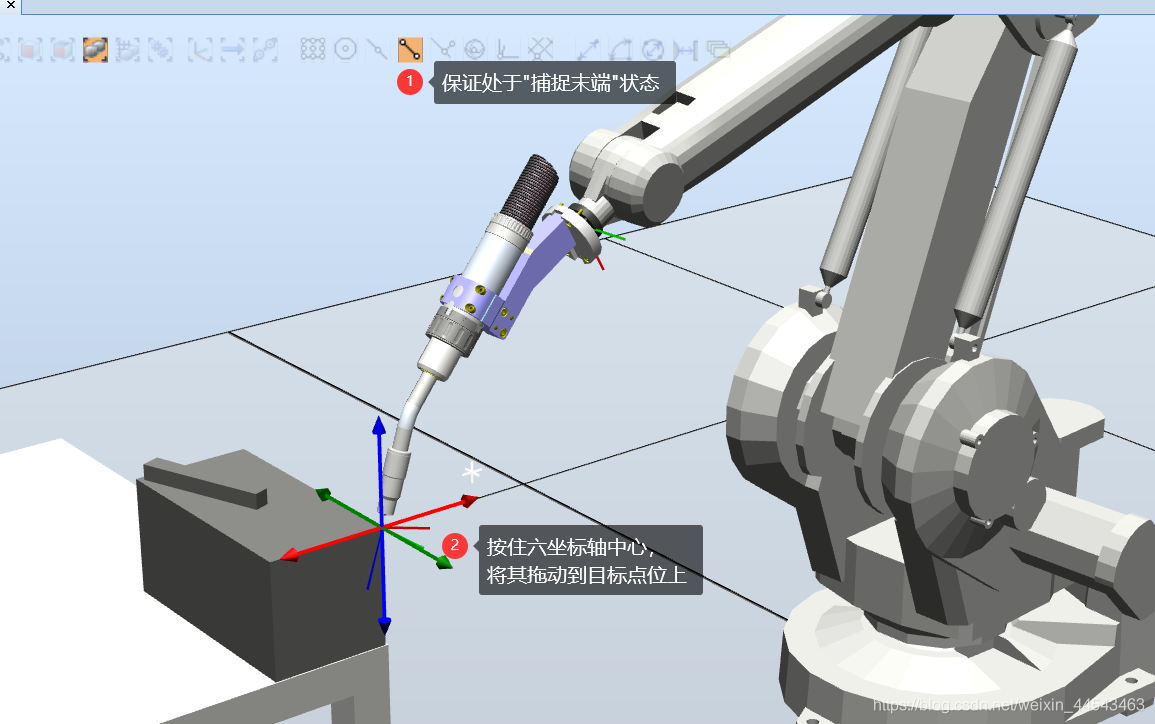
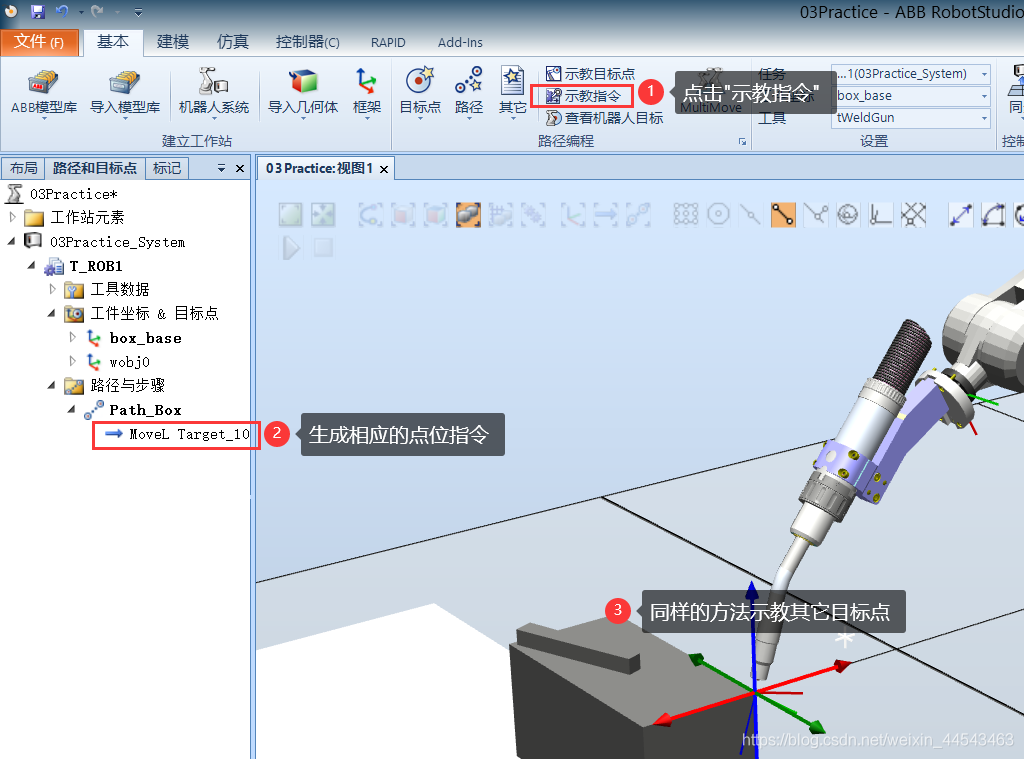
- Change the robot pose and move the tool to the target point to teach the target.
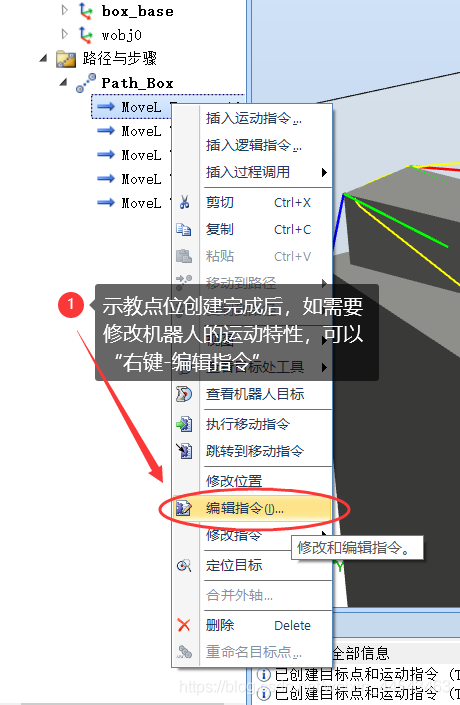
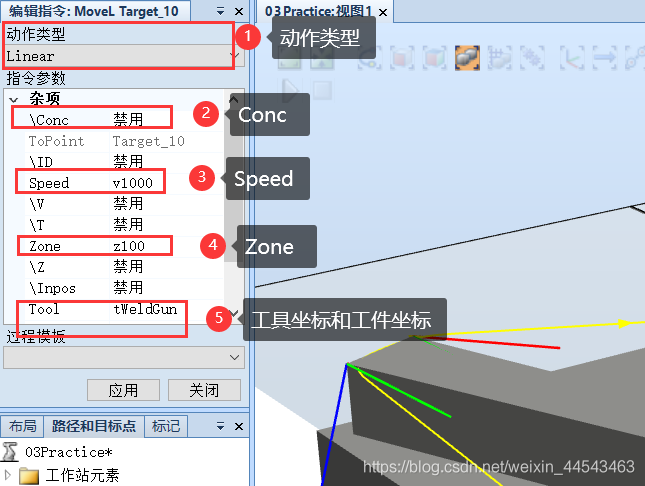
- Motion type
- Joint: The robot moves to this point using point-to-point motion (not in a straight line; each axis moves freely).
- Linear: The robot moves in a straight line from the previous point to the next point.
- Conc
- Disabled: The robot reaches this point precisely.
- Enabled: The robot passes this point according to the Zone parameter.
- Speed: The robot’s motion speed
- Zone: When Conc is enabled, the radius of the arc along which the robot passes the target point
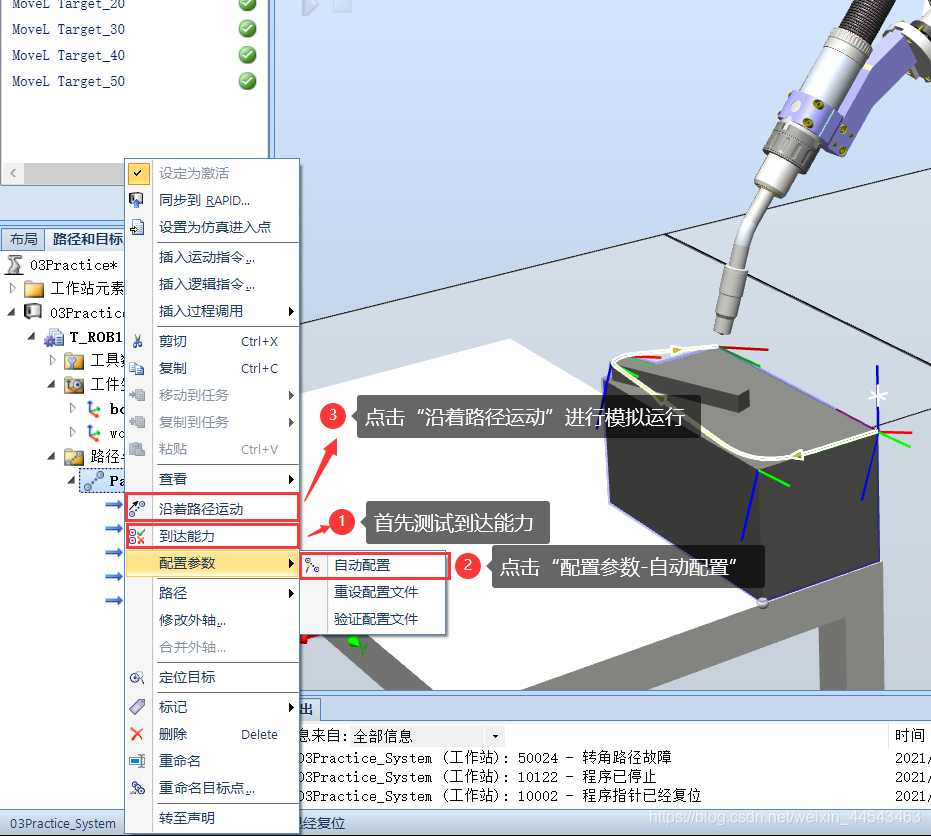
- Test reachability and perform a simulated run.
Simulation and Video Recording
- Synchronize the station to RAPID code.
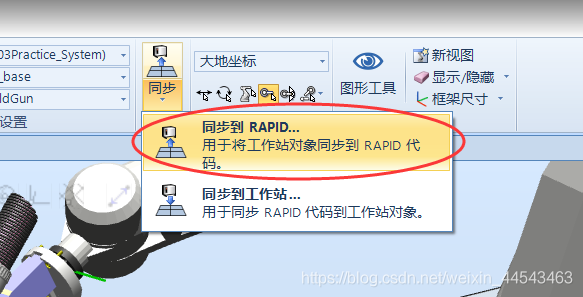
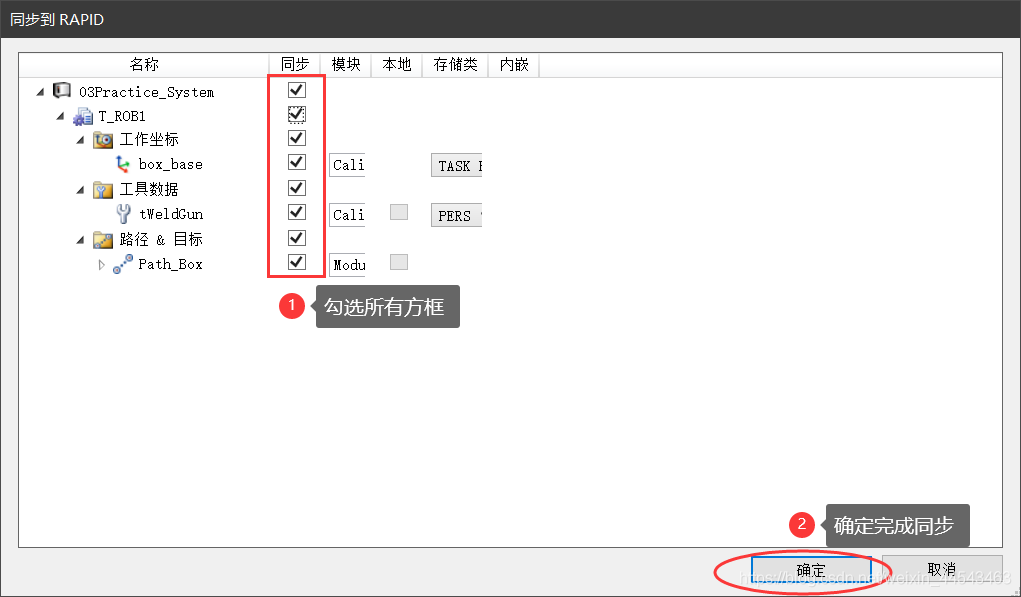
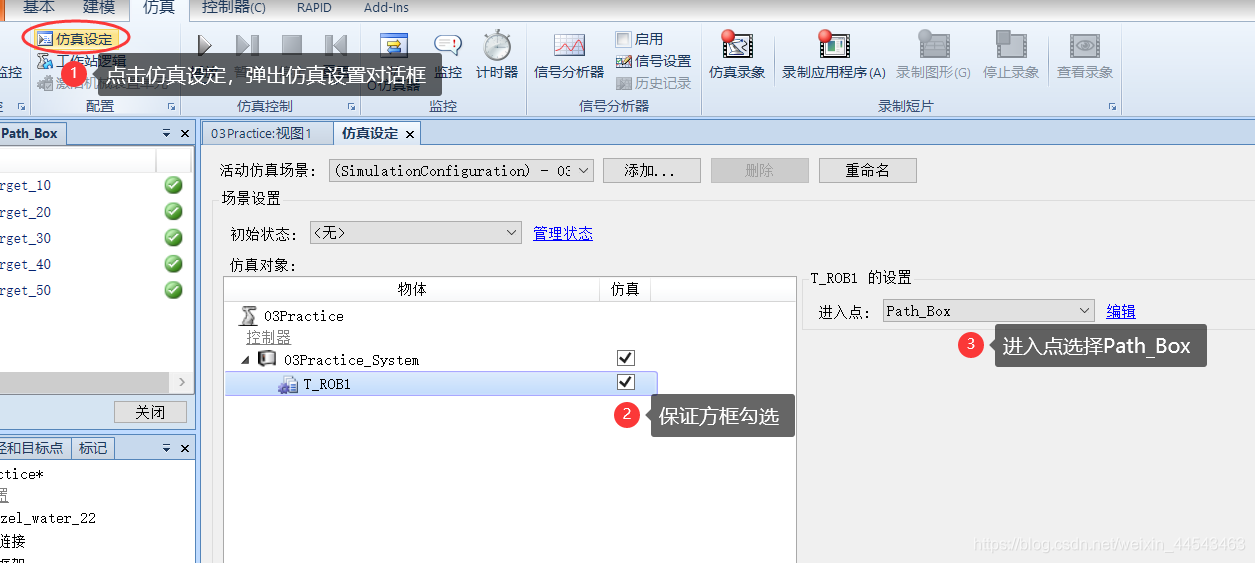
- Configure the simulation.
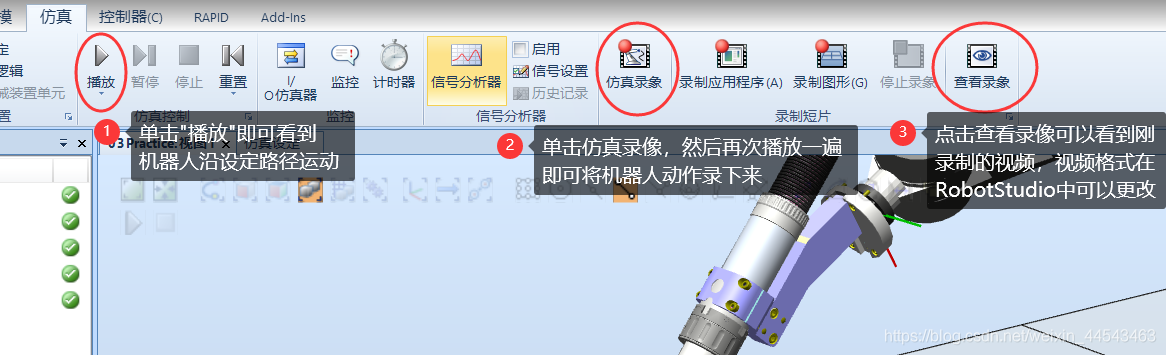
- Play the simulation, record it, and save the video. (Recorded videos are saved by default in the This PC/Videos directory.)
Comments