Contents
I. Introduction to WorkObject Coordinates
Create a Cartesian coordinate system at any position and orientation on the target workbench; this is called a WorkObject coordinate system. By creating WorkObject coordinate systems at different locations, the same program can perform the same process at those different locations.
II. Setting WorkObject Coordinates Using the 3-Point Method
- Go to Jogging - WorkObject - New and create a WorkObject
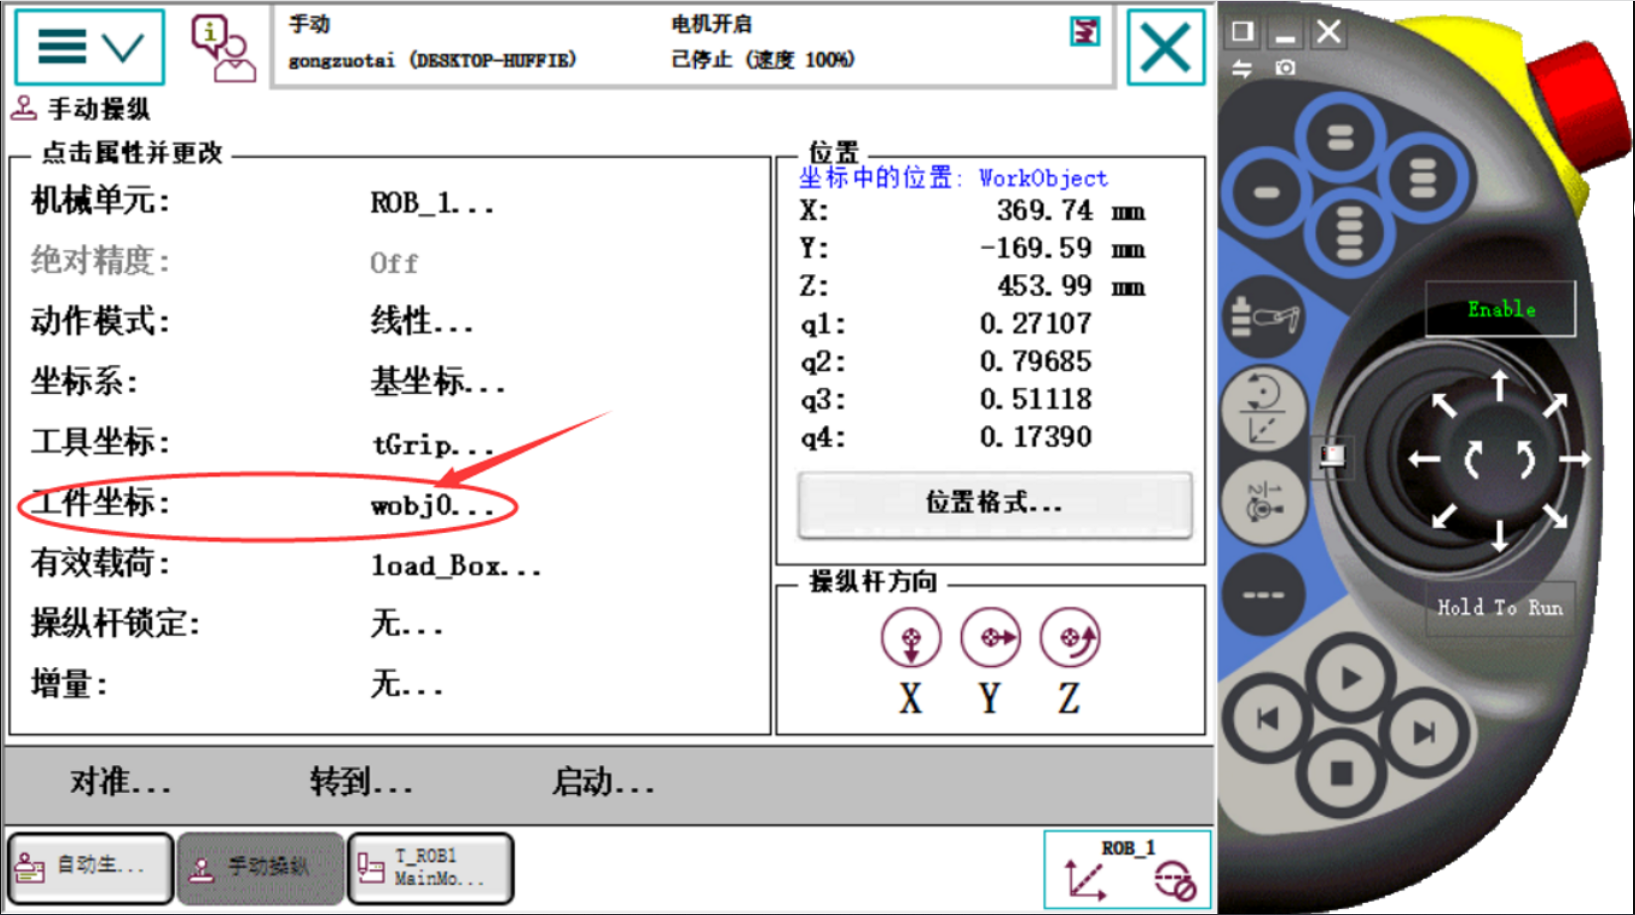
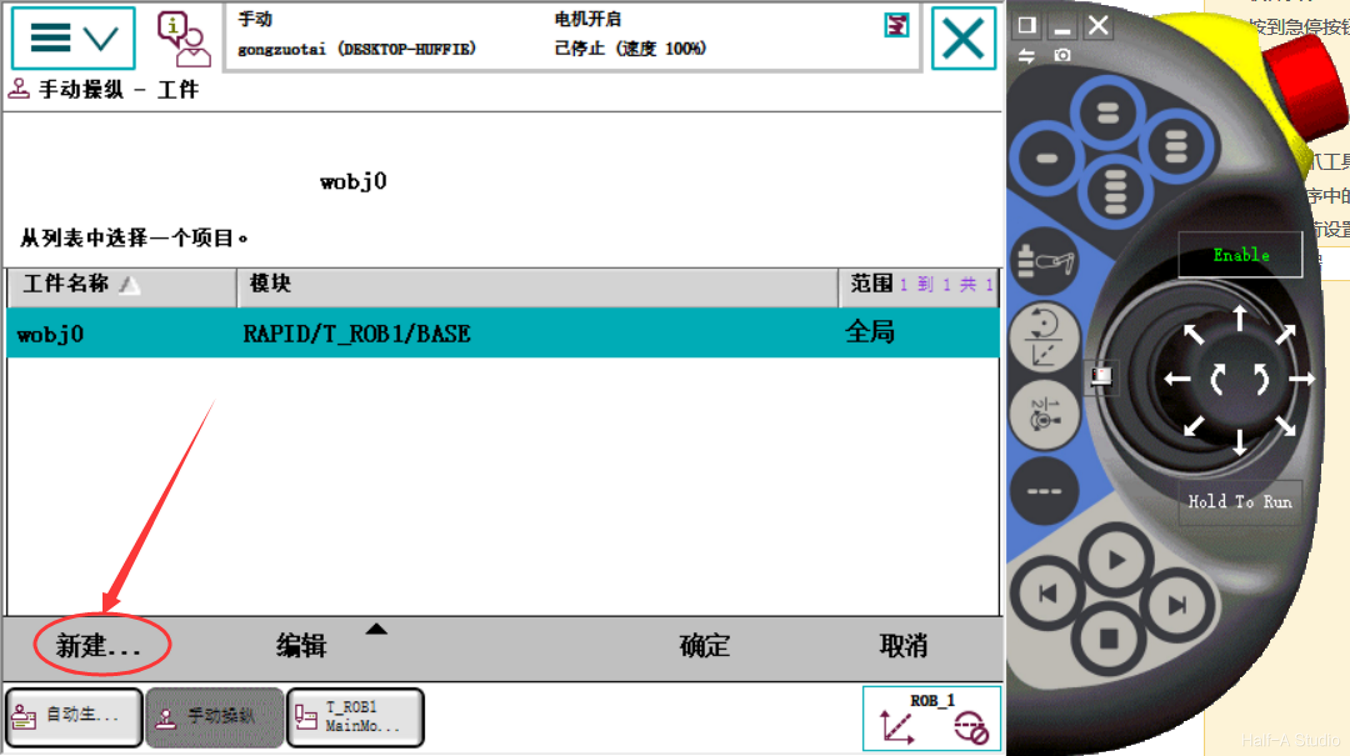
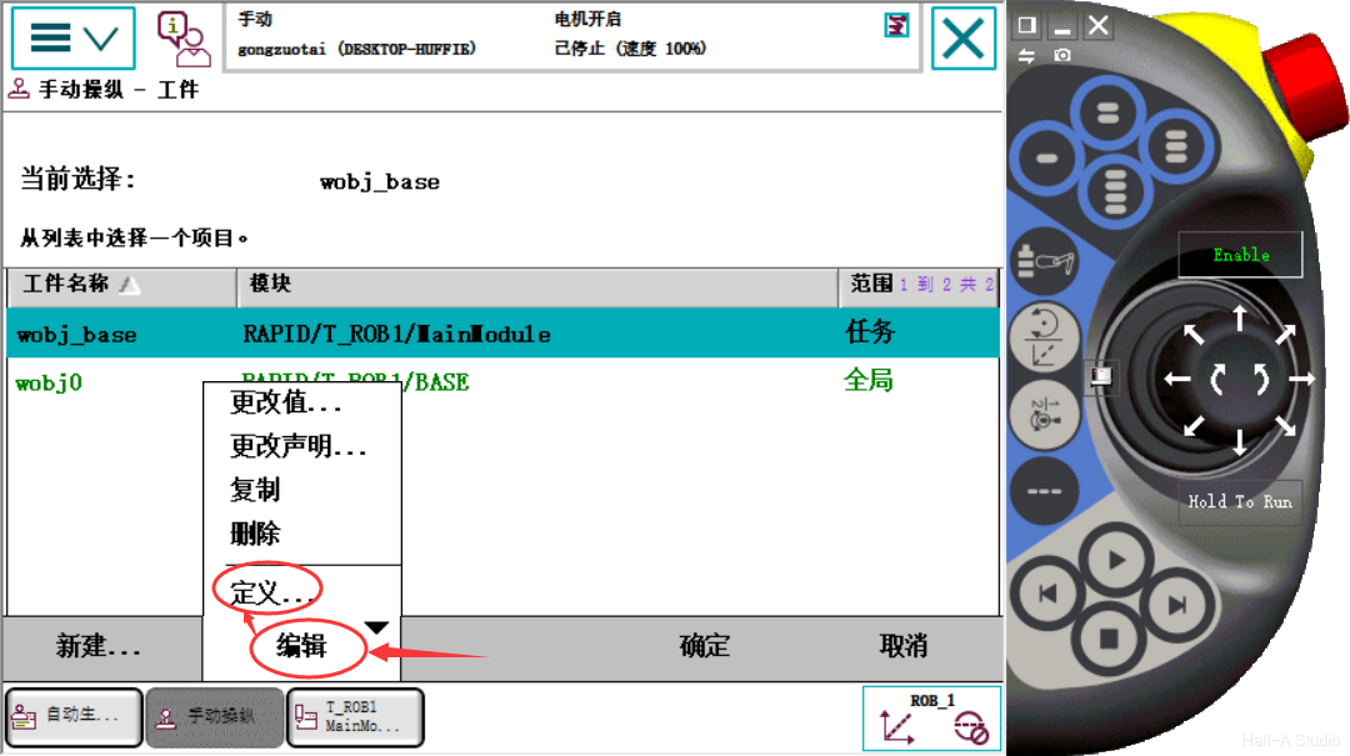
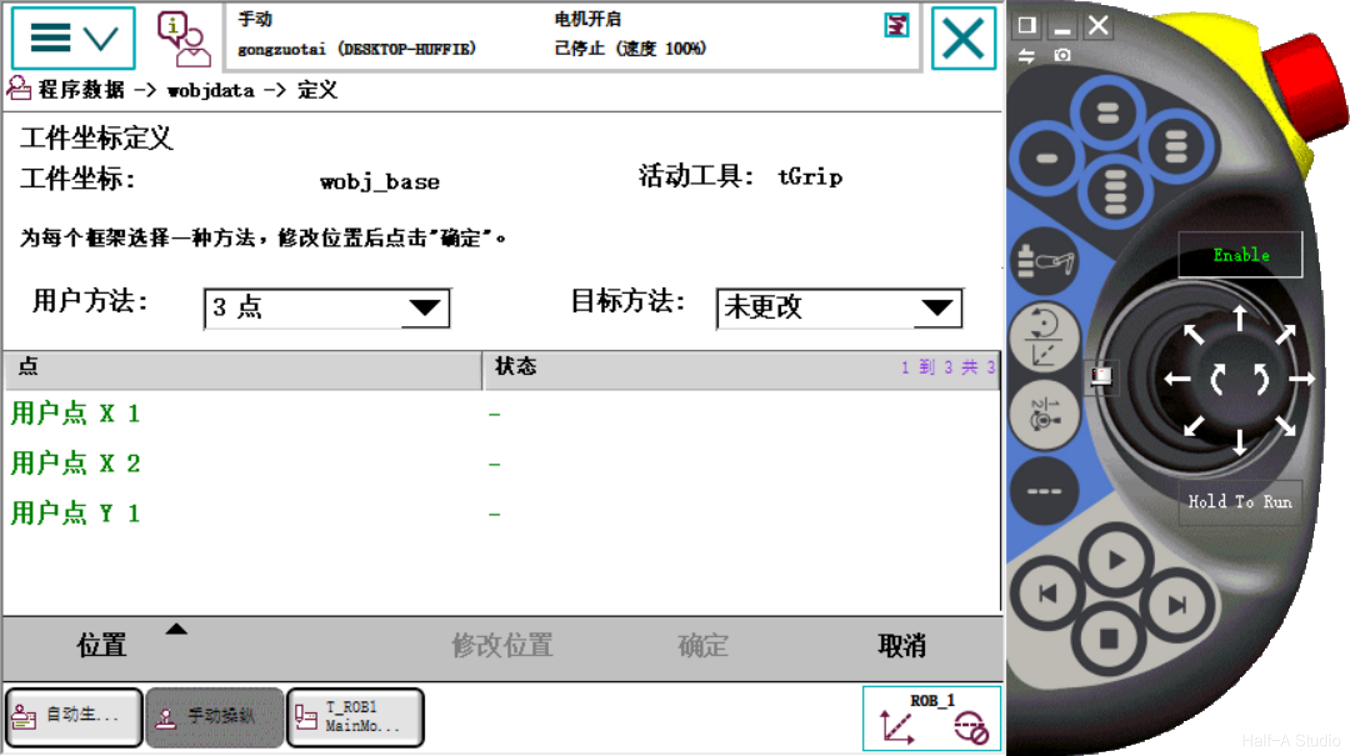
- Select the newly created WorkObject, tap Edit - Define, and set User method to 3 points
- Suppose you want to create the coordinate system shown below
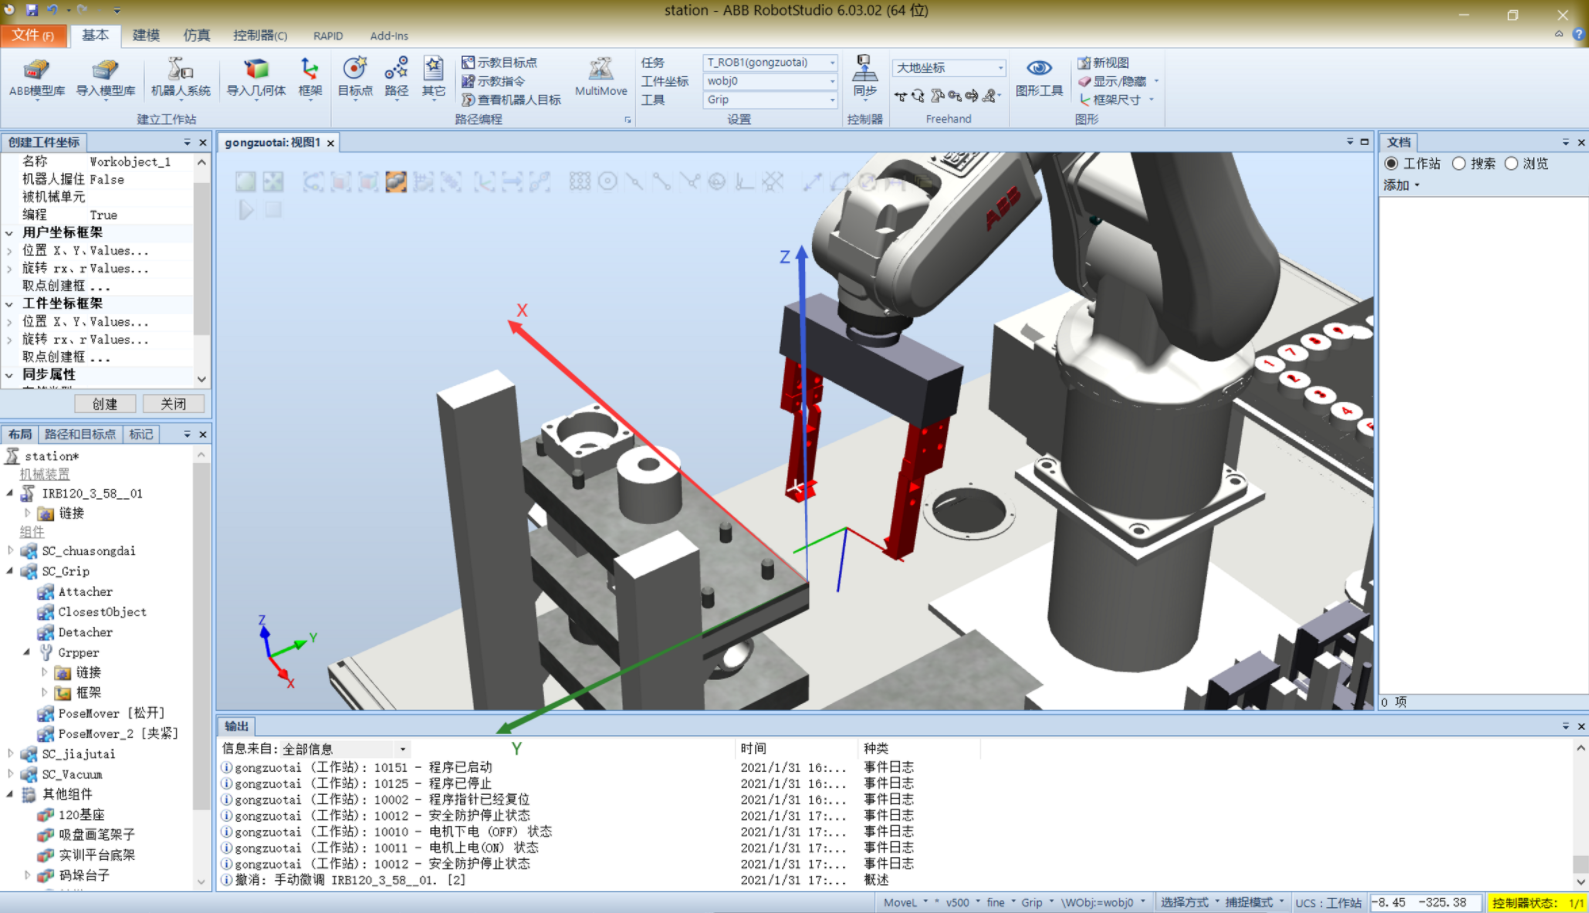
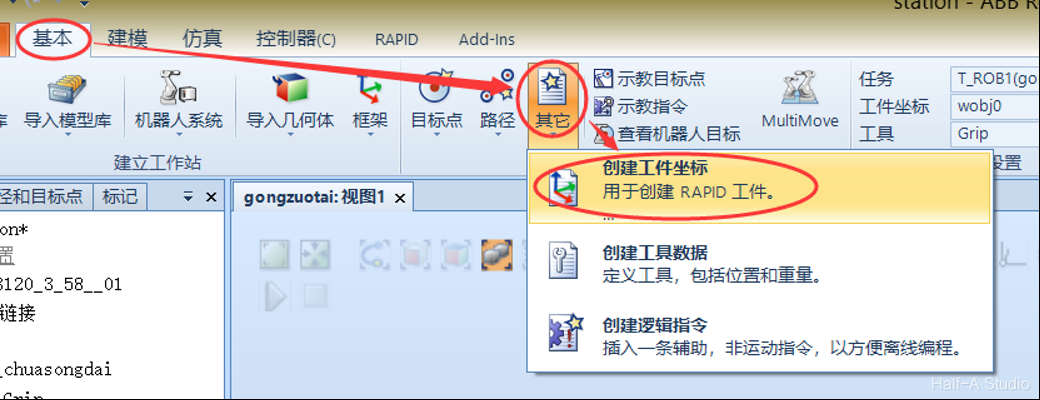
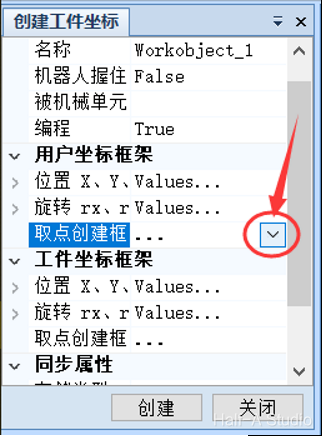
- In the simulation, select Home - Other - Create WorkObject. Under User Frame, select Frame by points, then select three points to create the coordinate system.
III. Determining WorkObject Coordinates on a Physical System
When operating a physical robot system, you can select a workpiece with a pointed tip, jog it to align with the three points to be determined, and record them to set the WorkObject coordinates.
-
Add a tool with a pointed tip for determining the target point coordinates. Add the tool to the robot system and hide the gripper tool used previously.
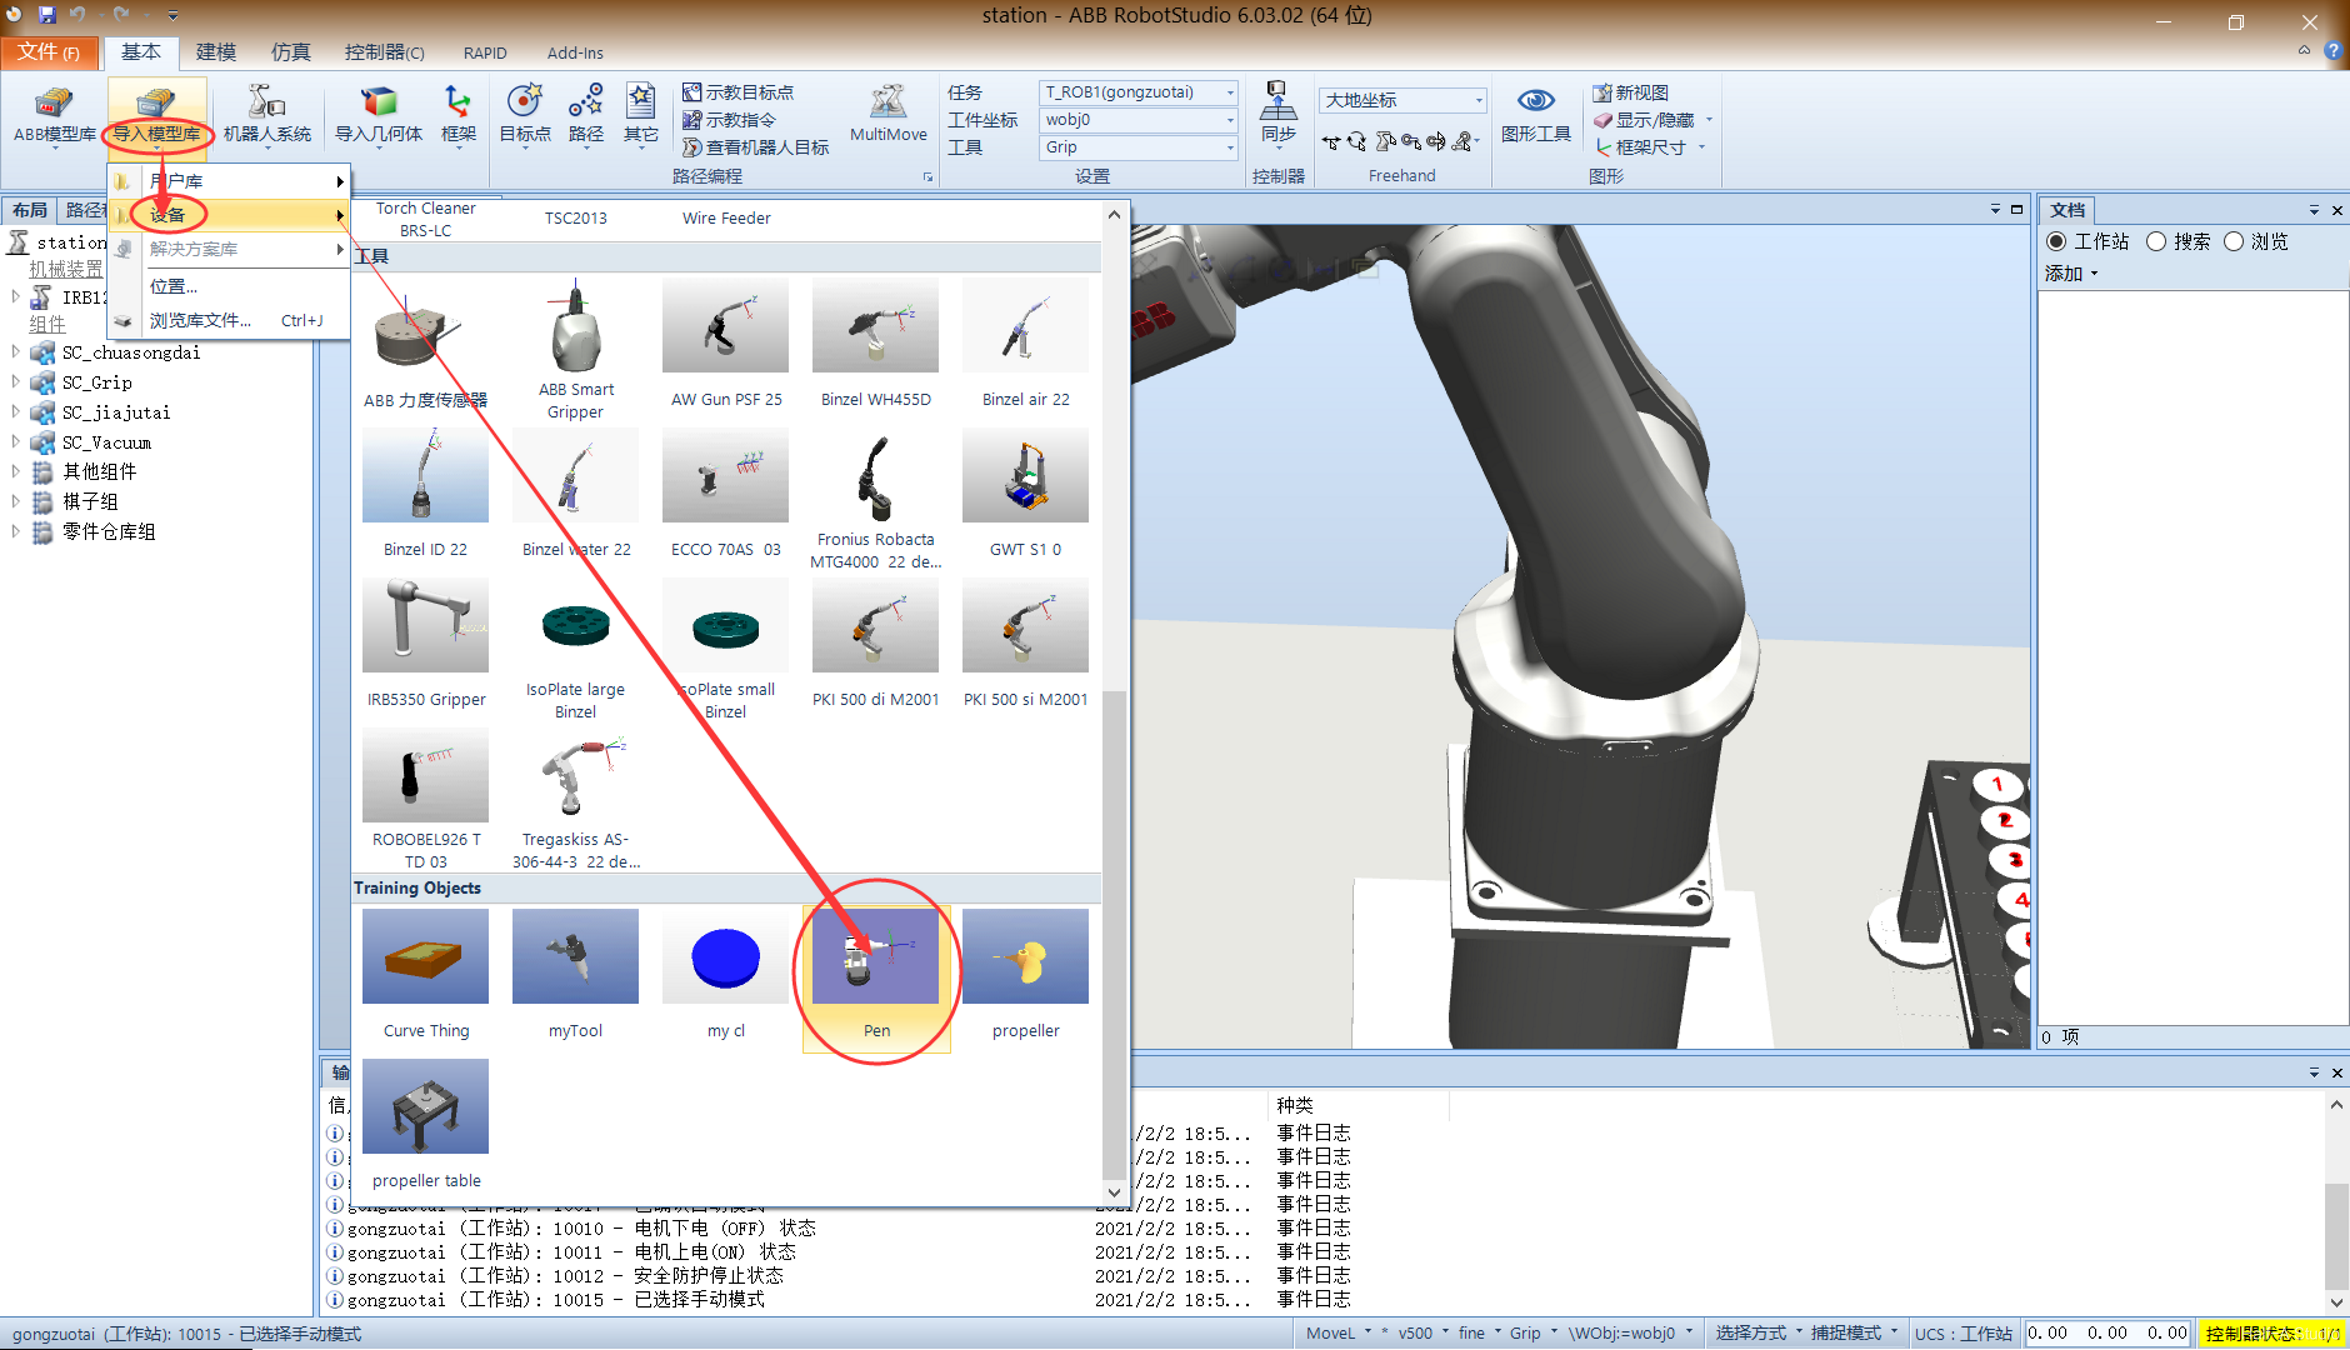
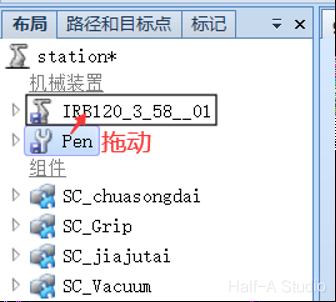

-
Follow the first two steps under Setting WorkObject Coordinates Using the Three-Point Method above. Set three positions in the warehouse as X1, X2, and Y1, respectively, to determine the WorkObject coordinate system. When finished, tap OK.

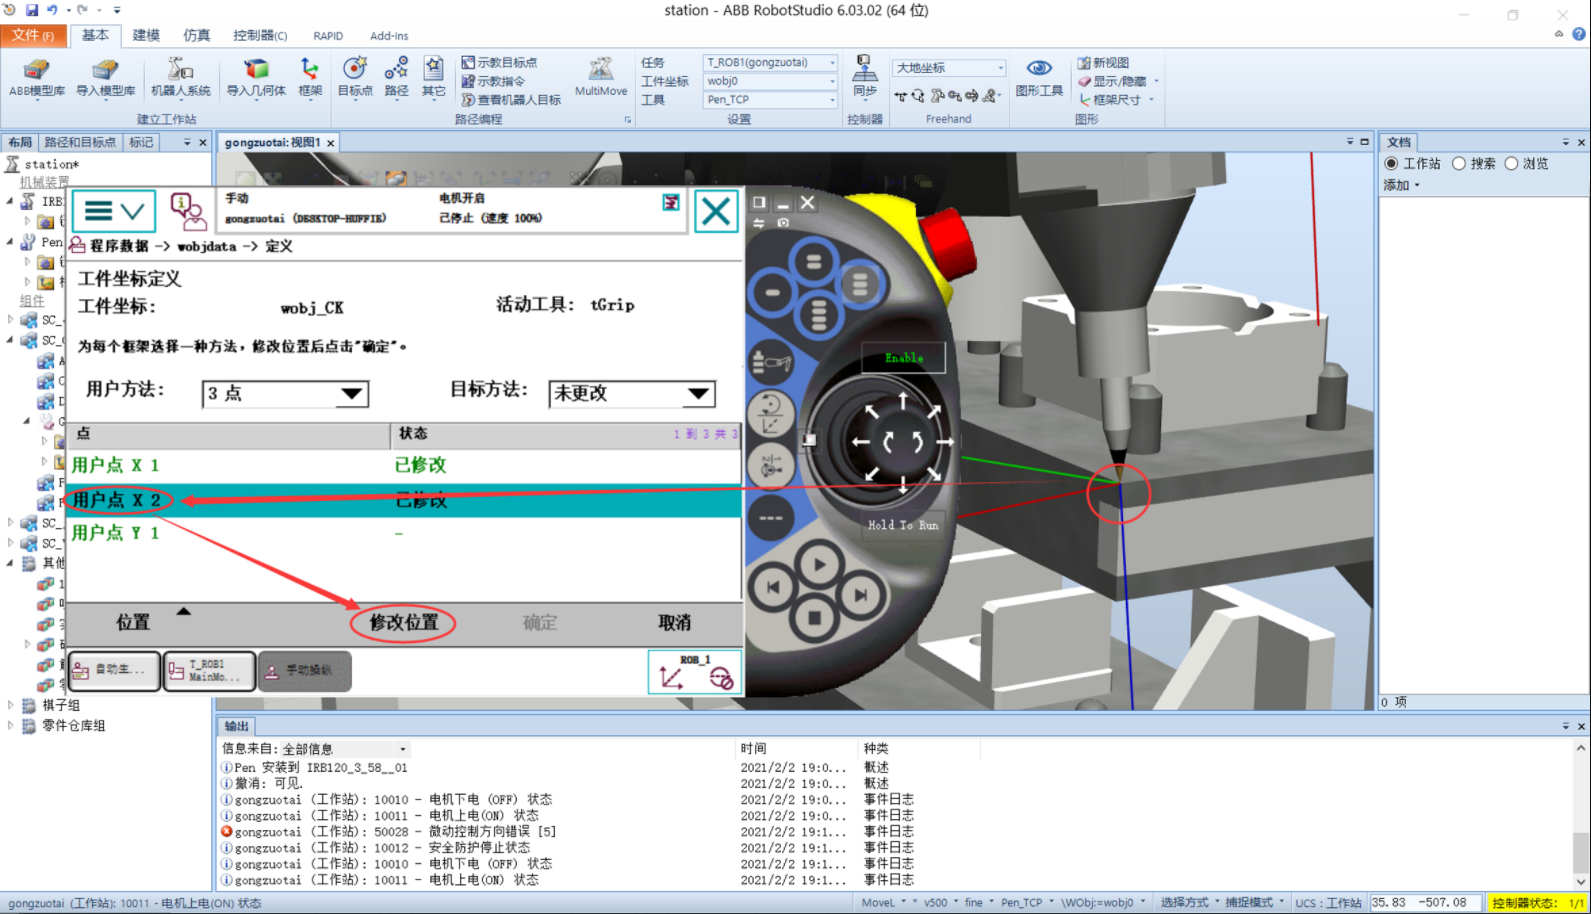

-
Likewise, a WorkObject coordinate system can also be created on the workbench
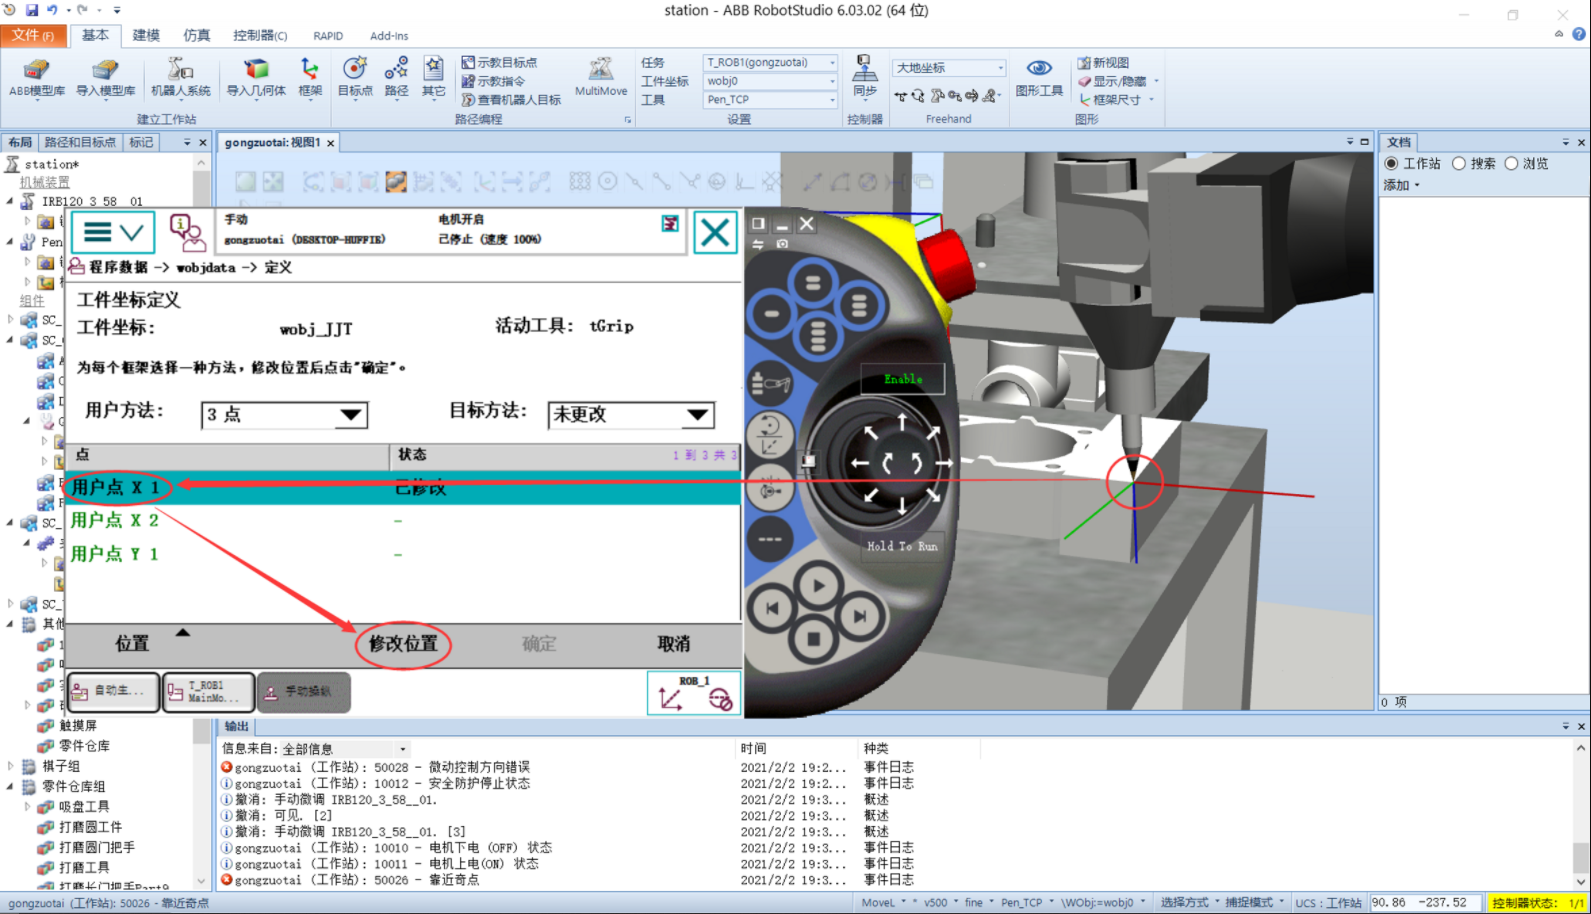

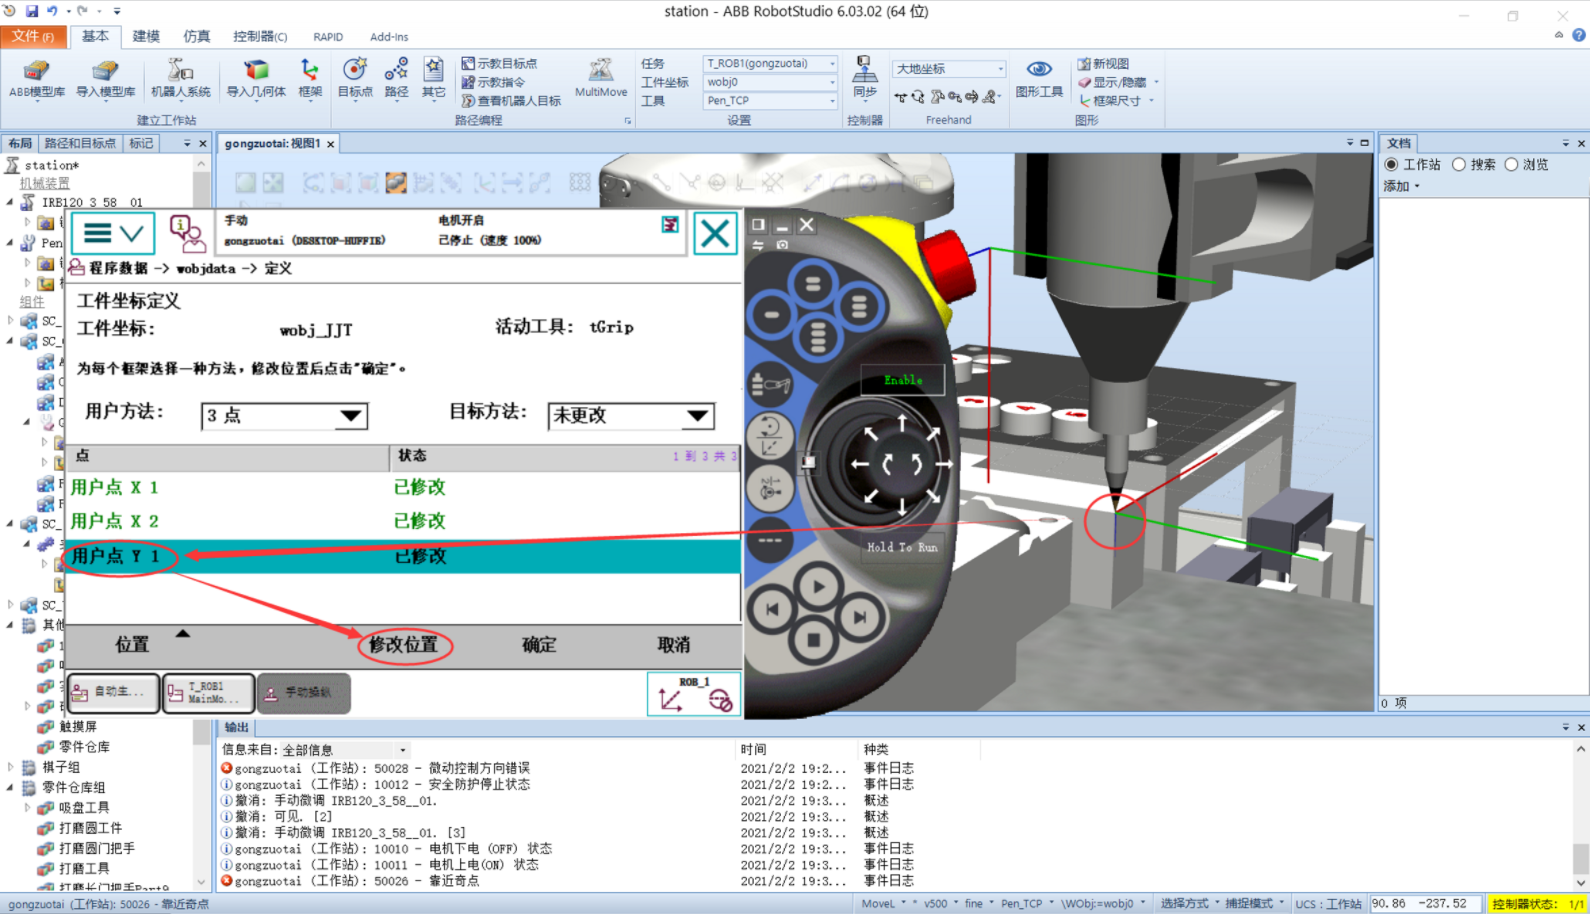
-
Delete the tool (Pen) just added for determining the positions, and make the gripper visible
IV. Changing the WorkObject Used in a Program
Assign the warehouse WorkObject to the motions that pick up a workpiece in the warehouse, the workbench WorkObject to the motions that place it on the workbench, and the default WorkObject to all other motions.
- Take the motion at pPickUP as an example. Step through the program. When it reaches pPickUP, tap the entire instruction, then tap Optional Arguments—[\WObj]—Use
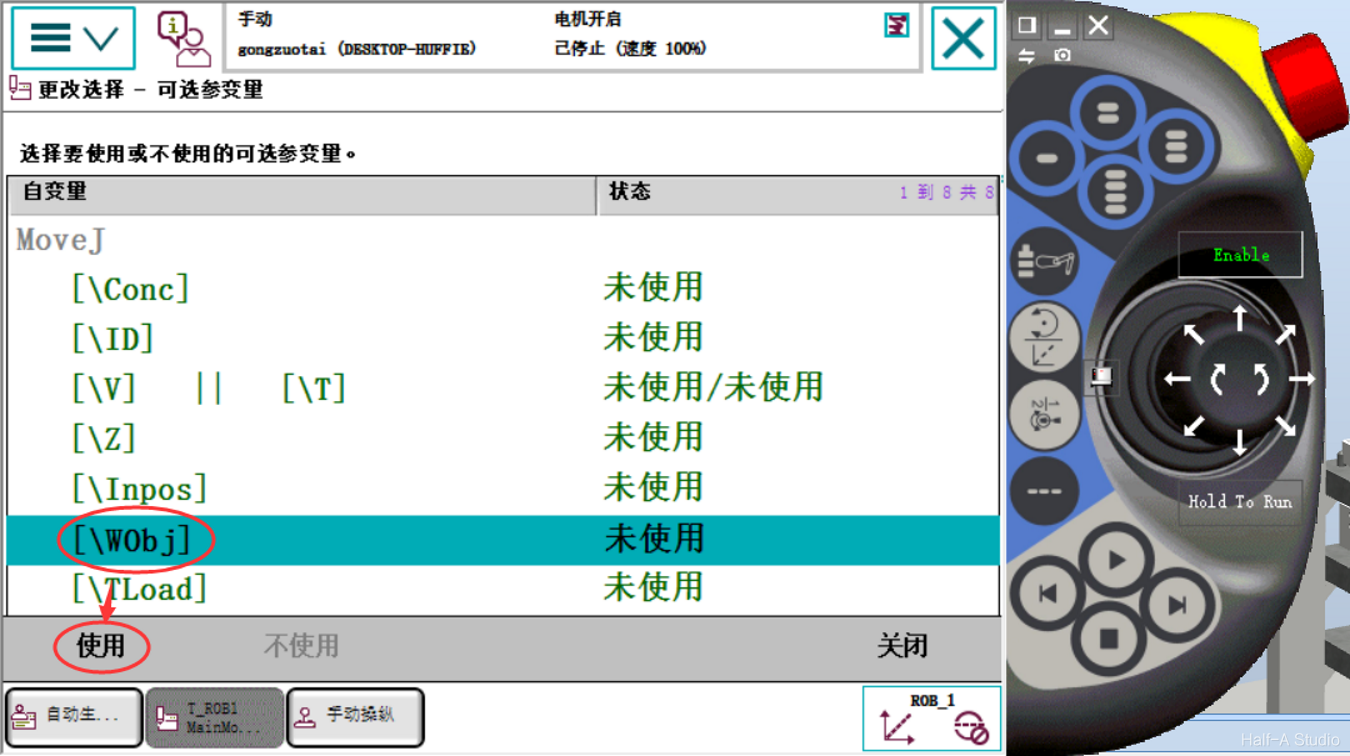
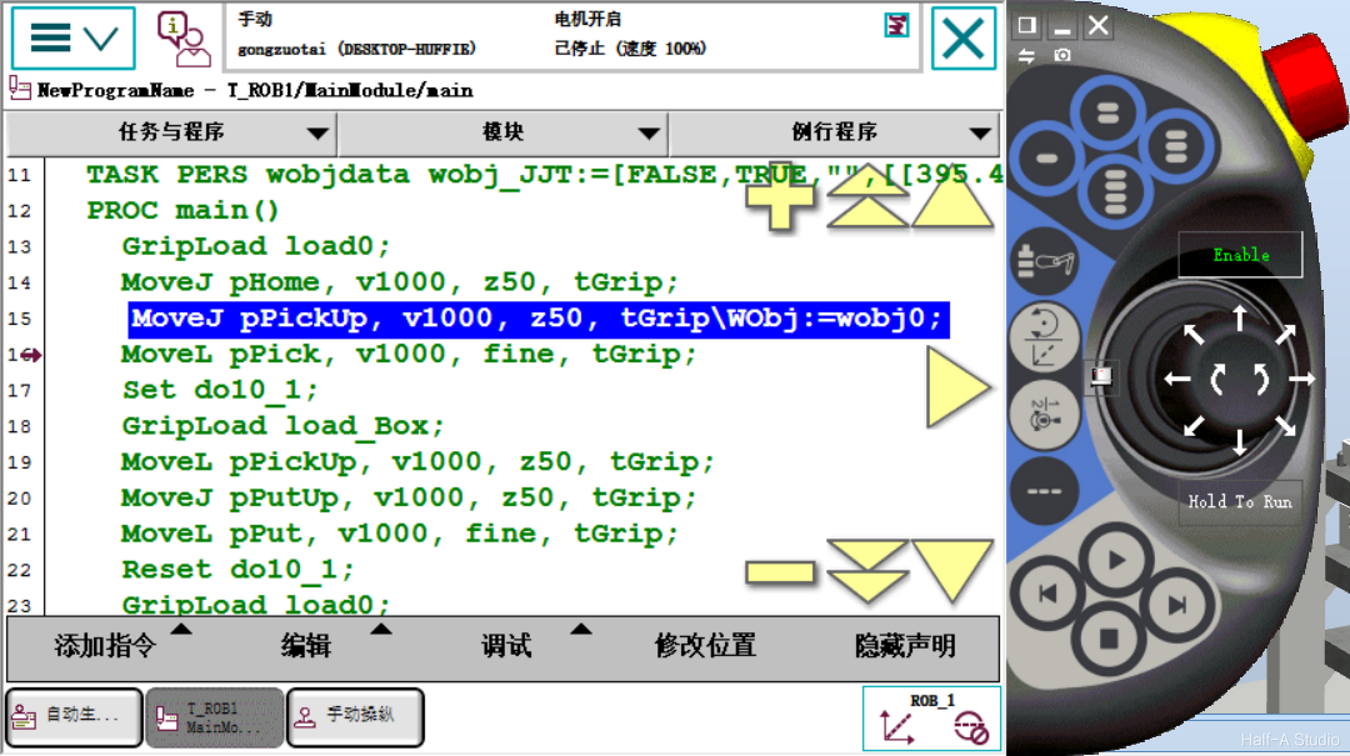
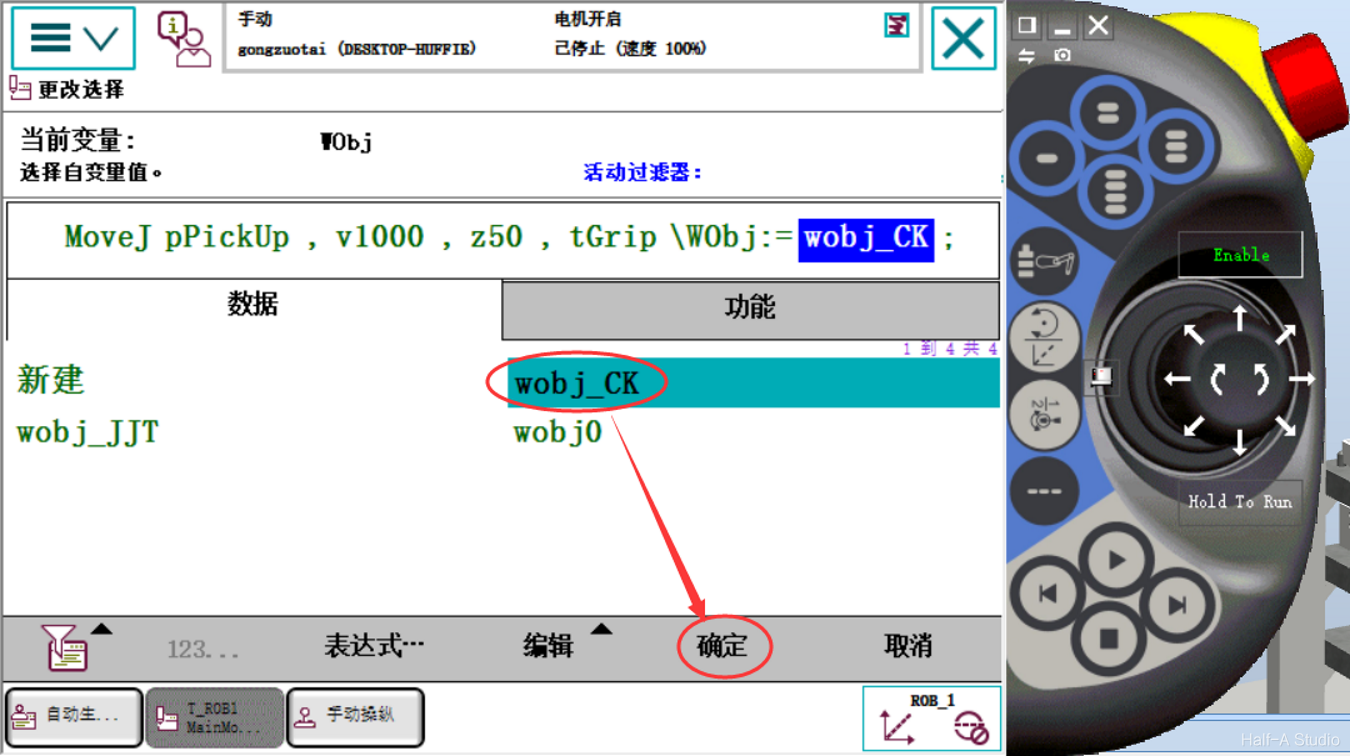
- Tap wobj0, select wobj_CK, and tap OK
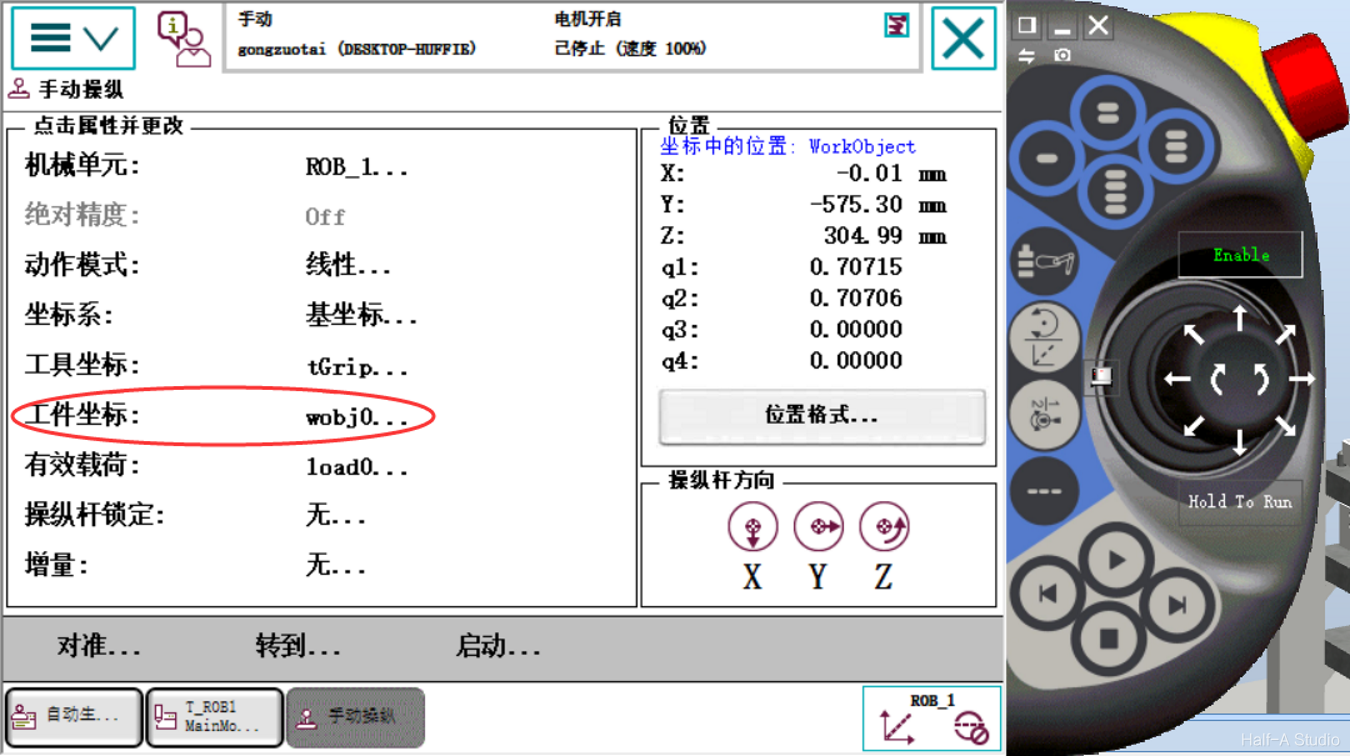
- Return to Jogging, tap WorkObject, and select wobj_CK

- Return to the Program Editor, select the statement you just edited, and tap Modify Position.
Comments