I. Setting Speed Directly
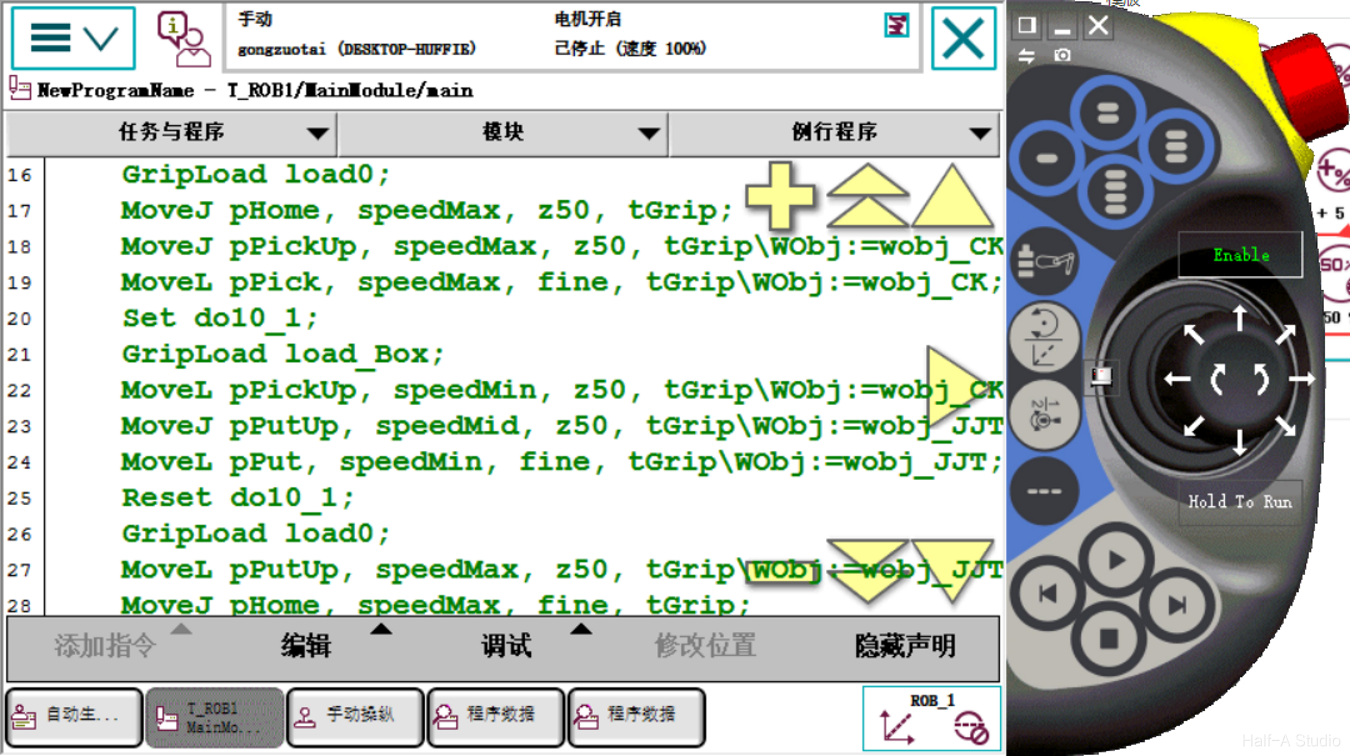
In manual mode, the maximum speed is limited to 250mm/s. In a program, however, v1000 is very fast both in simulation and on a physical robot. Therefore, change the speed used when picking up and putting down the workpiece so that it is handled gently.
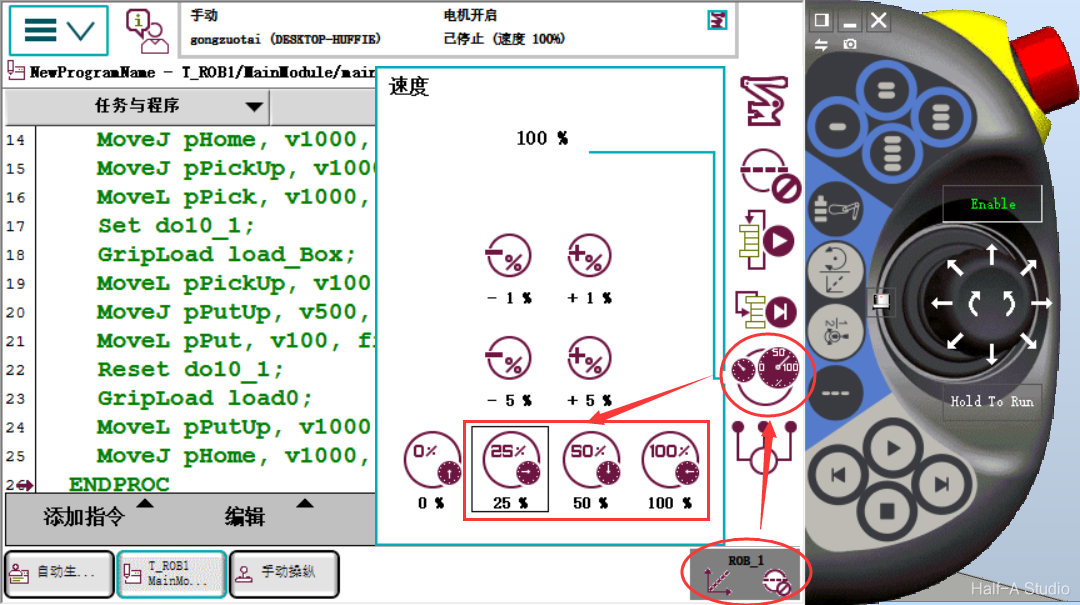
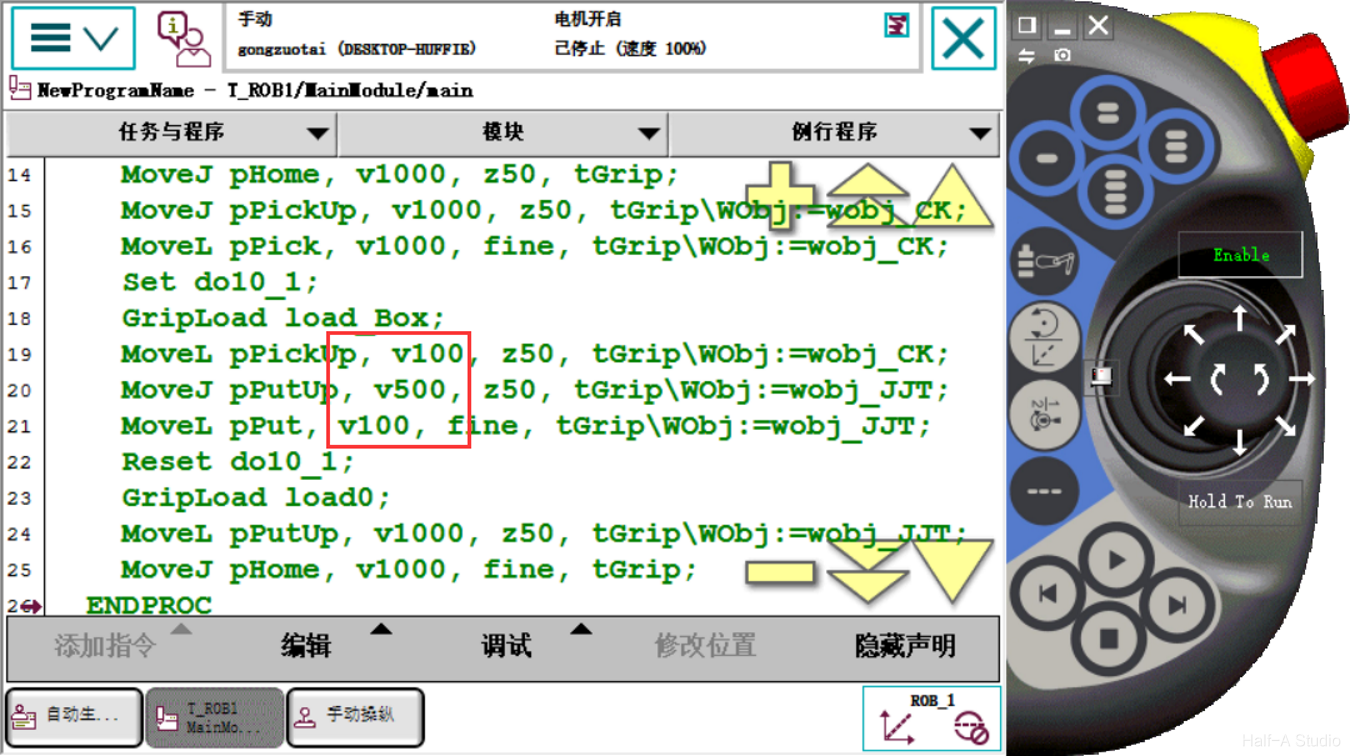 During actual operation, after completing manual debugging, first test at 25% speed as shown below. If the physical robot operates without any problems, gradually increase the speed to 100%. If any problem occurs along the way, change the speed parameter in the program to a suitable value.
II. Creating and Replacing Speed Data
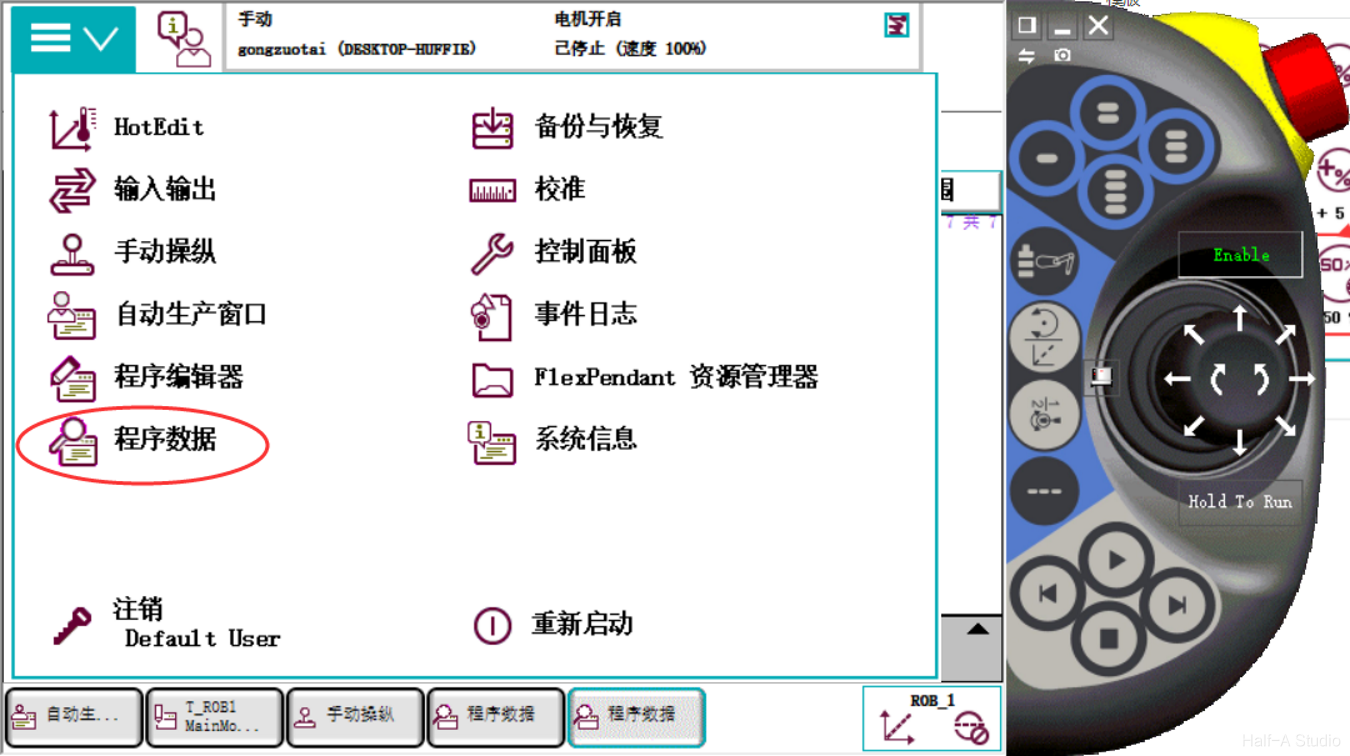
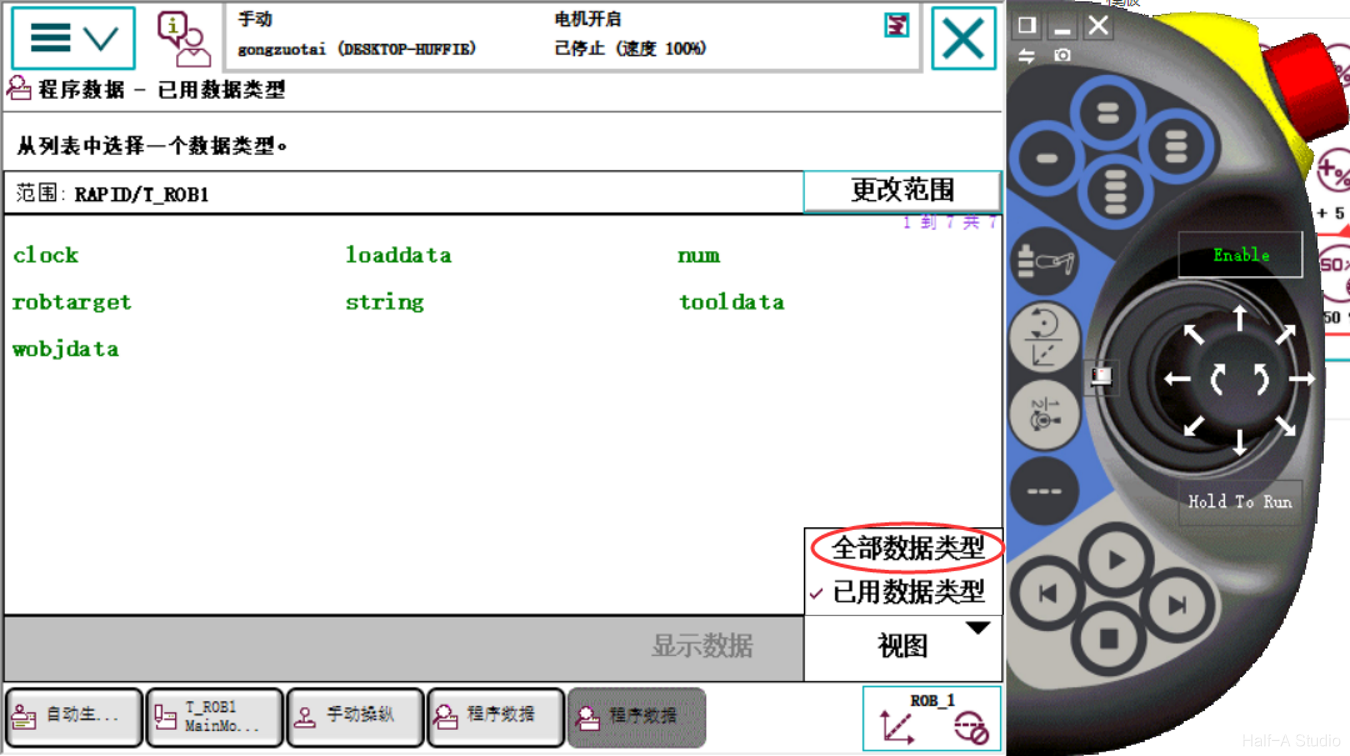
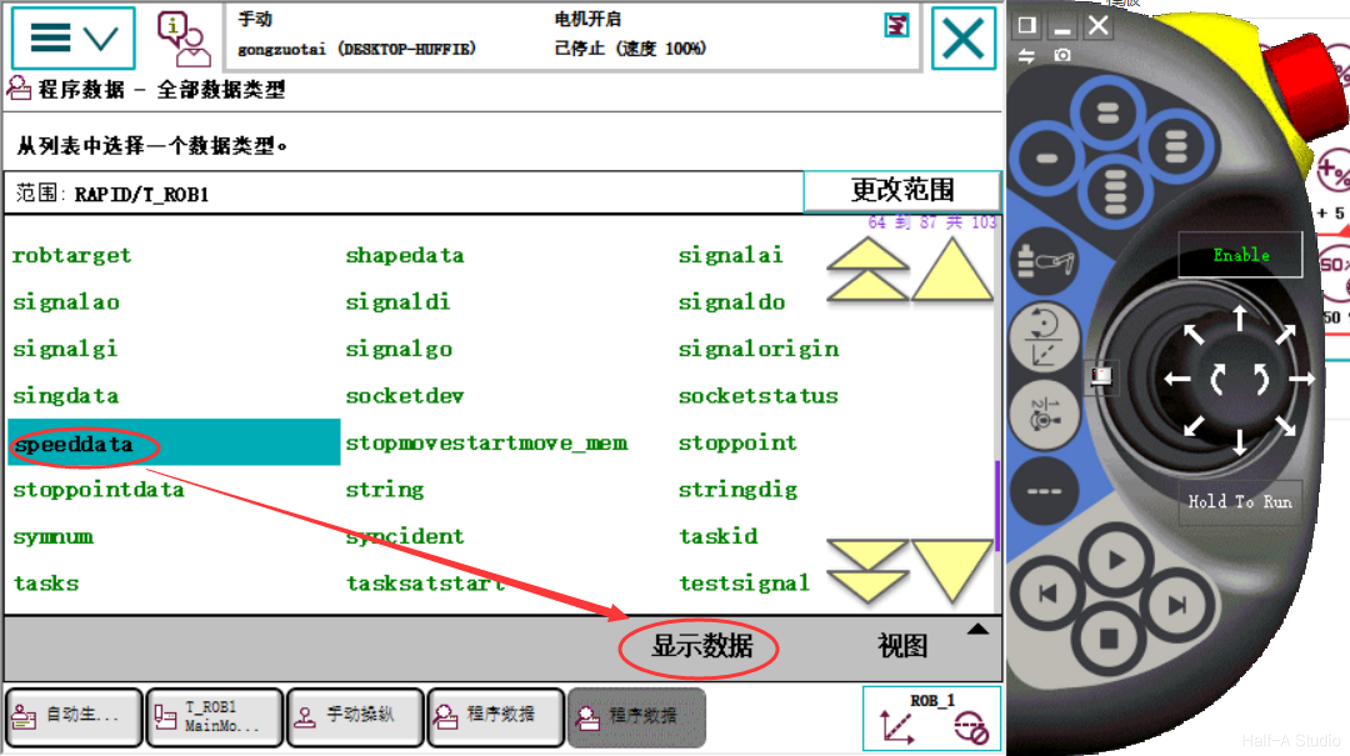
- Click Menu [Three V] —> Data Types —> All Data Types —> speeddata —> Show Data —> New
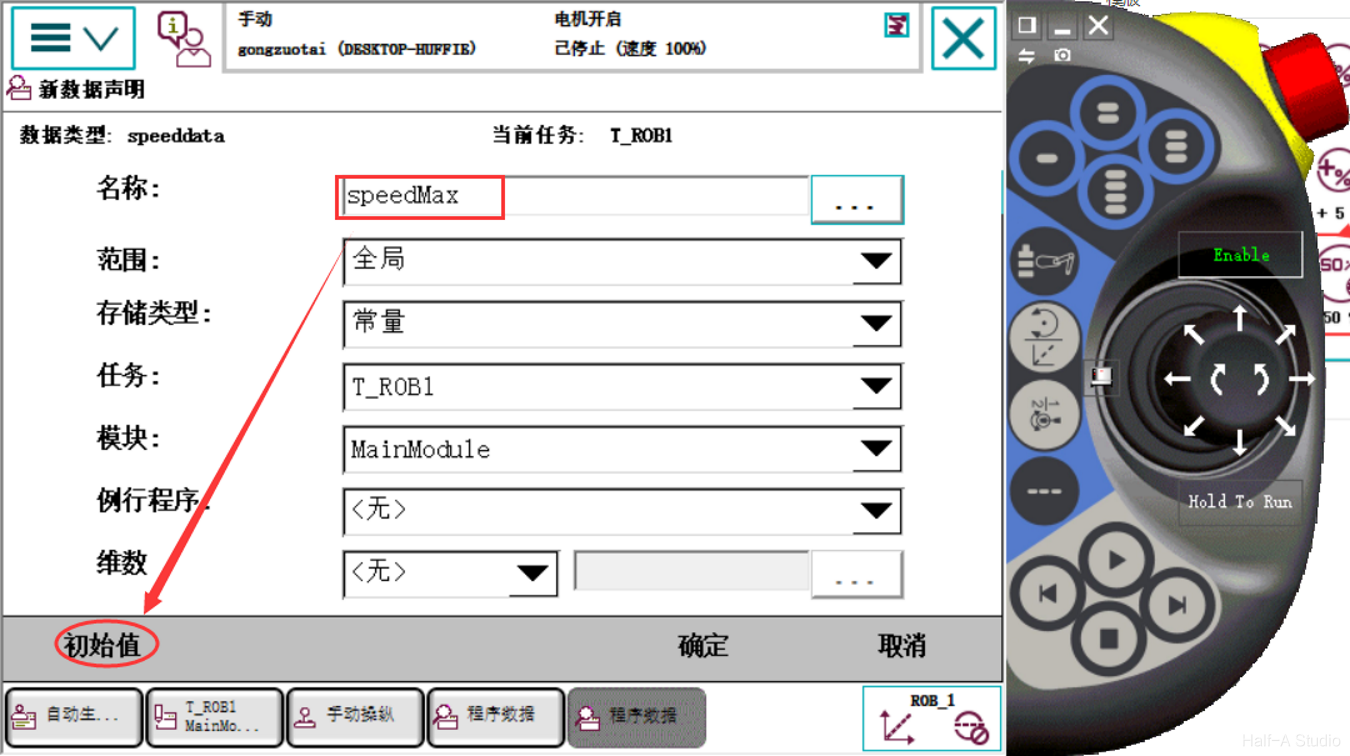
- Set the variable name, then change its initial value. Here, v_tcp is the linear motion speed (the one mainly used), and v_ori is the reorientation speed.

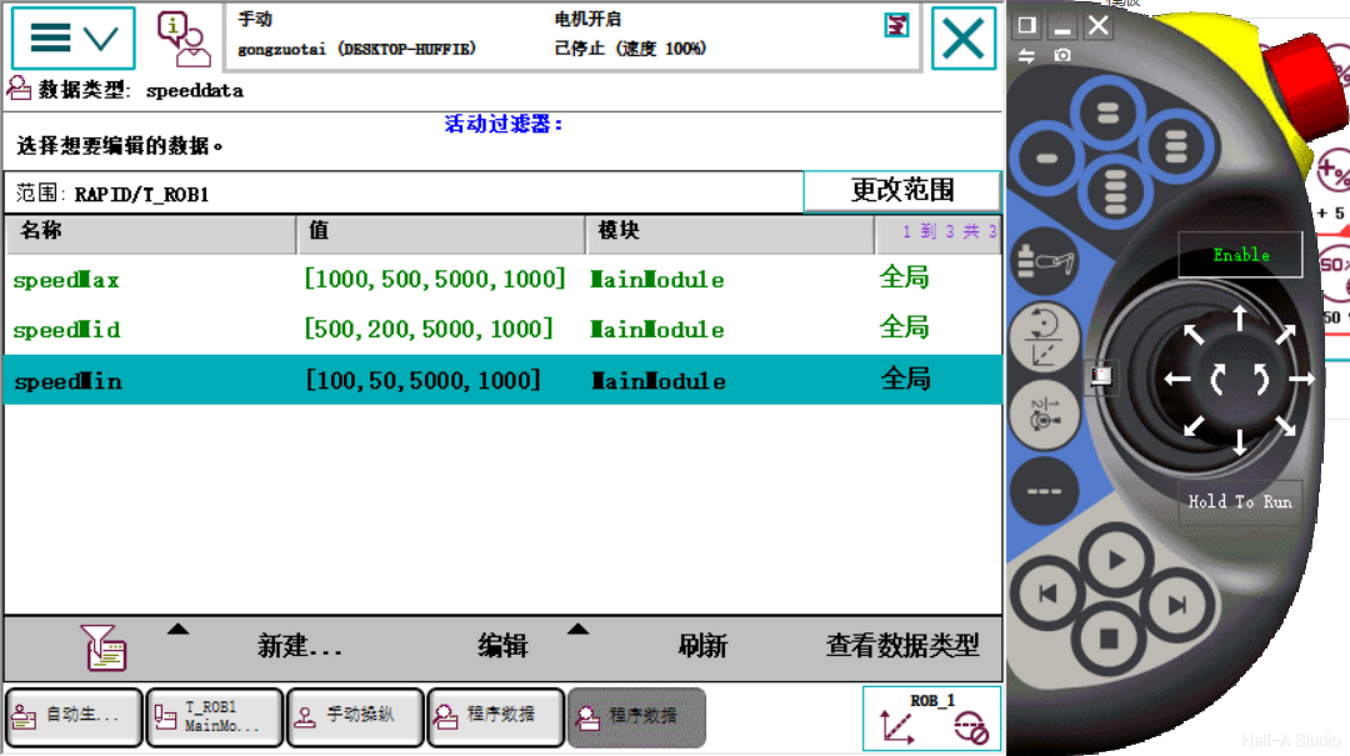
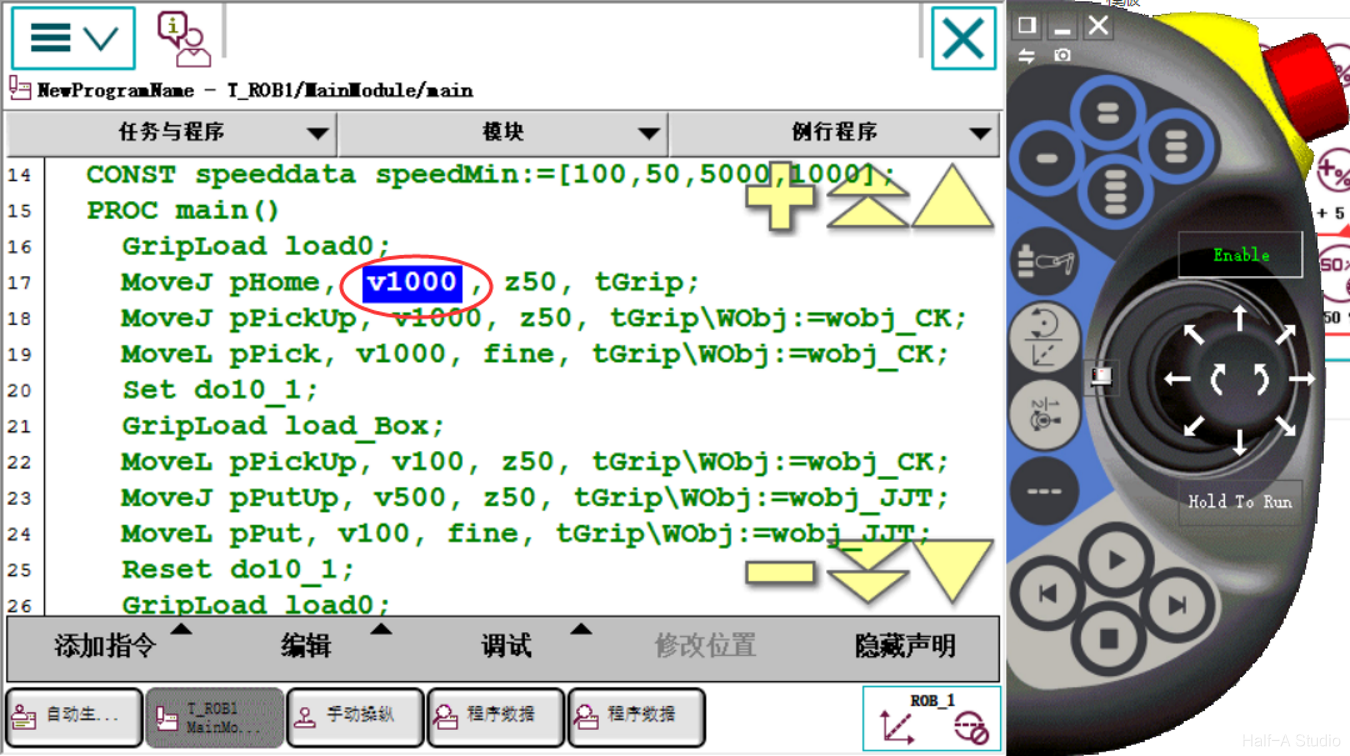
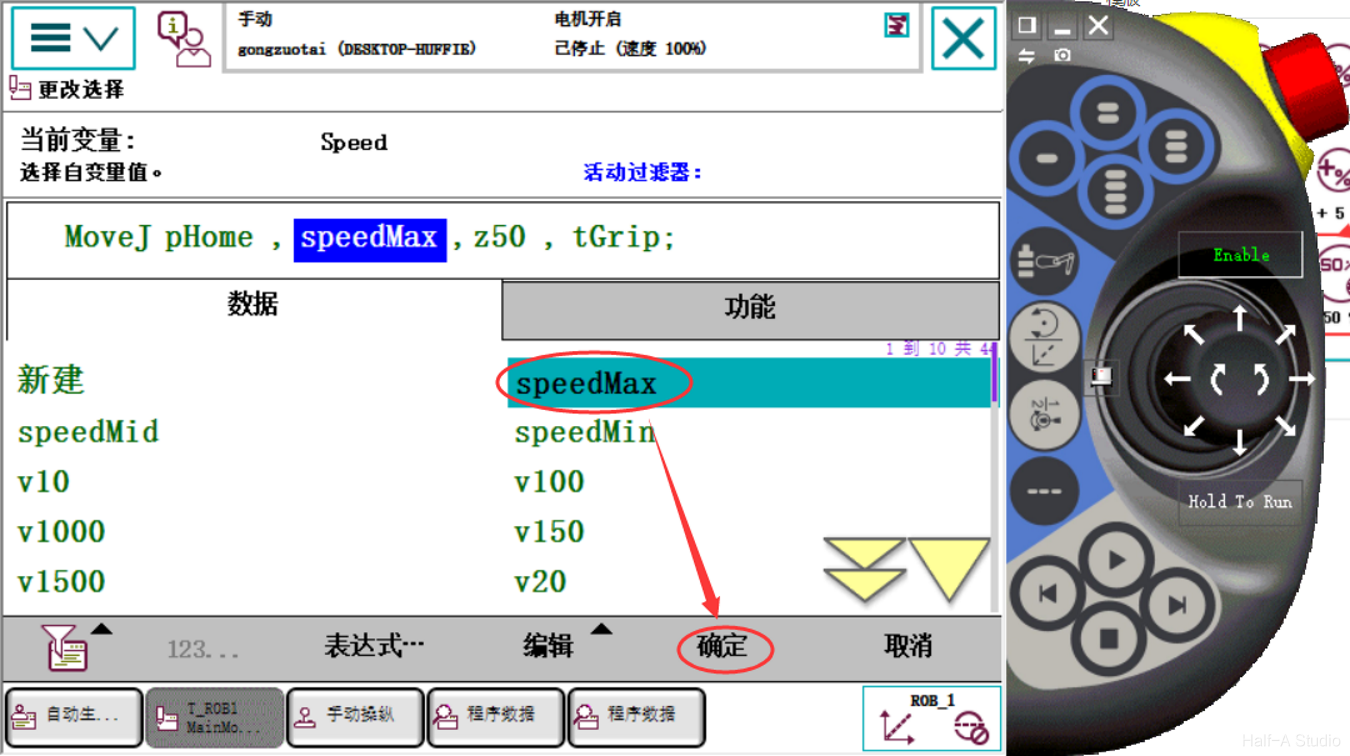
- Return to the programming page, click the speed value, select the speed variable to use as a replacement, and confirm.
III. Setting a Speed Delay
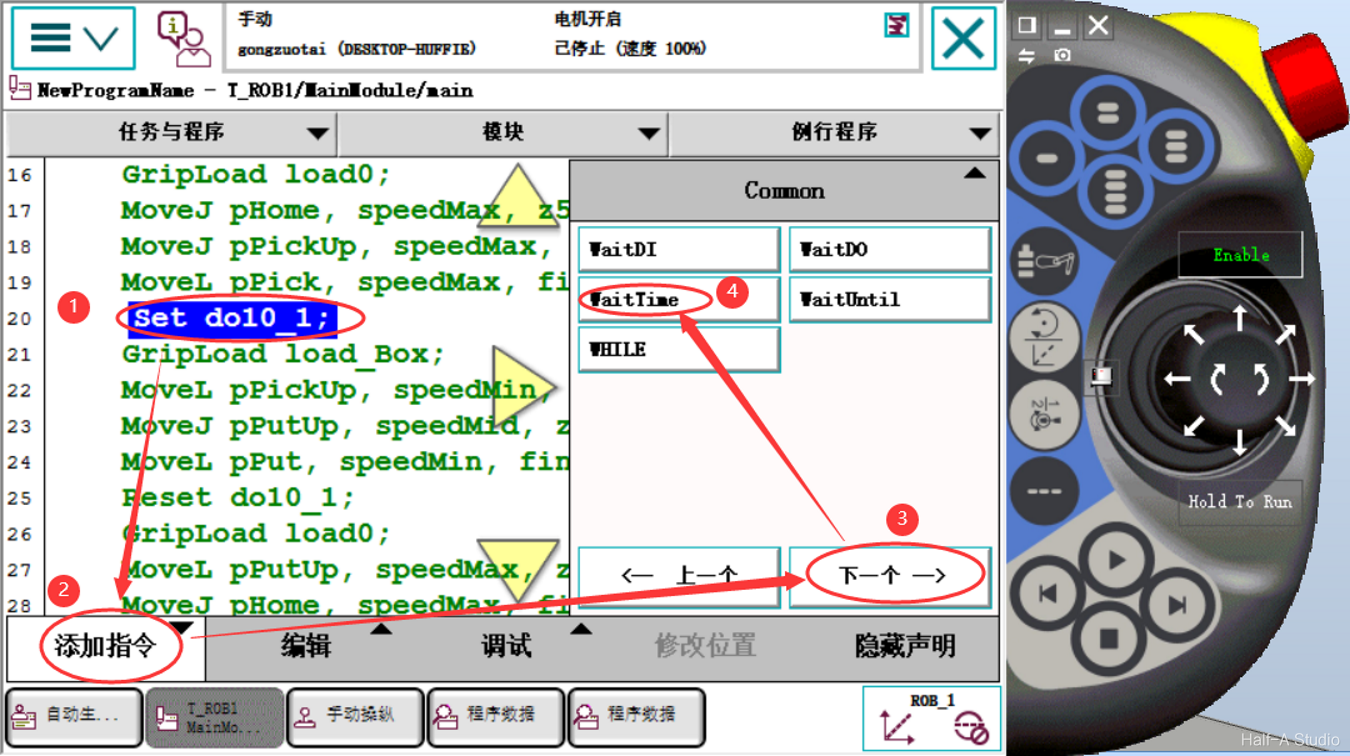
The gripper’s closing action takes time. Without a delay, the gripper will move while it is closing, which may cause problems. Configure the delay as follows:
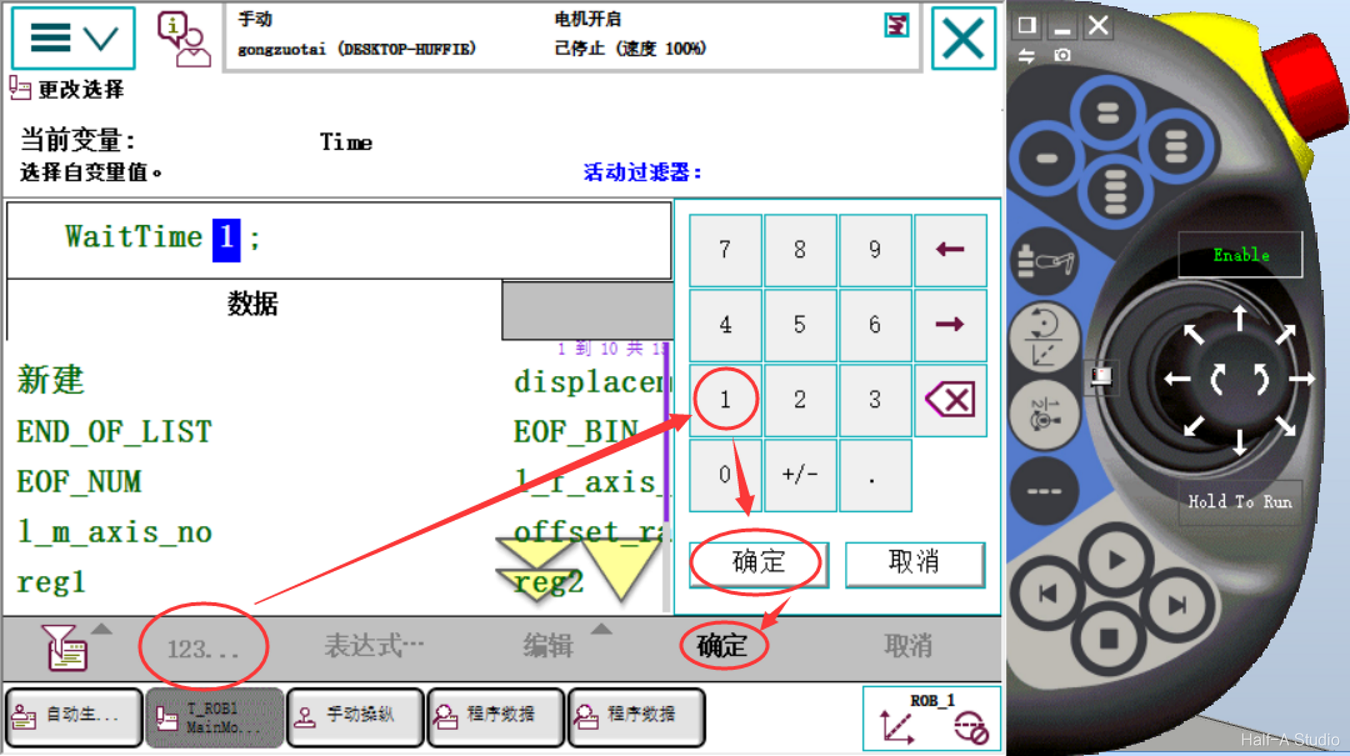
- Click the gripper-closing instruction (Set statement) and add the WaitTime instruction. This example uses a 1s delay.
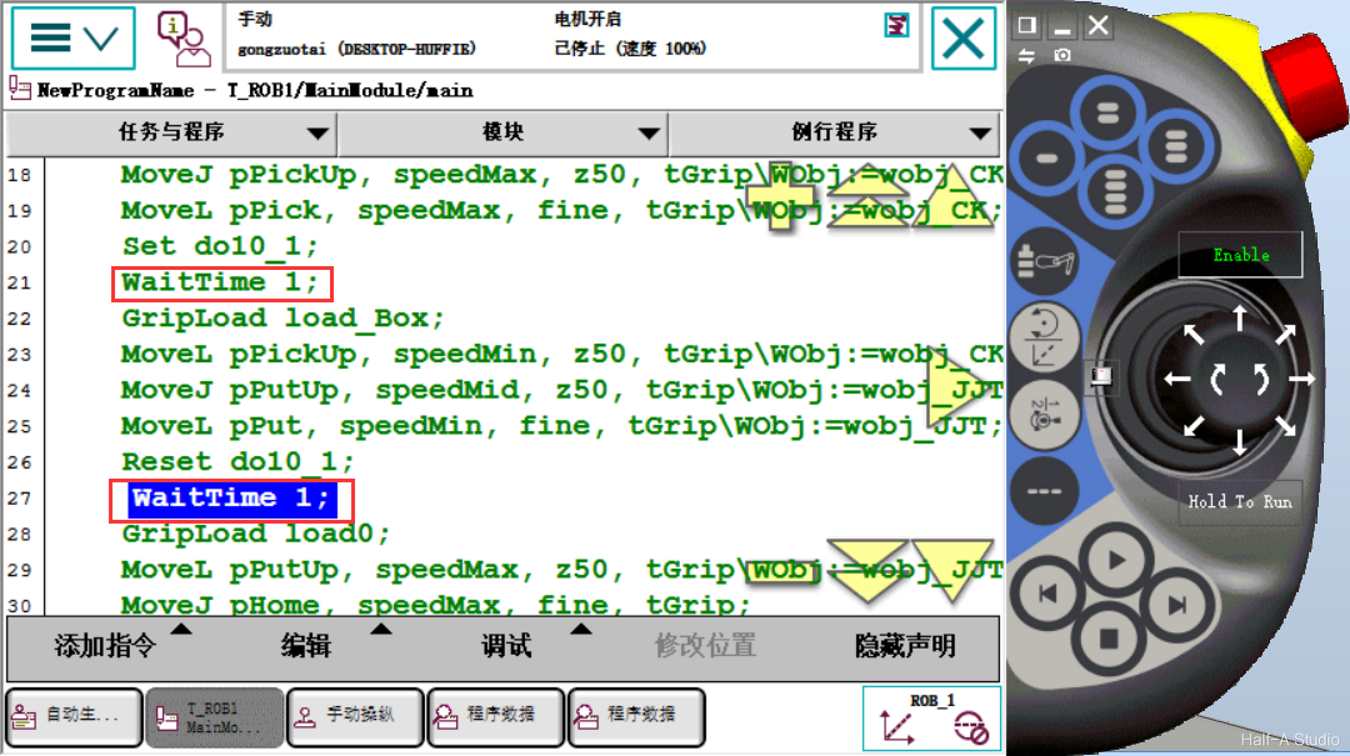
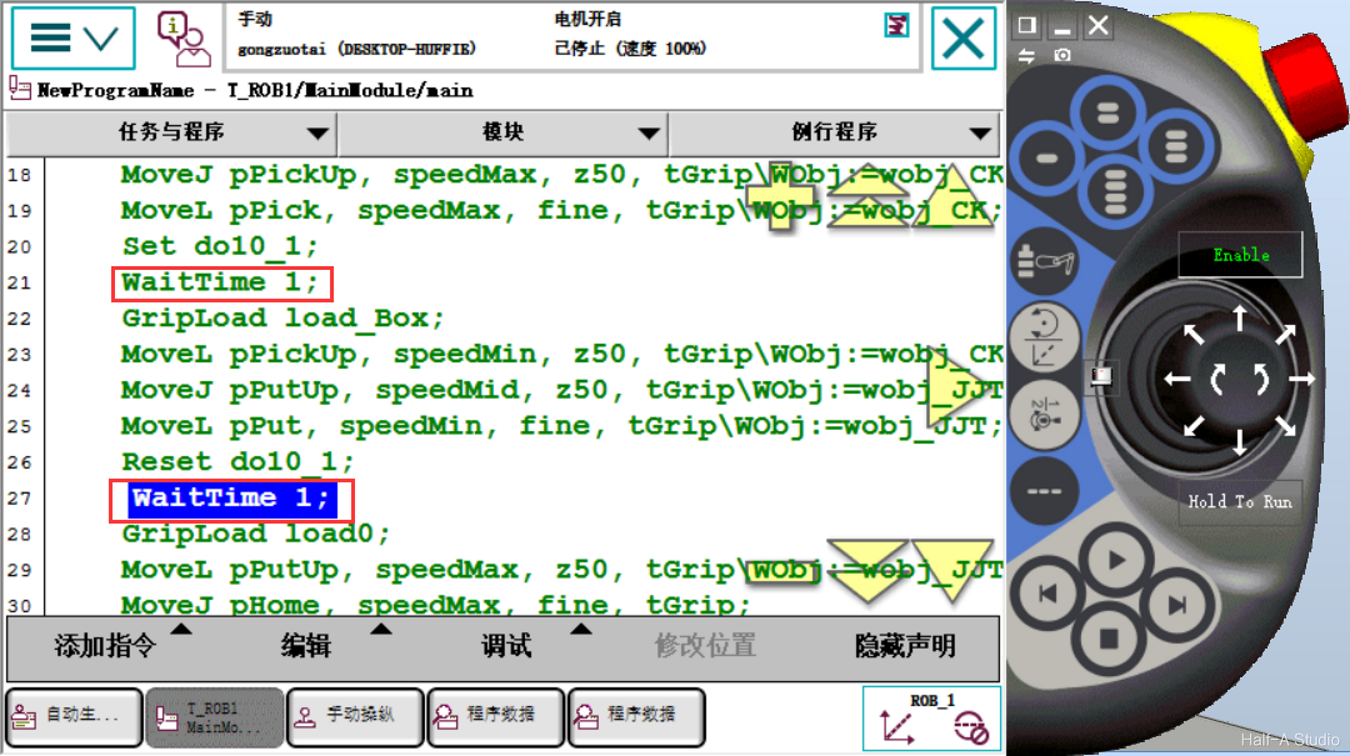
- Likewise, a delay must also be configured when the gripper opens.
Comments