Contents
The procedure in this article is based on this project: https://github.com/F2Wang/ObjectDatasetTools The code modified and added for this article has been uploaded to GitHub: https://github.com/HaofeiMa/Linemod_Custom (The code may not be very polished. It was written for demo testing and is provided for reference only.)
Introduction
This tool consists entirely of Python scripts and is used to create object masks, bounding-box labels, and 3D object mesh files from an RGB-D camera.
It can prepare training and test data for various deep learning projects, such as 6D pose estimation, object detection, instance segmentation, and more.
Preparation
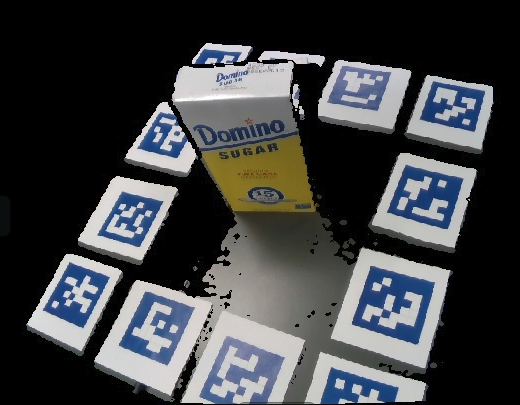
Print the ArUco markers in the arucomarkers folder in color. There are three A4 pages containing markers with IDs 1-13.
Cut out the markers one by one and place them around the object.
Use conda to create a virtual environment.
conda create -n objectdatasettools python=2.7
conda activate objectdatasettools
Install the dependencies.
sudo apt-get install build-essential cmake git pkg-config libssl-dev libgl1-mesa-glxpip install numpy Cython==0.19 pypng==0.0.18 scipy scikit-learn open3d==0.9.0 scikit-image tqdm pykdtree opencv-python==3.3.0.10 opencv-contrib-python==3.3.0.10 trimesh==2.38.24If you encounter the
ImportError: No module named pip._internal.cli.mainerror, use the commands below to installpip.python -m ensurepippip install --upgrade pip
If you encounter an issue related to
(from ipywidgets->open3d==0.9.0), useconda install -c conda-forge ipywidgetsto install ipywidgets, then reinstall the open3d dependency.
pip install pyrealsense2
# 如果过慢,可以使用pip install -i https://pypi.tuna.tsinghua.edu.cn/simple pyrealsense2
Recording a Video
(1) If you have a RealSense camera
Use the RealSense camera to record a video of the object. For older models, use record.py; for librealsense SDK 2.0, use recordf2.py.
python record2.py LINEMOD/OBJECTNAMEBy default, the script starts recording after a countdown of 5 and records for 40 seconds. The recording duration can be changed on line 20 of record.py. Press “q” to stop recording.
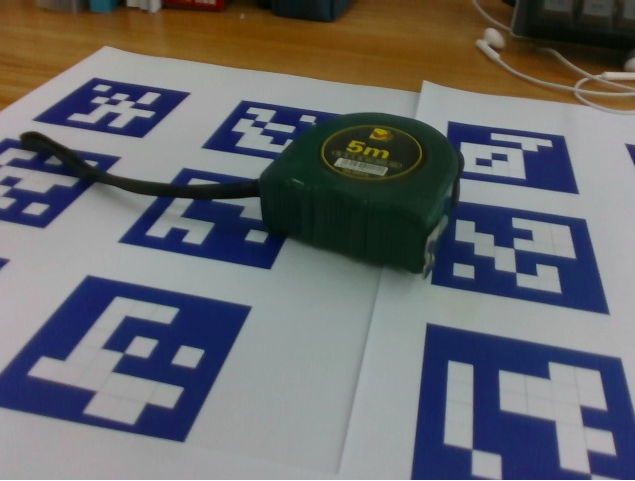
Move the camera steadily to capture different views of the object while always keeping 2-3 of the markers within the camera’s field of view.
Note that this project assumes all sequences are stored in a folder named “LINEMOD.” Using a different folder name will cause errors.
If you use record.py to create a sequence, the color images, depth images, and camera parameters will automatically be saved in the sequence directory.
(2) If you have existing images
If you already have color images or depth images, place the color images (.jpg) in a folder named “JPEGImages” and place the depth images to it in a folder named “depth.”
Note: The algorithm assumes that the depth images are aligned with the color images. Name the color images sequentially from 0.jpg, 1.jpg, …, 600.jpg, and name the corresponding depth images 0.png, …, 600.png. You should also create a file named “intrinsics.json” in the sequence directory and manually enter the camera parameters in the following format:
{"fx": 614.4744262695312, "fy": 614.4745483398438, "height": 480, "width": 640, "ppy": 233.29214477539062, "ppx": 308.8282470703125, "ID": "620201000292"}Obtaining Transformations Between Frames
Compute transformations from the first frame at formulated intervals (the interval can be changed in config/registrationParameters), and save the transformations (4x4 matrices) as a NumPy array. The result is saved to LINEMOD/OBJECTNAME/transforms.npy.
python compute_gt_poses.py LINEMOD/OBJECTNAMEor
python compute_gt_poses.py allThree-Dimensional Reconstruction of the Target Object
python register_scene.py LINEMOD/OBJECTNAMEThe code above will original registeredScene.ply will be saved in the specified directory (for example, LINEMOD/OBJECTNAME/registeredScene.ply). registerScene.ply is the point cloud of the entire scene, including the table, marker sheets, object, and other items visible to the camera.

python register_segmented.py LINEMOD/OBJECTNAMEThe code above lets you skip the manual work of removing unwanted backgrounds and performs three-dimensional reconstruction of the object.
register_segmented.py converts the object’s point cloud into a mesh. When FILLBOTTOM is set to true, the algorithm automatically fills the bottom of the object with a flat surface.
However, register_segmented.py may fail. In that case, you need to adjust some parameters so that the algorithm can run properly. The most important parameter is MAX_RADIUS. If the object is large, increase this value to ensure that the object is not truncated.
Adjust the MAX_RADIUS parameter to make the model as accurate as possible. After generation, use MeshLab to manually remove isolated points and regions, then save it manually once.
Manually Processing the Point Cloud
If you are satisfied with the result produced by register_segmented.py above, you can skip this step.
Open the generated point cloud data registeredScene.ply in MeshLab:
- Delete the background
- Perform surface reconstruction to fill in the missing bottom
- Process the reconstructed mesh
- Ensure that the processed mesh has no isolatedly noise
This produces the final mesh file.
Generating Image Masks and Label Files
After generating the object mesh file, use the following program to create image masks and labels:
python create_label_files.py allor
python create_label_files.py LINEMOD/OBJECTNAMEThis step generates a file named OBJECTNAME.ply. Open this file in MeshLab, save it as a mesh, and uncheck binary. The saved file is the dataset’s model file. Its AABB is centered at the origin and has the same dimensions as its OBB. Image masks are generated in the mask folder, the transformation matrix for the new mesh is saved in the transforms folder, and label files are saved in the labels folder.
Also copy the printed min_xyz and size_xyz values to the models_info.yml file.
Use the following command to verify that the generated bounding boxes and masks are correct:
python inspectMasks.py LINEMOD/OBJECTNAMEObtaining the Object Scale
python getmeshscale.pyCopy the object diameter to the models_info.yml file.
Creating Bounding-Box Labels
After obtaining the object’s mask, use the following code:
python get_BBs.pyThis creates an annotations.csv file in the root directory containing object-class labels and bounding-box information for all images.
Matching the Dataset Format
The 4 programs below were written by me. They are mainly used to process the generated LINEMOD dataset and organize it into the linemod_processed dataset format.
From annotations.csv, generate gt.yml and info.yml. You need to modify the obj_id corresponding to each object.
python generate_yml.py LINEMOD/timerRename the images to a format such as 0000.png.
python rename.py allSplit the dataset based on the number of images for each object, generating train.txt and test.txt.
python data_divide.py all(Convert the coordinate units in the ply file from m to mm.) Open the objectname.ply file in MeshLab, delete invalid points, and save it as objectname_aligned.ply. Check normal and color, and uncheck binary encoding.
Then run the following command to convert the point-cloud file’s units from m to mm:
python plym2mm.py all
Comments