Contents
LabVIEW Study Notes: LabVIEW Study Notes, Part One: Basic Introduction LabVIEW Study Notes, Part Two: Filter Experiment LabVIEW Study Notes, Part Three: Basic Controls LabVIEW Study Notes, Part Four: Dynamic Data Type LabVIEW Study Notes, Part Five: Comprehensive Data Type Experiment LabVIEW Study Notes, Part Six: While Loops and For Loops LabVIEW Study Notes, Part Seven: Variables and Shift Registers LabVIEW Study Notes, Part Eight: Property Nodes LabVIEW Study Notes, Part Nine: Arrays and Clusters LabVIEW Study Notes, Part Ten: Case Structures Notes on Other Experiments
I. Front Panel
1. Controls Palette
(1) Controls come from the Controls palette. Right-click to open the Controls palette. You can add a control to the front panel by clicking it or dragging it.
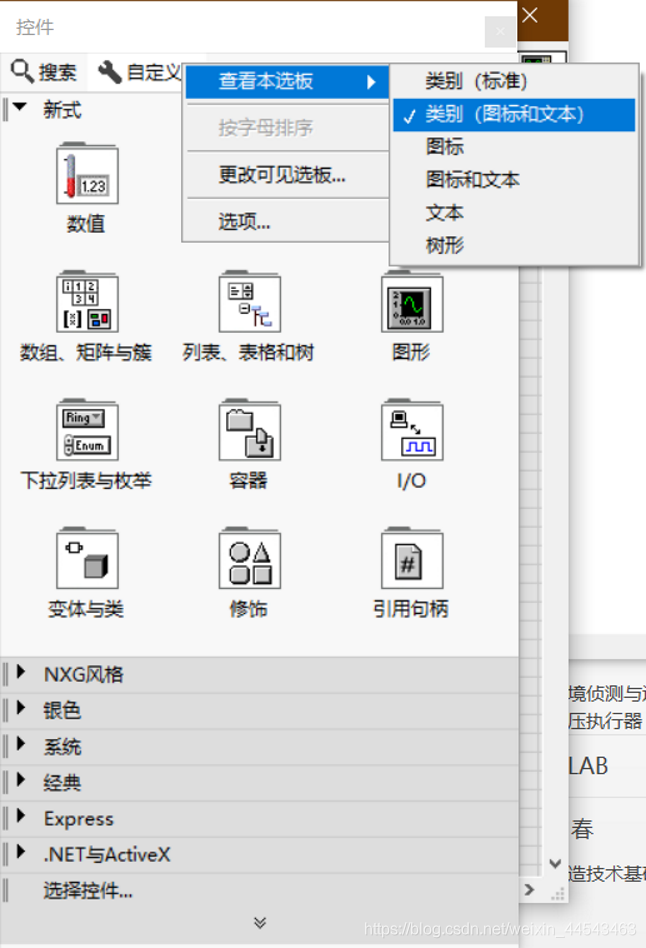 (2) Categories
- Numeric controls: enter and display numeric data
- Boolean controls: create buttons, switches, and indicators
- Path controls: enter or return the address of a file or directory
- Array, matrix, and cluster controls: create arrays, matrices, and clusters
- List box, tree, table, and similar controls: provide lists of options
- Graph controls: plot numeric data as graphs and charts
- Enum controls: provide a list of selectable items
- Container controls: group various controls
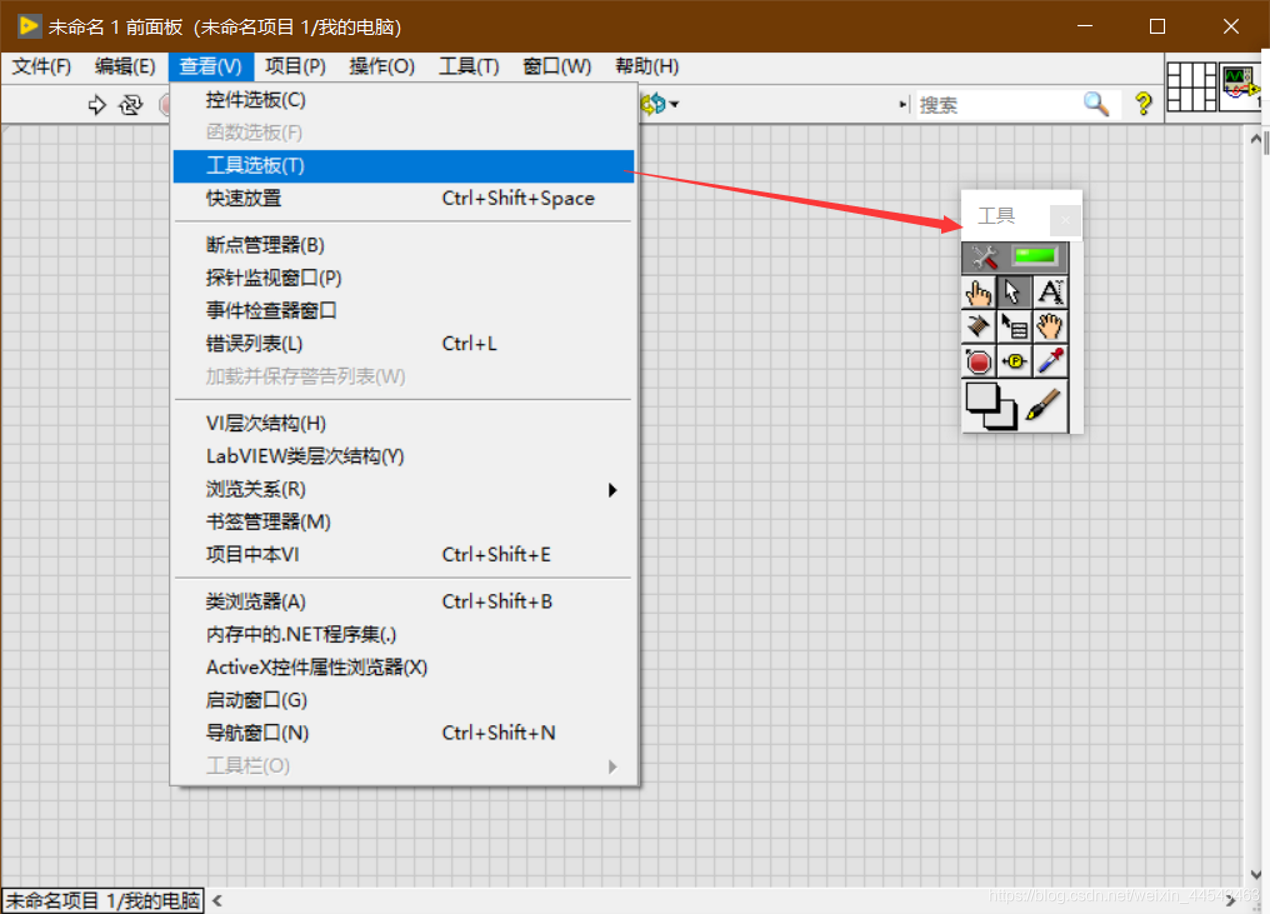
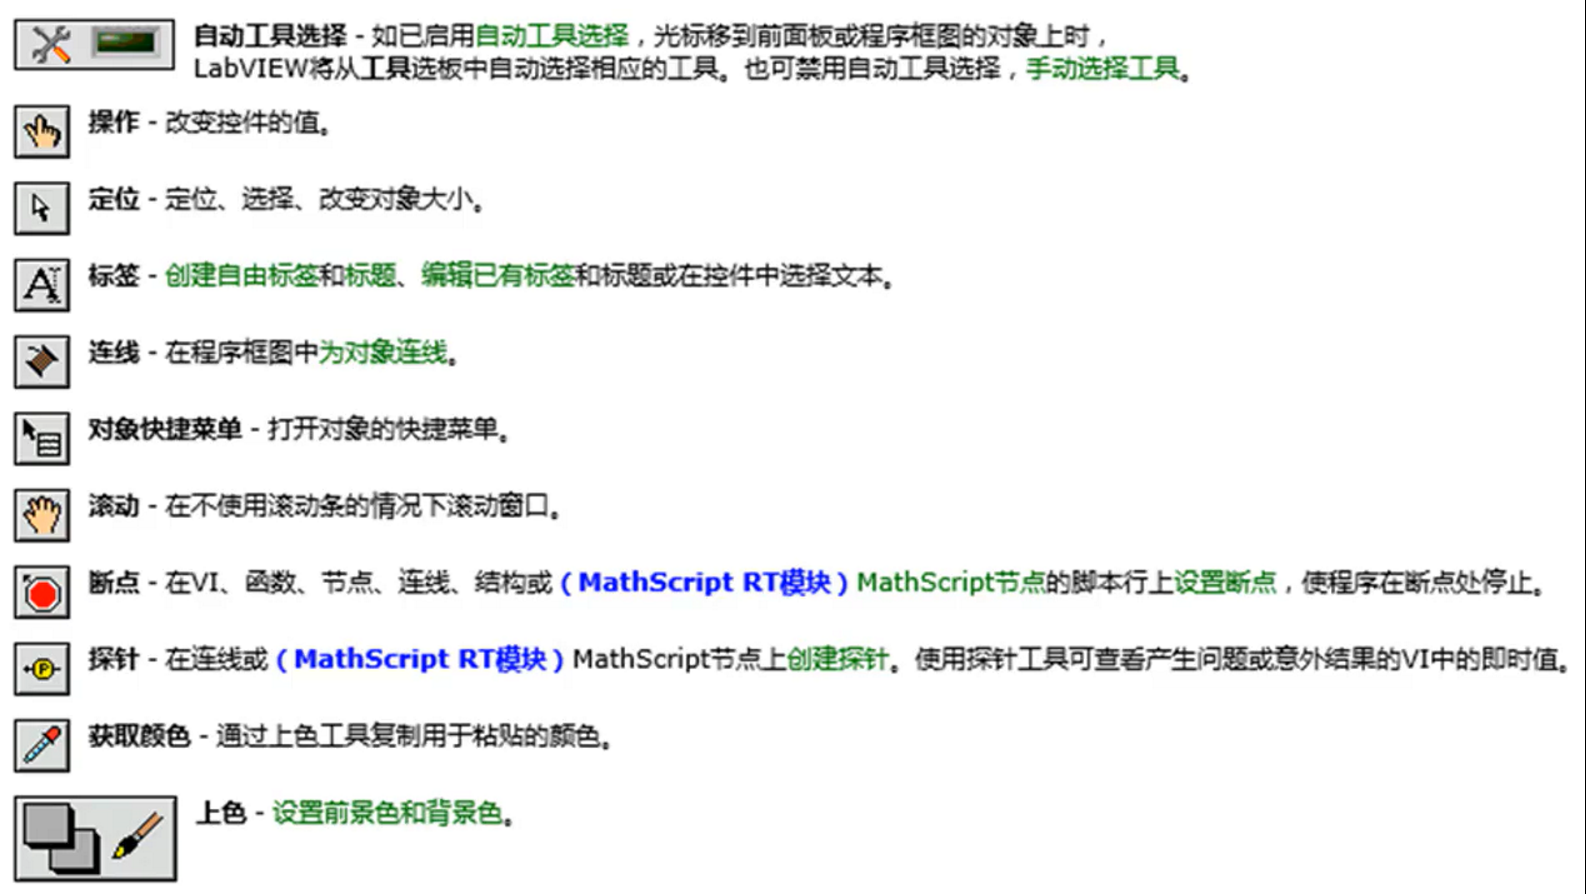
2. Tools Palette
II. Block Diagram
1. Components
Terminals (front panel), subVIs, functions, constants, structures, and wires
2. Functions Palette
As before, right-click to open it
3. Block Diagram
(1) Terminals: These include the block diagram appearance of front panel objects. Right-click and deselect Display as Icon to make the block diagram cleaner. (2) Nodes: These have input and output terminals and are used to perform operations. Examples include function nodes and subVI nodes (double-click to view a subVI’s front panel and block diagram; Express VIs are special subVIs that require the fewest wires and are configured through dialog boxes). (3) Wires
- Wires transfer data between block diagram objects
- Wires for different data types differ in color, thickness, and style
- Broken wires appear as black dashed lines with a red cross in the middle
- Press Ctrl+B to delete all broken wires
- Right-click a wire to clean it up
- Select an area of the block diagram and use Clean Up Diagram to make the block diagram easier to read
Comments