After WordPress has been installed and configured, you can access the website by entering localhost or 树莓派的ip地址 in a browser. However, it still cannot be accessed from the external network (outside the same router). The purpose of NAT traversal is to allow computers on the external network to access your website. To make the setup less difficult and complex, I used PeanutHull.
(Although it is described as free NAT traversal, I spent 6 yuan during the process.)
I. Install PeanutHull
- Go to the official download page and download the 32-bit system for Raspberry Pi.
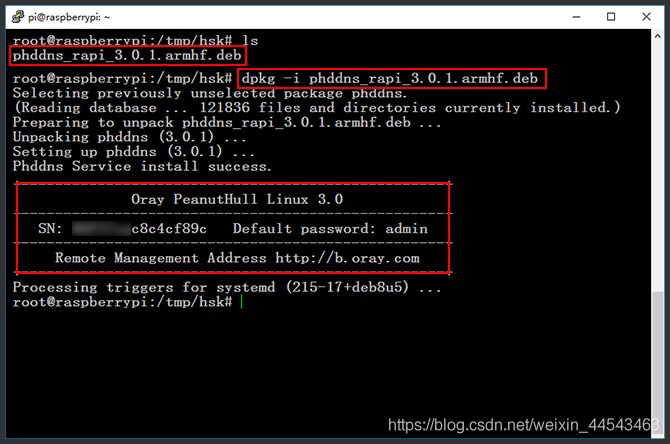
- Use the cd command to enter the corresponding download directory, then enter the following command to install it:
dpkg -i phtunnel_5_0_rapi_armhf.deb- After a successful installation, the Raspberry Pi’s SN code, default password, and remote management address will be displayed. Remember the SN code.
II. Configure PeanutHull
- Enter the remote management address b.oray.com in your browser to open the PeanutHull remote management page. Enter the SN code generated when PeanutHull was installed and the default password admin to log in.
- When you log in for the first time, you need to activate it either by scanning a QR code or by using a password. Choose either method.
- After successful activation, you can enable NAT traversal for free.
III. Configure NAT Traversal
- In the console’s left sidebar, click PeanutHull - Account List, then click your account name to open the NAT traversal configuration page.
- Add a mapping and select http as the mapping type. This is where you need to pay 6 yuan.
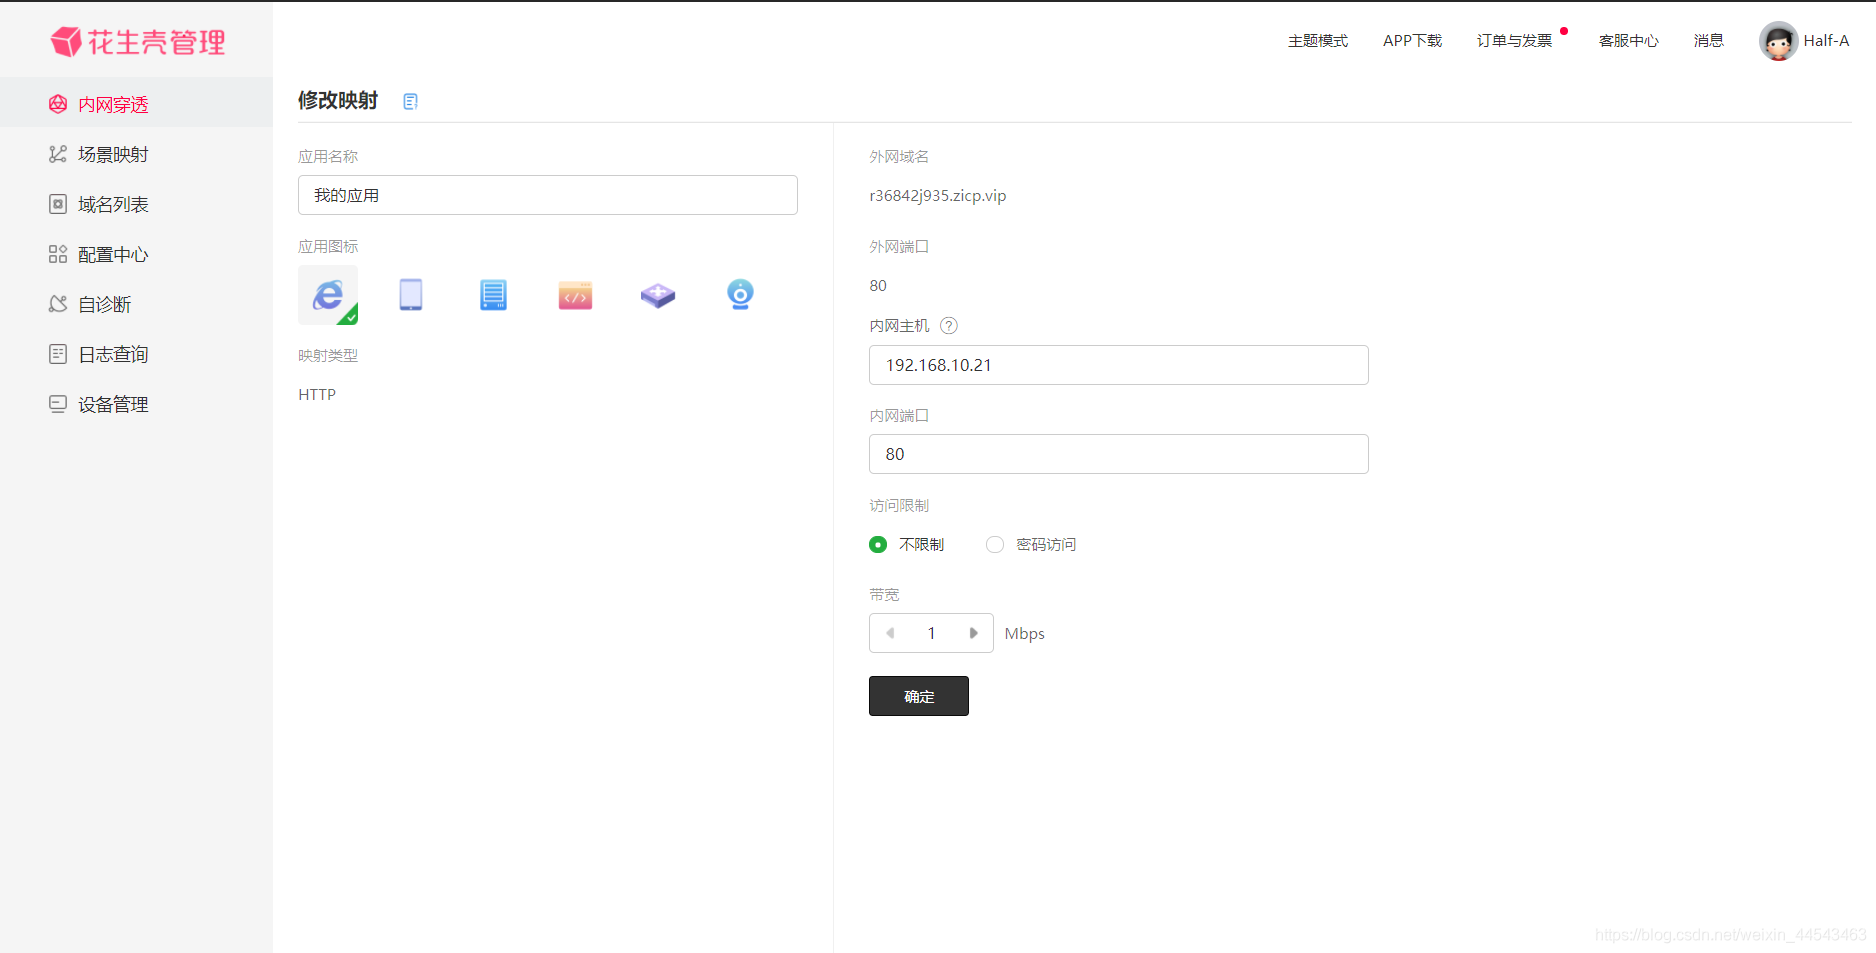
- Configure the other settings as shown below. You can only select a fixed domain name, and the external port can only be a dynamic port. Set the internal host to the Raspberry Pi’s IP address; the port is generally 80.
You have now made your WordPress personal website accessible from the external network.
Comments