Contents
I. Preparing the Raspberry Pi
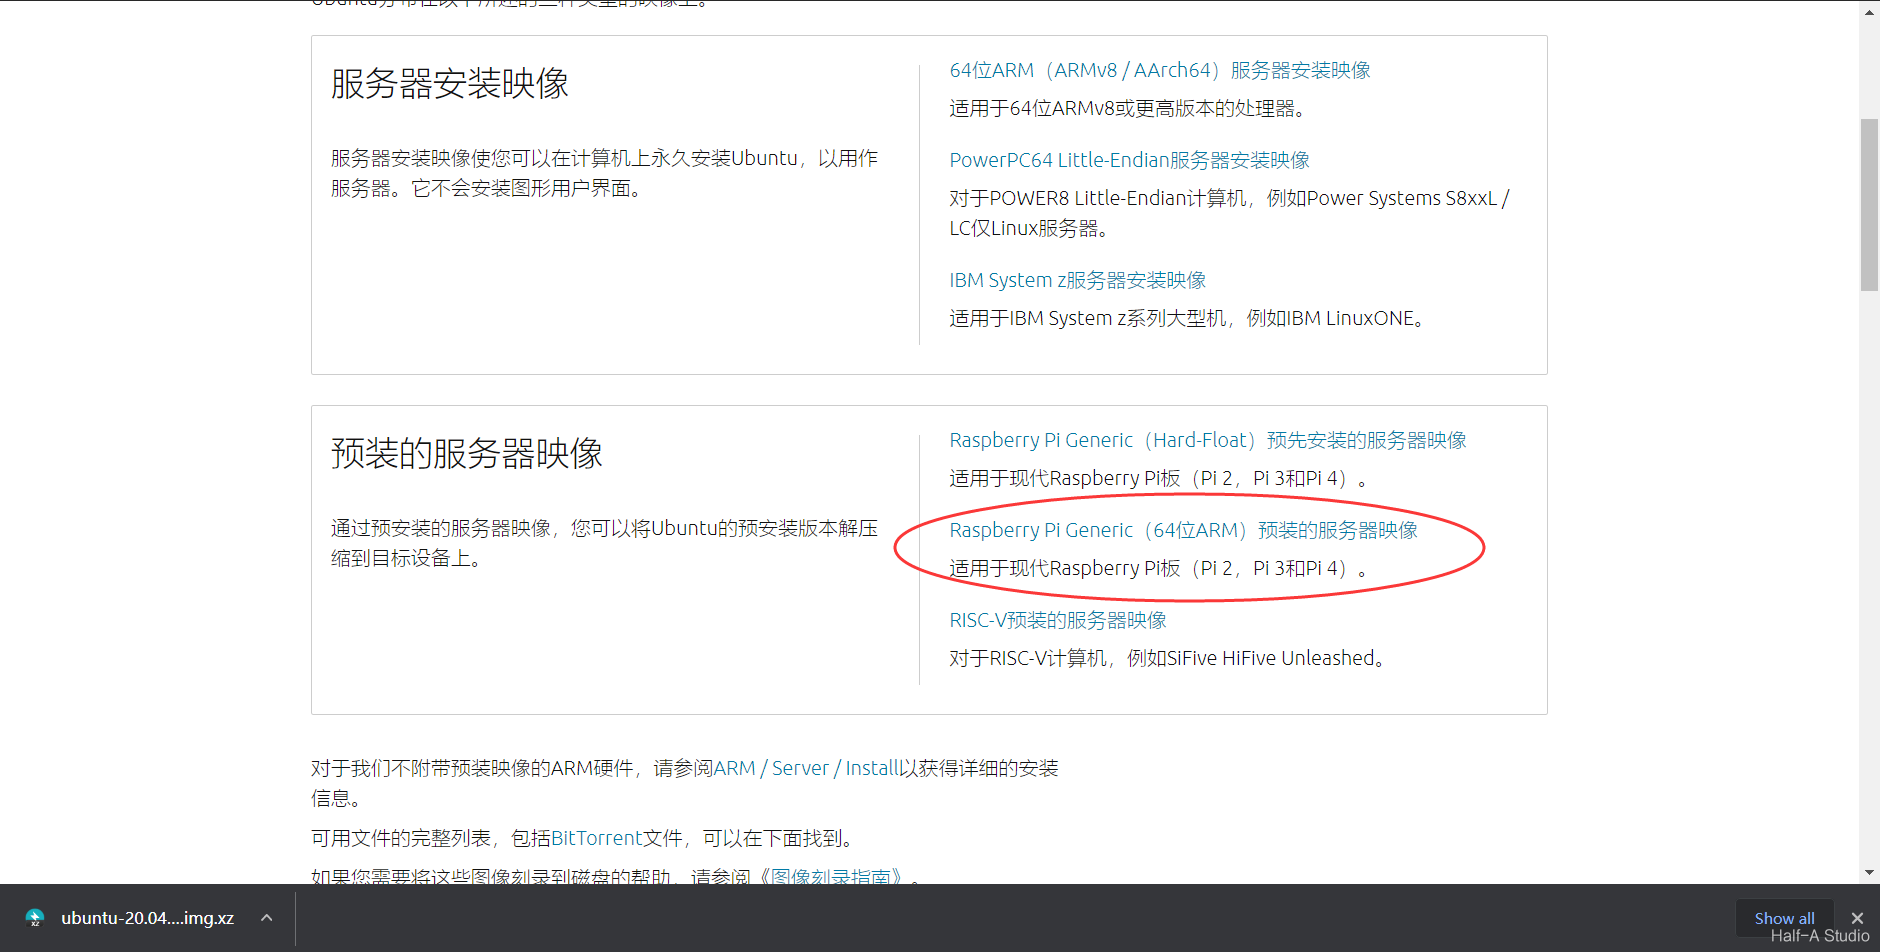
- Go to the official Ubuntu website and download the Ubuntu installation package for Raspberry Pi.
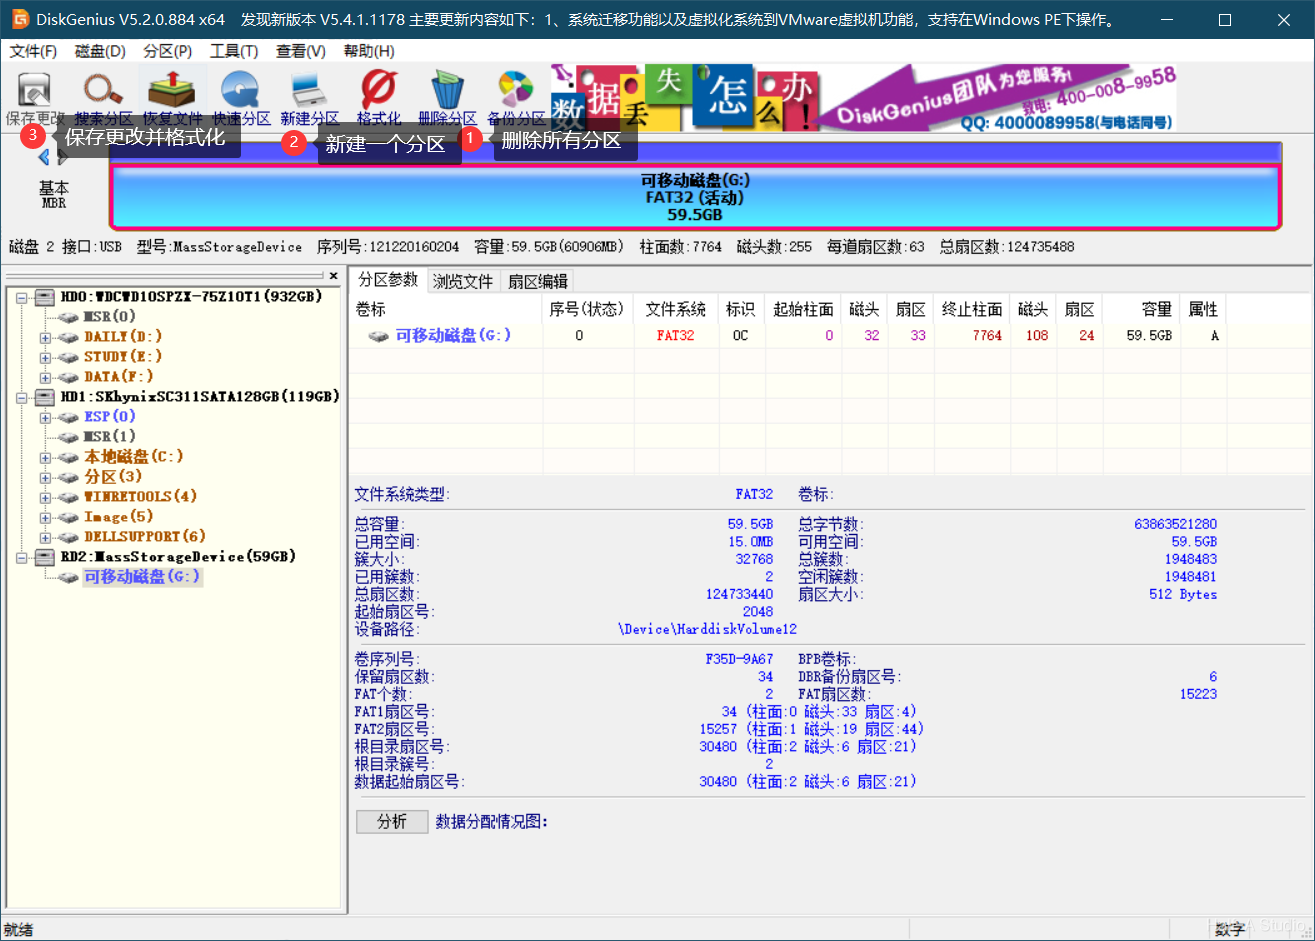
- Use DiskGenius to format the SD card. Delete all sectors, and then format it.
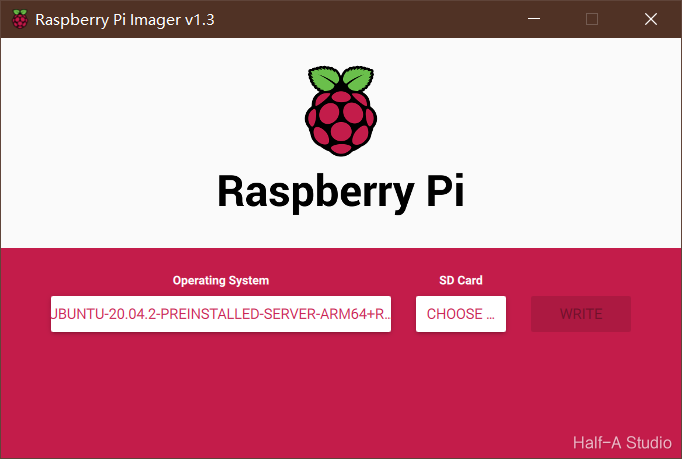
- Download the official imaging tool, select the .xz file you just downloaded as the image, select your SD card, and write the image.
II. Ubuntu System Configuration
2.1 Starting Ubuntu
Insert the TF card into the Raspberry Pi. You can initialize the system using a monitor, or connect the Raspberry Pi to a computer with an Ethernet cable and configure it remotely. An external monitor is recommended because it makes the process much easier. The following example uses an external monitor+keyboard (you will only need these devices once).
- Insert the SD card you prepared earlier into the Raspberry Pi, then connect the Raspberry Pi to a power supply. (You can use a power cable with a 2.5mm round connector, or a cable with a microUSB or TypeC connector, but the charger must support 5V 3A, with a minimum of 5V 2.5A.)
- Power it on and wait for the system to start. First, log in. The initial username and password are both ubuntu. After logging in, you will be prompted to set a new password.
2.2 Wi-Fi Setup
cd /etc/netplanIn this directory, the server version will contain a file named 50-cloud-init.yaml, while the desktop environment will contain a file named 01-network-manager-all.yaml. The following example uses 50-cloud-init.yaml. Edit the file: Pay attention to the file’s indentation.
network:
    ethernets:
        eth0:
            dhcp4: true
            optional: true
    wifis:
        wlan0:
            optional: true
            access-points:
                "WiFi名":
                    password: "你wifi的密码"
            dhcp4: true
    version: 2
Then run the following commands to apply the configuration:
sudo netplan generate
sudo netplan apply
If this does not work, reboot. If it still does not work, run sudo systemctl start wpa_supplicant and reboot again.
Run ifconfig to view the IP address, then use a remote access tool to connect.
2.3 Updating Package Sources
sudo vim /etc/apt/sources.listContents of source.list:
deb https://mirrors.ustc.edu.cn/ubuntu-ports/ focal main restricted universe multiverse
deb-src https://mirrors.ustc.edu.cn/ubuntu-ports/ focal main main restricted universe multiverse
deb https://mirrors.ustc.edu.cn/ubuntu-ports/ focal-updates main restricted universe multiverse
deb-src https://mirrors.ustc.edu.cn/ubuntu-ports/ focal-updates main restricted universe multiverse
deb https://mirrors.ustc.edu.cn/ubuntu-ports/ focal-backports main restricted universe multiverse
deb-src https://mirrors.ustc.edu.cn/ubuntu-ports/ focal-backports main restricted universe multiverse
deb https://mirrors.ustc.edu.cn/ubuntu-ports/ focal-security main restricted universe multiverse
deb-src https://mirrors.ustc.edu.cn/ubuntu-ports/ focal-security main restricted universe multiverse
# deb https://mirrors.ustc.edu.cn/ubuntu-ports/ focal-proposed main restricted universe multiverse
# deb-src https://mirrors.ustc.edu.cn/ubuntu-ports/ focal-proposed main restricted universe multiverse
Run the updates:
sudo apt-get update
sudo apt-get upgrade
2.4 Installing the Desktop Environment
sudo apt install ubuntu-desktop
sudo apt install xrdp
2.5 Installing the Chinese Language Environment
sudo apt install language-pack-zh-hans language-pack-zh-hans-base language-pack-gnome-zh-hans language-pack-gnome-zh-hans-base
sudo apt install `check-language-support -l zh`
sudo reboot
2.7 Allowing root Login
sudo passwd root #设置root密码
sudo vim /usr/share/lightdm/lightdm.conf.d/50-ubuntu.conf #编辑此文件
Add the following two lines to 50-ubuntu.conf:
greeter-show-manual-login=true
allow-guest=false
2.8 Remote Desktop Connection
Enter 远程桌面连接 (Remote Desktop Connection) in the Windows search box, select Xorg mode, and enter your username and password to connect.
Comments