Contents
I. Preparing the TF Card
- Connect the TF card to your computer through a card reader.
- If the card was used before, use DiskGenius to delete all partitions on the TF card, create a new FAT32 partition, and format the current partition.
II. Downloading and Writing the Image
- Go to the Raspberry Pi official website to download the latest system image. There are three versions available—Lite, standard, and full. You can download whichever you need; the standard version is usually sufficient.

If the download is too slow, you can also use some methods to download from Baidu Netdisk. The link is below.
Link: https://pan.baidu.com/s/1FhSZkqXggTO-spSZxLwLcQ Extraction code: qhcm
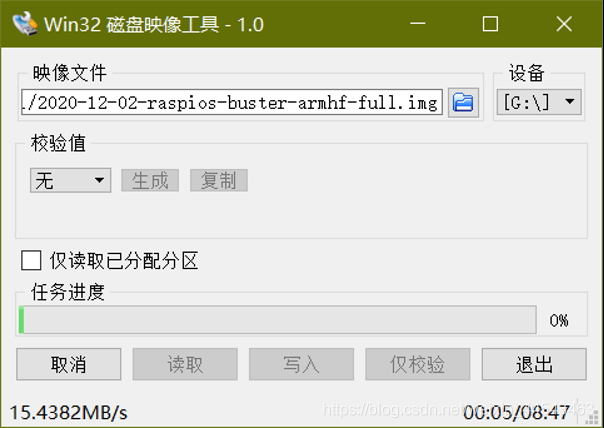
- Use Win32DiskImager to install the image. After the image installation completes, a format dialog may pop up. Do not format the card, or you will lose everything you just set up.
(ps: An error may occur during use because a folder on the TF card may be open. You can ignore it and click OK.)
 3. Enable the SSH service: In the prepared boot partition, create a new file named ssh with no file extension. (In File Explorer, you can click View in the top menu and select Show file name extensions.)
III. Determining and Accessing the IP Address
The following operations require either [a screen + external keyboard] or [an Ethernet cable]. Choose one. If using the former, connect the screen and keyboard to the Raspberry Pi when needed. If using the latter, connect the router or computer to the Raspberry Pi with an Ethernet cable.
Using an Ethernet cable:
- Insert the prepared TF card into the Raspberry Pi and connect power. (The power supply can be a 2.5mm round connector cable, or a microUSB or TypeC cable, but the charger must support 5V 3A, with a minimum of 5V 2.5A.)
- Power on and wait for the system to start. If you have a display, you can see the boot interface. If not, proceed to the next step.
- Use Advanced IP Scanner to search for the Raspberry Pi’s IP address on the local network.
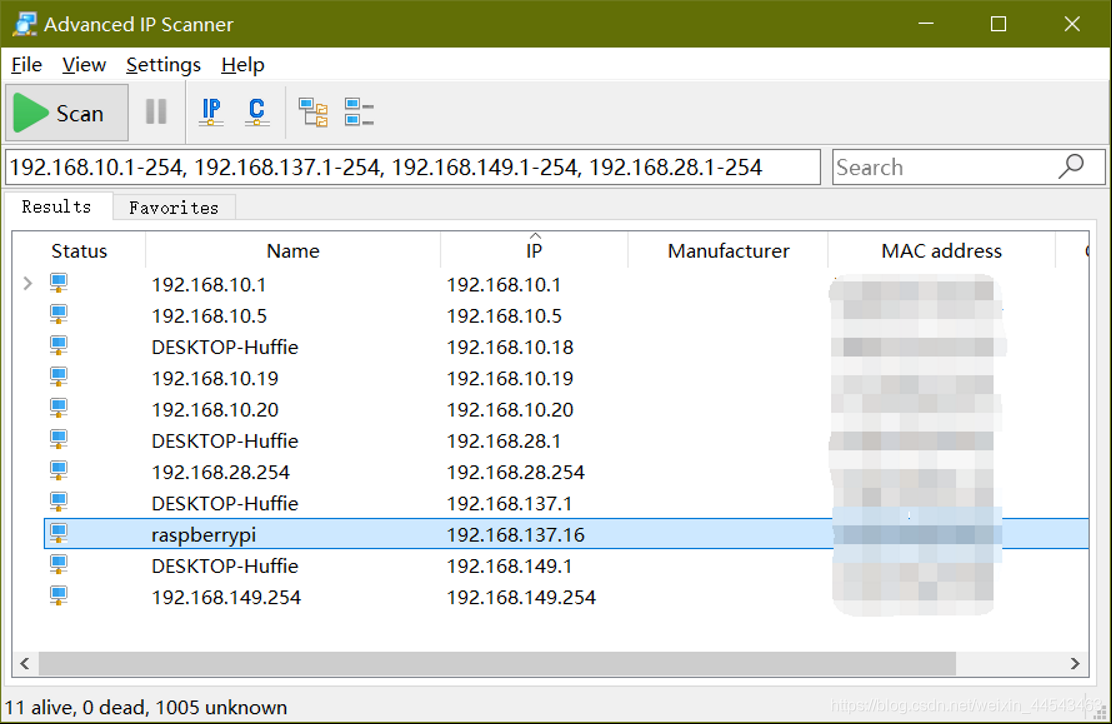
- Use PuTTY with the default SSH connection method, enter the IP address, and connect. After connecting, if you see login, the connection succeeded. The username is pi and the password is raspberry, and you can enter the system successfully. If PuTTY times out, the IP address may be wrong or the Raspberry Pi is not connected to the network.
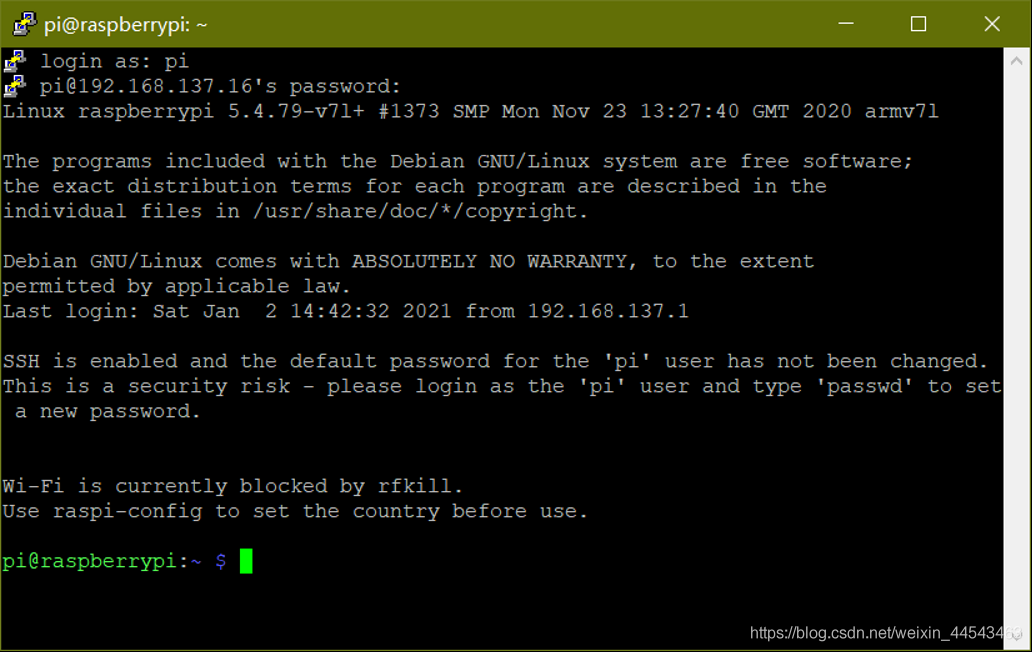
- Set up WiFi
(1) Run on the command line
sudo nano /etc/wpa_supplicant/wpa_supplicant.conf(2) Change the contents to
country=CN
ctrl_interface=DIR=/var/run/wpa_supplicant GROUP=netdev
update_config=1
network={
ssid="这里写wifi名称"
psk="这里写密码"
key_mgmt=WPA-PSK
priority=1
}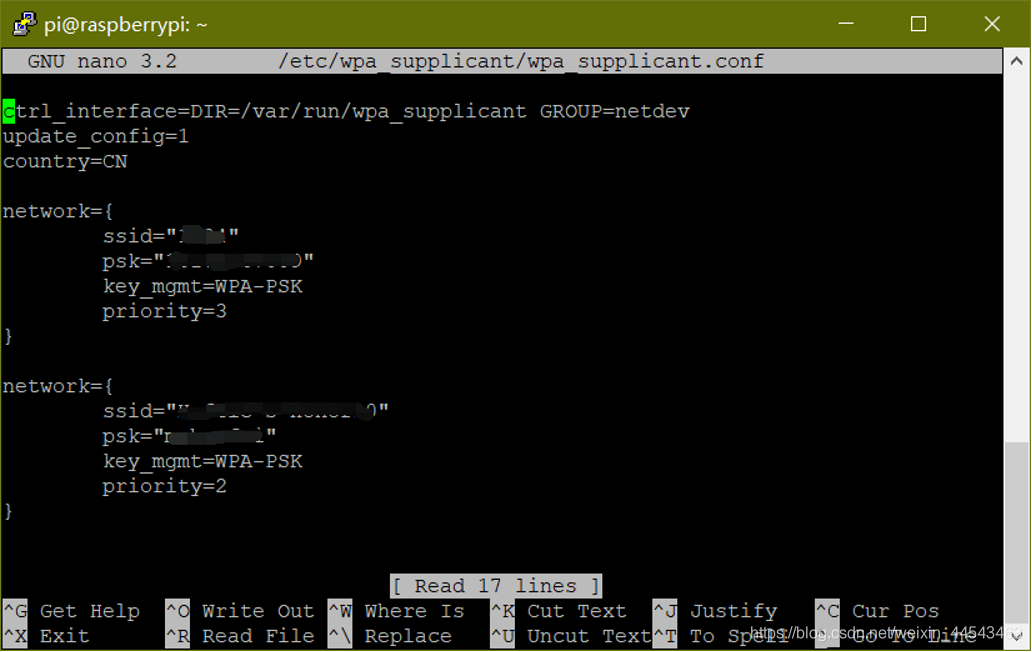
Here, priority is the connection priority—the larger the number, the higher the priority.
(3) After saving, reboot. If everything is correct, you should be able to connect to WiFi. If you see no wireless interfaces found, you must check the contents of /etc/wpa_supplicant/wpa_supplicant.conf above. The key_mgmt and priority lines are optional, but every spelling must be correct. (I once could not connect to WiFi for a long time because I typed ssod instead of ssid.)
- To check the IP address, search with Advanced IP Scanner, or use a simpler method—enter
raspberrypi.localon the command line to view the Raspberry Pi’s address, then connect with PuTTY. Using an external screen and keyboard (you only need these devices once) - Insert the prepared TF card into the Raspberry Pi and connect power. (The power supply can be a 2.5mm round connector cable, or a microUSB or TypeC cable, but the charger must support 5V 3A, with a minimum of 5V 2.5A.)
- Power on and wait for the system to start. If you have a display, you can see the boot interface. Follow the prompts to complete the initial setup. When prompted that a large update is required, you can skip it for now and update manually after changing the package sources.
IV. Updating and Configuring Package Sources
If you use the default mirrors, download speeds may be very slow, so switching to domestic mirrors is recommended. This example uses the Tsinghua mirror.
打开sources.list文件
sudo nano /etc/apt/sources.list

注释里面的所有内容,输入以下地址
deb http://mirrors.tuna.tsinghua.edu.cn/raspbian/raspbian/ buster main contrib non-free rpi
deb-src http://mirrors.tuna.tsinghua.edu.cn/raspbian/raspbian/ buster main contrib non-free rpi
(ctrl+o回车保存,ctrl+x退出编辑器)

打开raspi.list文件
sudo nano /etc/apt/sources.list.d/raspi.list

注释里面的所有内容,输入以下地址
deb http://mirror.tuna.tsinghua.edu.cn/raspberrypi/ buster main ui
deb-src http://mirror.tuna.tsinghua.edu.cn/raspberrypi/ buster main ui

更新源
sudo apt-get update
sudo apt-get upgrade
V. Implementing Windows Remote Access
- In the PuTTY command-line window, enter
sudo raspi-config, select Interfacing Options, select VNC, press Enter, and choose Enable to turn on VNC. - Download and install VNC software
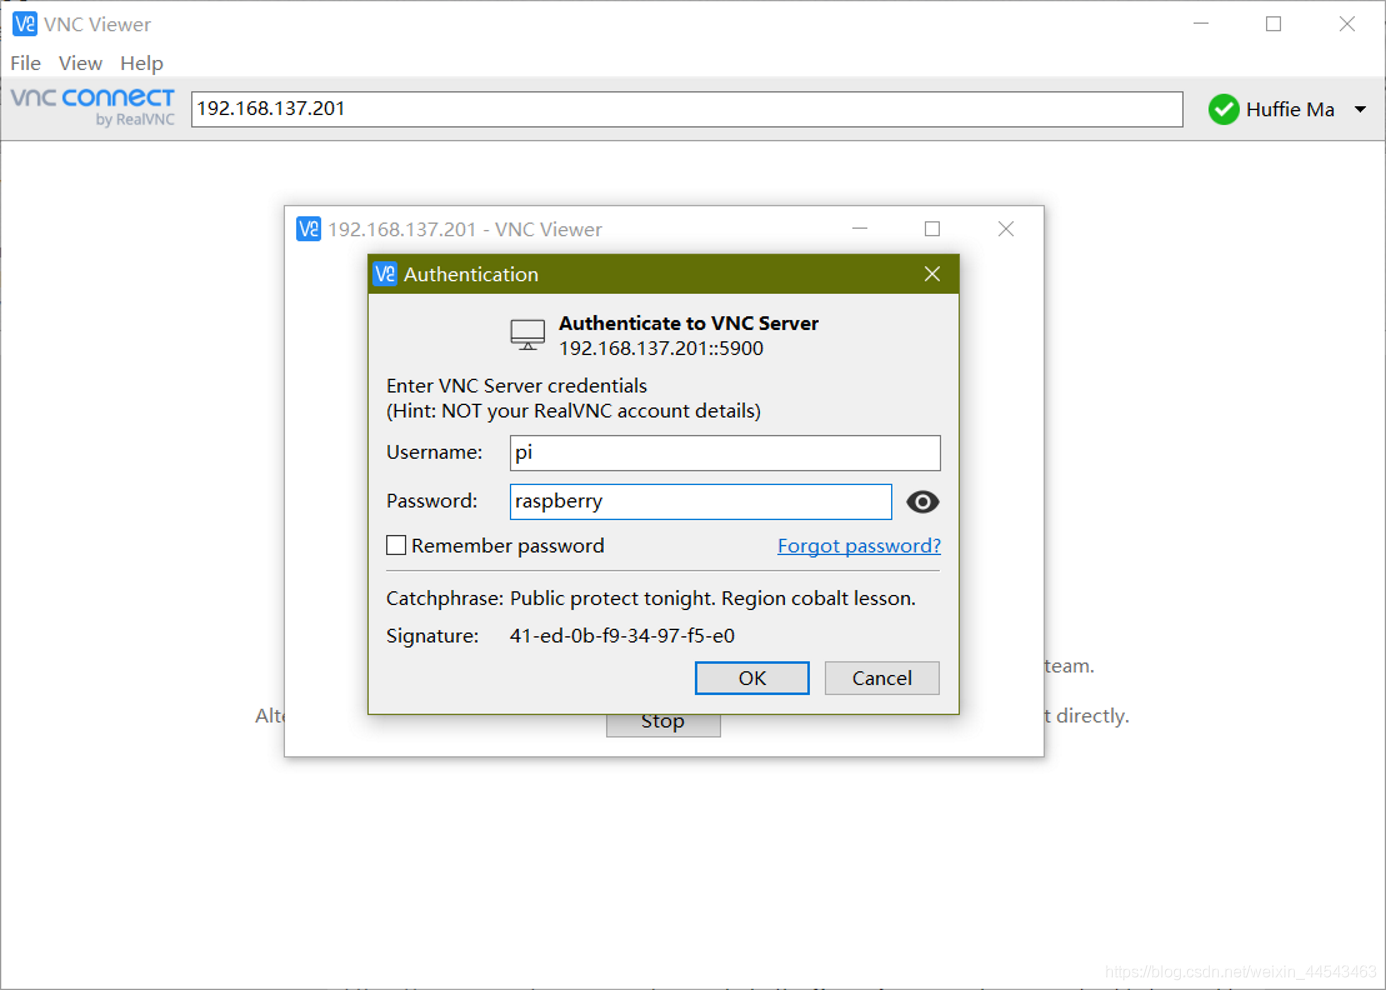
Note: If you see cannot currently show the desktop, you need to change the resolution in the same place. In PuTTY, enter sudo raspi-config, select Advanced Options-Resolutions, choose any option other than the first default, save and reboot, then open VNC again.
- You can then enter the graphical interface. At this point, the initial system installation is complete.
Comments