Setting Up a LAMP Server
i.e., Linux + Apache + MySQL + PHP
1. Install Apache Open the terminal and run commands to make sure your installed software is up to date.
sudo apt update
sudo apt upgrade
Install Apache
sudo apt install apache2After installation completes, set permissions on the Apache files
sudo chown -R pi:www-data /var/www/html/
sudo chmod -R 770 /var/www/html/
Enter 127.0.0.1 in your browser to see the Apache page, which means Apache was installed successfully.
 2. Install Nginx
sudo apt-get install nginx2. Install PHP and some plugins In the terminal, run the following commands to install php7.3 (version 7.3 was current in January, the 1st month of 2021; installing the latest version is fine)
sudo apt-get install php7.0Install plugins
sudo apt-get install php7.0-fpm
sudo apt-get install php7.0-mysql
sudo apt-get install php7.0-common
3. Install MySQL Because MySQL went closed source, we install MariaDB.
sudo apt-get install mariadb-server
sudo apt-get install mariadb-client
4. Configure Nginx Run the following command in the terminal
sudo nano /etc/nginx/sites-available/defaultFind the location block and change location to
location / {
index index.html index.htm index.php default.html default.htm default.php
}

location ~\.php${
}
5. Restart services
sudo /etc/init.d/nginx restart
sudo /etc/init.d/php7.3-fpm restart
sudo service mysql restart
sudo service nginx restart
6. Test Nginx and PHP Everything related to the website lives under var; grant permissions on it
sudo chmod -R 777 /var
sudo chmod -R 777 /var/www
sudo chmod -R 777 /var/www/html
Create a new index.php file in /var/www/html and enter
<html>
	<head>
		<title>PHP Test</title>
	</head>

	<body>
		<?php echo '<p>Hello World!</p>'; ?>
	</body>
</html>
Then delete the index.html and index.nginx-debian.html files in the /var/www/html folder
sudo rm -rf /var/www/html/index.html
sudo rm -rf /var/www/html/index.nginx-debian.html
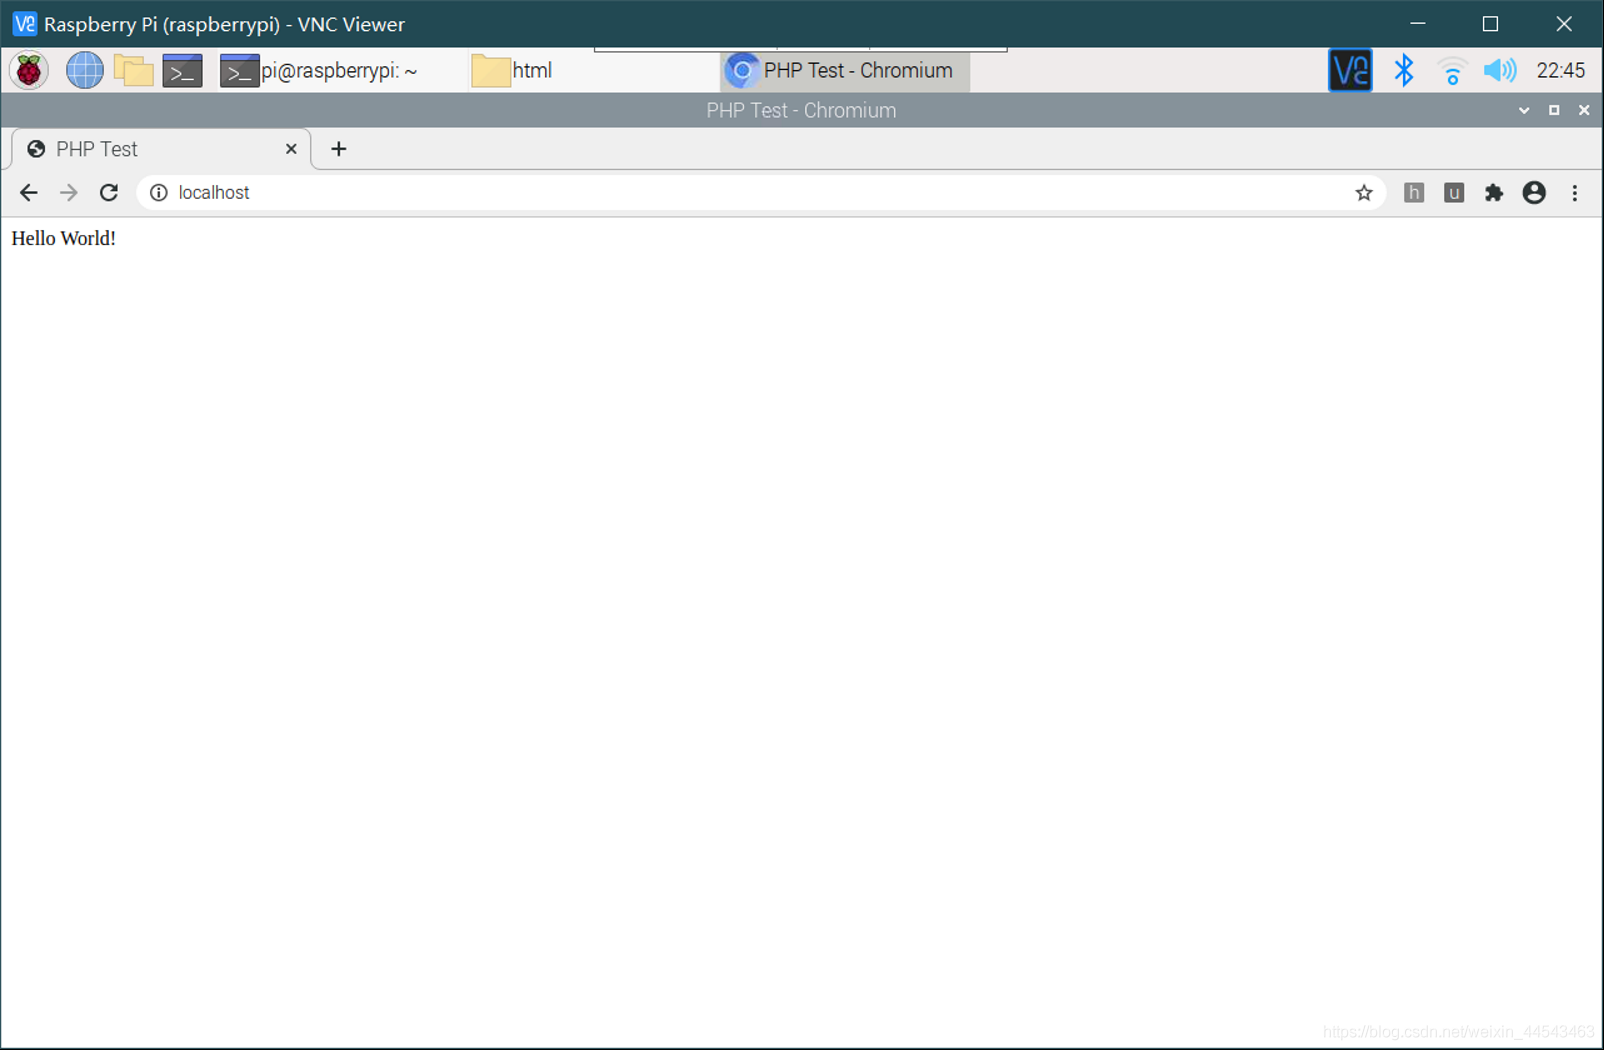
When finished, open your browser and enter the Raspberry Pi’s IP address or localhost to see the Helloworld page, which means the steps above completed successfully.
Creating a Database User
This step requires installing PhpMyAdmin and using SQL statements to add a MariaDB database user. PHPMYADMIN is a MySQL database administration tool based on PHP that runs on the web host in a Web-Base prevention architecture, allowing administrators to manage MySQL databases directly through a web interface. 1. Install phpMyAdmin Install it with the following command
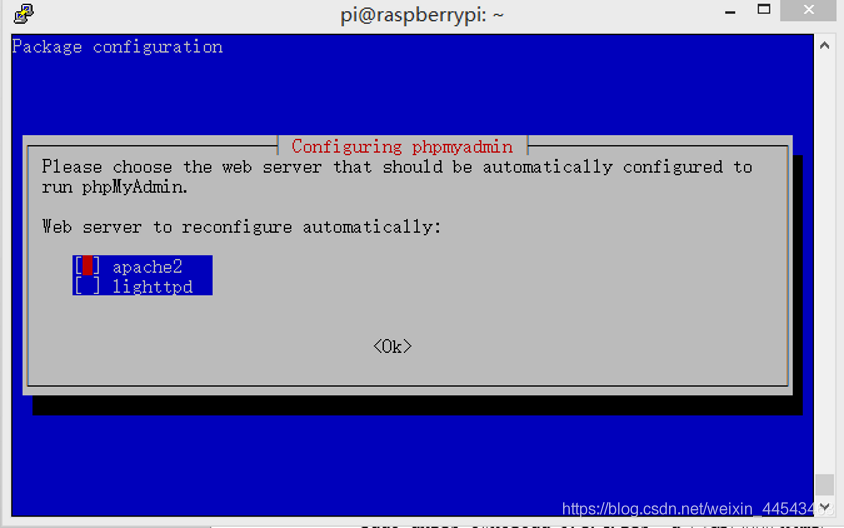
sudo apt-get install phpmyadminDuring installation you will see some options; set them as shown below
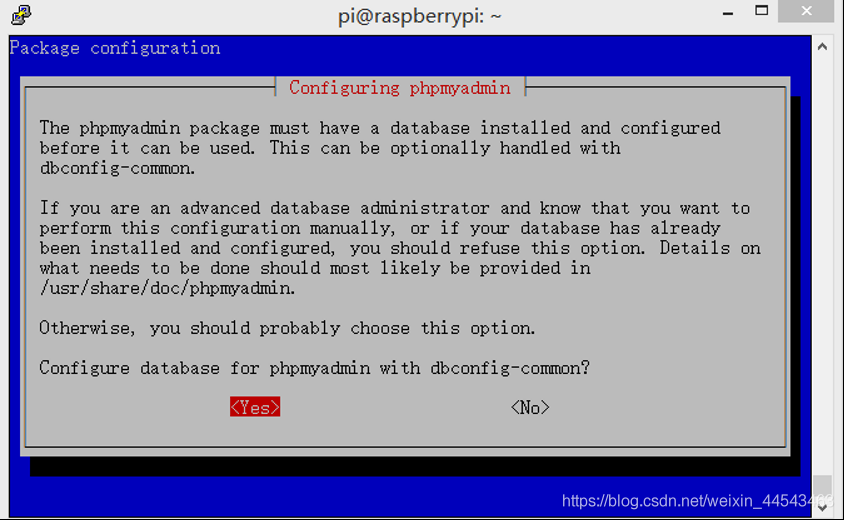 Remember this password—you will need it when logging into phpMyAdmin shortly.
 2. Set up the PHPMYADMIN symlink
sudo ln -s /usr/share/phpmyadmin /var/www/html3. Log in to phpMyAdmin
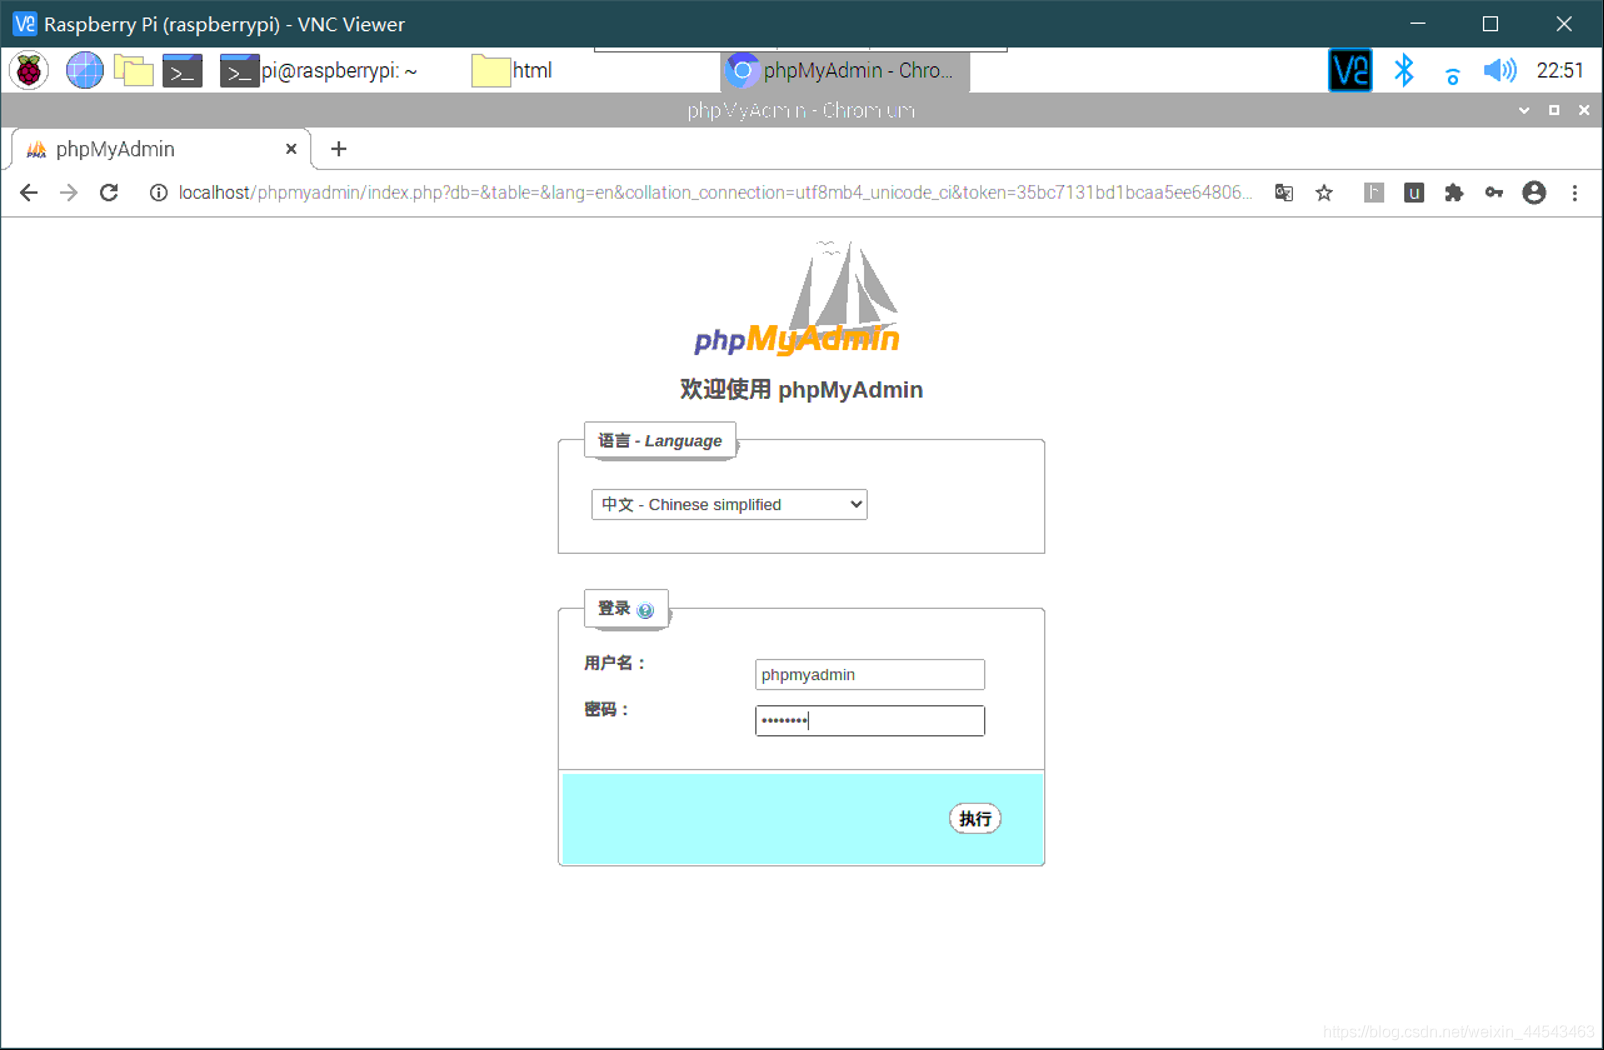
Enter localhost/phpmyadmin in your browser to reach the login page. The default username is phpmyadmin and the default password is the one you set during installation.
 4. Use SQL statements to add a MariaDB database user
Run the following command to enter the MariaDB environment. There is no password here—press Enter or type anything to get in
4. Use SQL statements to add a MariaDB database user
Run the following command to enter the MariaDB environment. There is no password here—press Enter or type anything to get in
sudo mysql -u root -pAdd a user in MariaDB and grant privileges (1) Add a user:
CREATE USER '名字'@'localhost' IDENTIFIED BY '密码';(2) Grant privileges to the user:
grant all privileges on *.* to 名字@localhost;(3) Flush privileges:
flush privileges;(4) Exit:
exit;Open your browser again and go to phpMyAdmin (localhost/phpmyadmin), then log in with the user you just created.

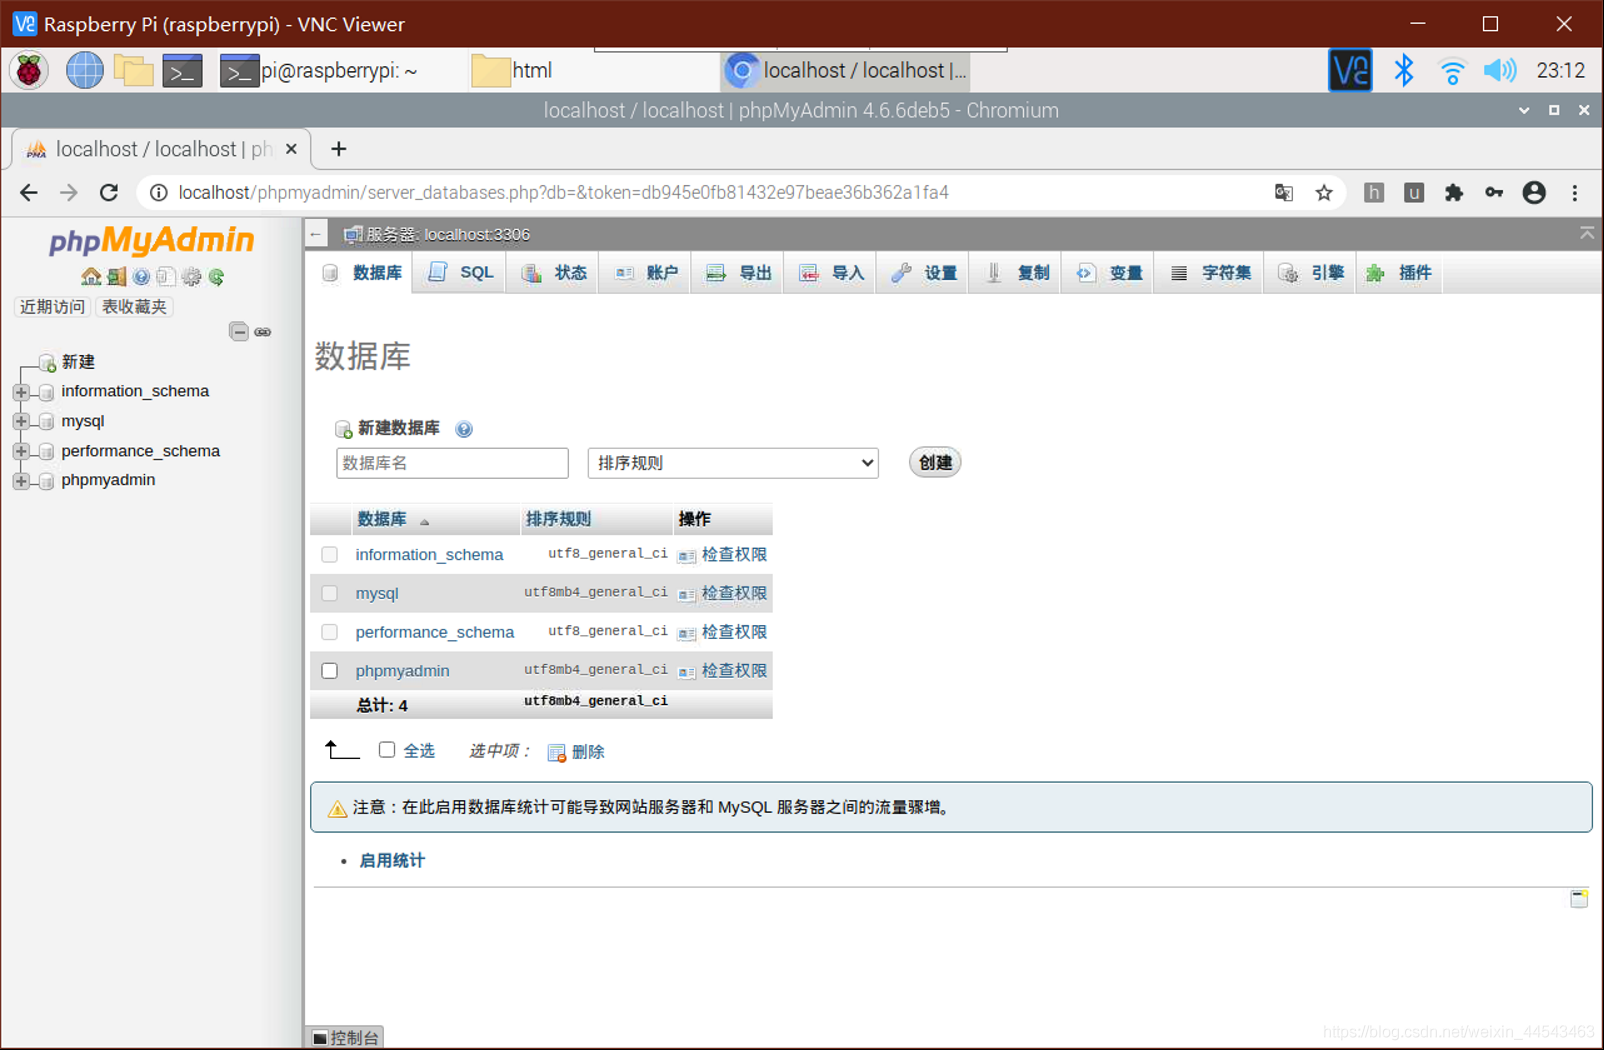 You can see we have very high privileges (we could even drop the whole database [doge])
At this point the basic website environment setup is essentially complete; next you can use tools such as WordPress to build your personal website.
You can see we have very high privileges (we could even drop the whole database [doge])
At this point the basic website environment setup is essentially complete; next you can use tools such as WordPress to build your personal website.
Comments