Contents
LabVIEW Series:https://blog.csdn.net/weixin_44543463/category_10714833.html
I. Controls Used
1.1 two-dimensional Picture
How to add: Right-click the front panel, then choose Graph → Controls → two-dimensional Picture. The two-dimensional Picture control provides pixel-level control and can create almost any graphical object. To display an image in a two-dimensional Picture control, you must write an image to the control programmatically. You can draw with the Picture Functions VIs.
1.2 Property Node
A control’s Property Node exposes the same properties as the control itself. Right-click the control and choose Create → Property Node → Value to create a Value Property Node.
II. Drawing with the two-dimensional Picture Control
2.1 Purpose
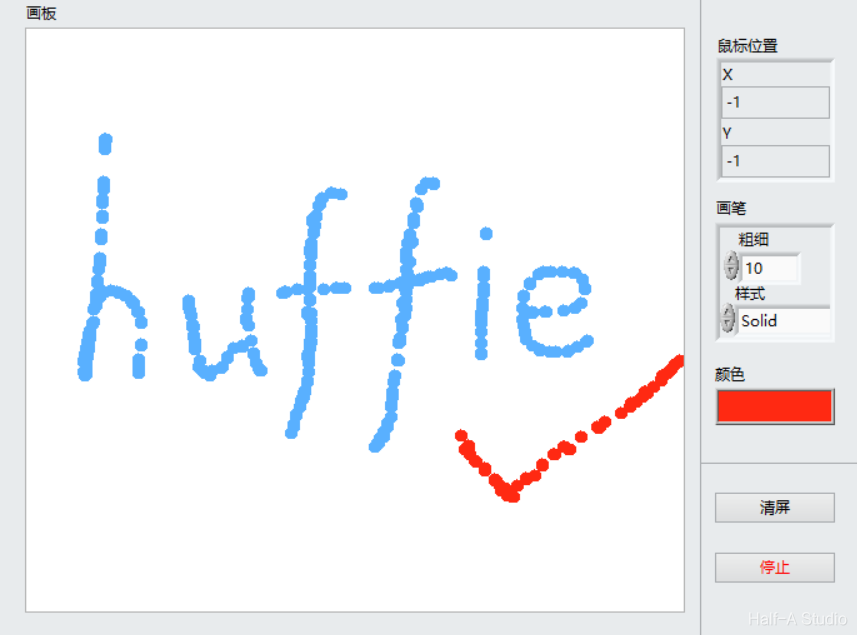
2.2 Program Design Approach
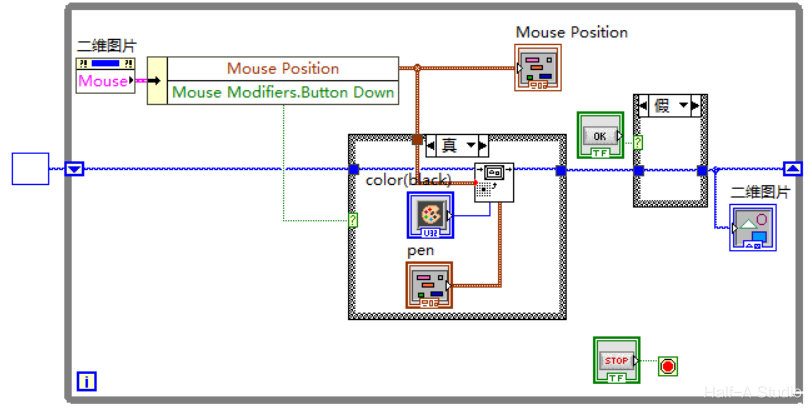
(1) Use the two-dimensional Picture mouse position Property Node to get the current mouse position. (2) Use the Draw Point function from Picture Functions to draw a point at the incoming mouse position. (3) Use a shift register to pass the image with the drawn point into the next loop iteration as the canvas for drawing the next point. (4) Use the two-dimensional Picture mouse-down Property Node with a Case Structure to check whether the mouse button is down, and thereby control whether to draw. (5) Clearing the screen can use a Case Structure: when the clear button is pressed, pass a blank canvas to the shift register.
2.3 Implementation Steps
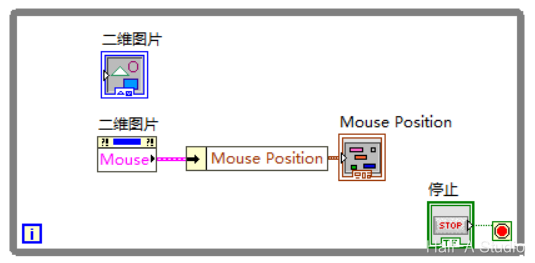
(1) Get the mouse position First, create a two-dimensional Picture on the front panel (right-click → Graph → Controls → two-dimensional Picture). Then, on the block diagram, right-click the two-dimensional Picture control and choose Create → Property Node → Mouse.
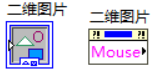
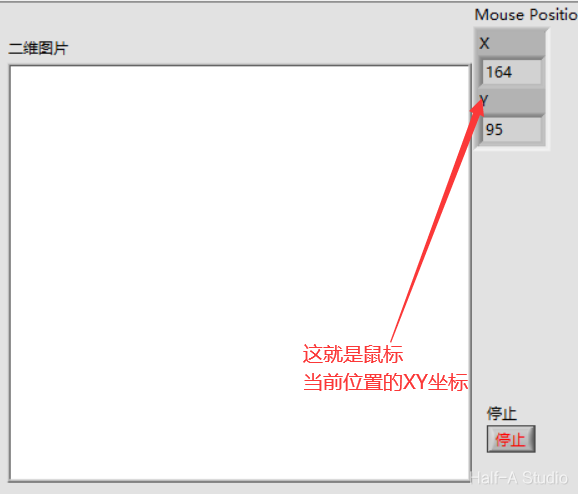
Use Unbundle By Name on the two-dimensional Picture Property Node, then create an indicator on the Mouse Position output terminal. That gets the mouse position. Wrap everything in a While Loop and run it to see the effect.
(2) Draw the current point On the block diagram, choose right-click → Graphics & Sound → Picture Functions → Draw Point, wire the unbundled mouse position as the input, and the two-dimensional Picture control as the output. Then right-click the Color and Pen terminals and choose Create → Control.
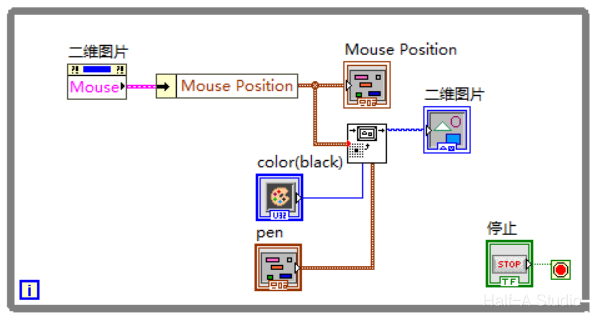

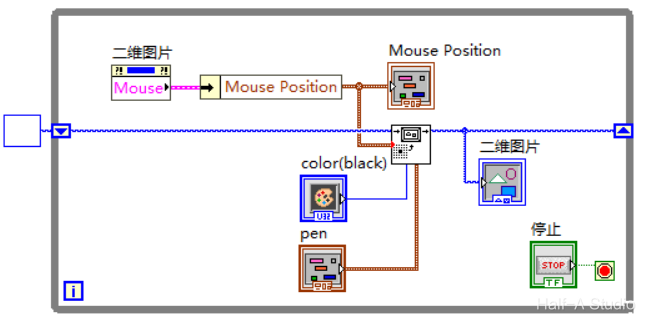
(3) Draw continuous points — keep points the mouse has already passed Pass the two-dimensional Picture with the drawn point through a shift register into the next loop iteration as the starting image for the next draw. (Note: always initialize a shift register when you use one.)
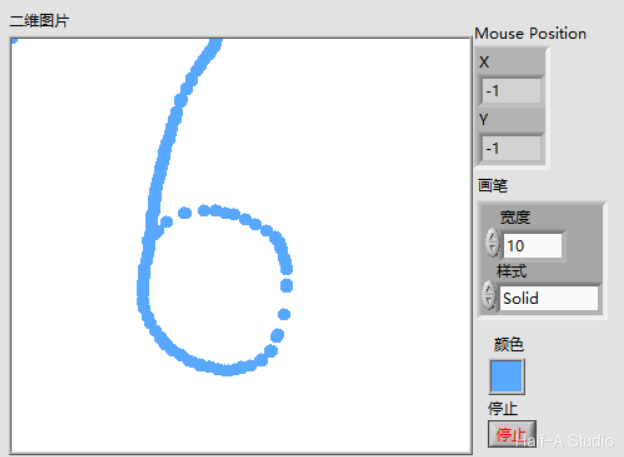
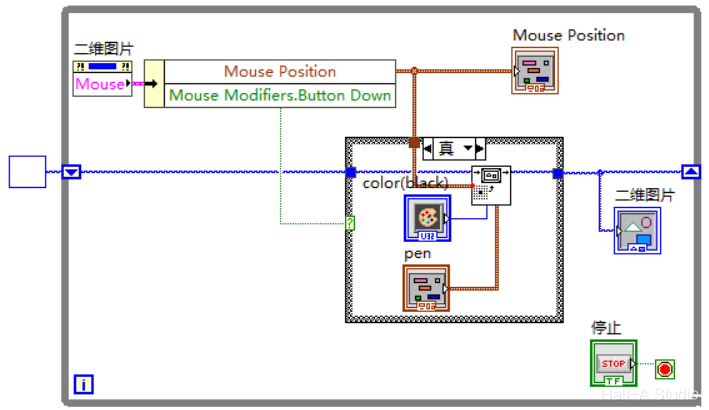
(4) Draw only when the mouse button is down Use another property from the two-dimensional Picture mouse Property Node: drag out the mouse-down property, left-click it, and choose Mouse Modifiers → Button Down.

This Property Node outputs a Boolean, so use a Case Structure. When the condition is True (button down), draw the current point; when False (button not down), do nothing.

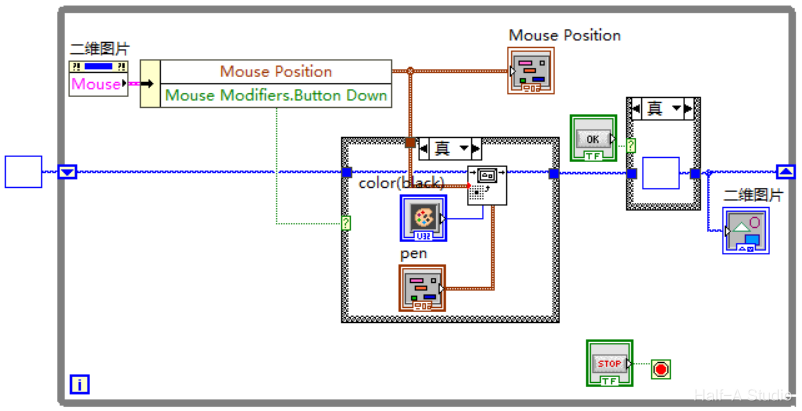
(5) Add a clear-screen button Clearing the screen is simple: add a Boolean button on the front panel, then use a Case Structure on the block diagram to check the button state. If it is pressed, pass a blank image to the two-dimensional Picture control; if not, do nothing.

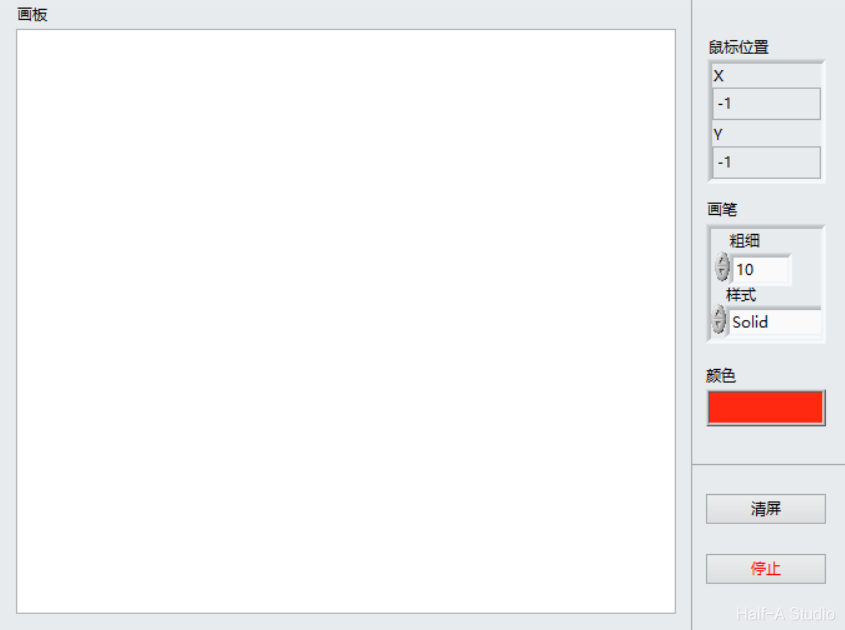
(5) Adjust the panel layout, colors, and style
Comments